不要随便使用 npm 源加速站点
开发用的机器使用的第三方源是腾讯 https://mirrors.cloud.tencent.com/npm/,安装 antd 得到的版本是 5.16.3 版本,实际上下载文件是什么内容都没有的,导致一直依赖失败。最后换回官方源才能得到 5.16.2 这个版本。
还有个需要注意的点,
yarn.lock也要记得删除,才能更新到最新的源地址
开发用的机器使用的第三方源是腾讯 https://mirrors.cloud.tencent.com/npm/,安装 antd 得到的版本是 5.16.3 版本,实际上下载文件是什么内容都没有的,导致一直依赖失败。最后换回官方源才能得到 5.16.2 这个版本。
还有个需要注意的点,
yarn.lock也要记得删除,才能更新到最新的源地址
打开这个路径下的文件
/usr/share/javascript/proxmox-widget-toolkit/proxmoxlib.js
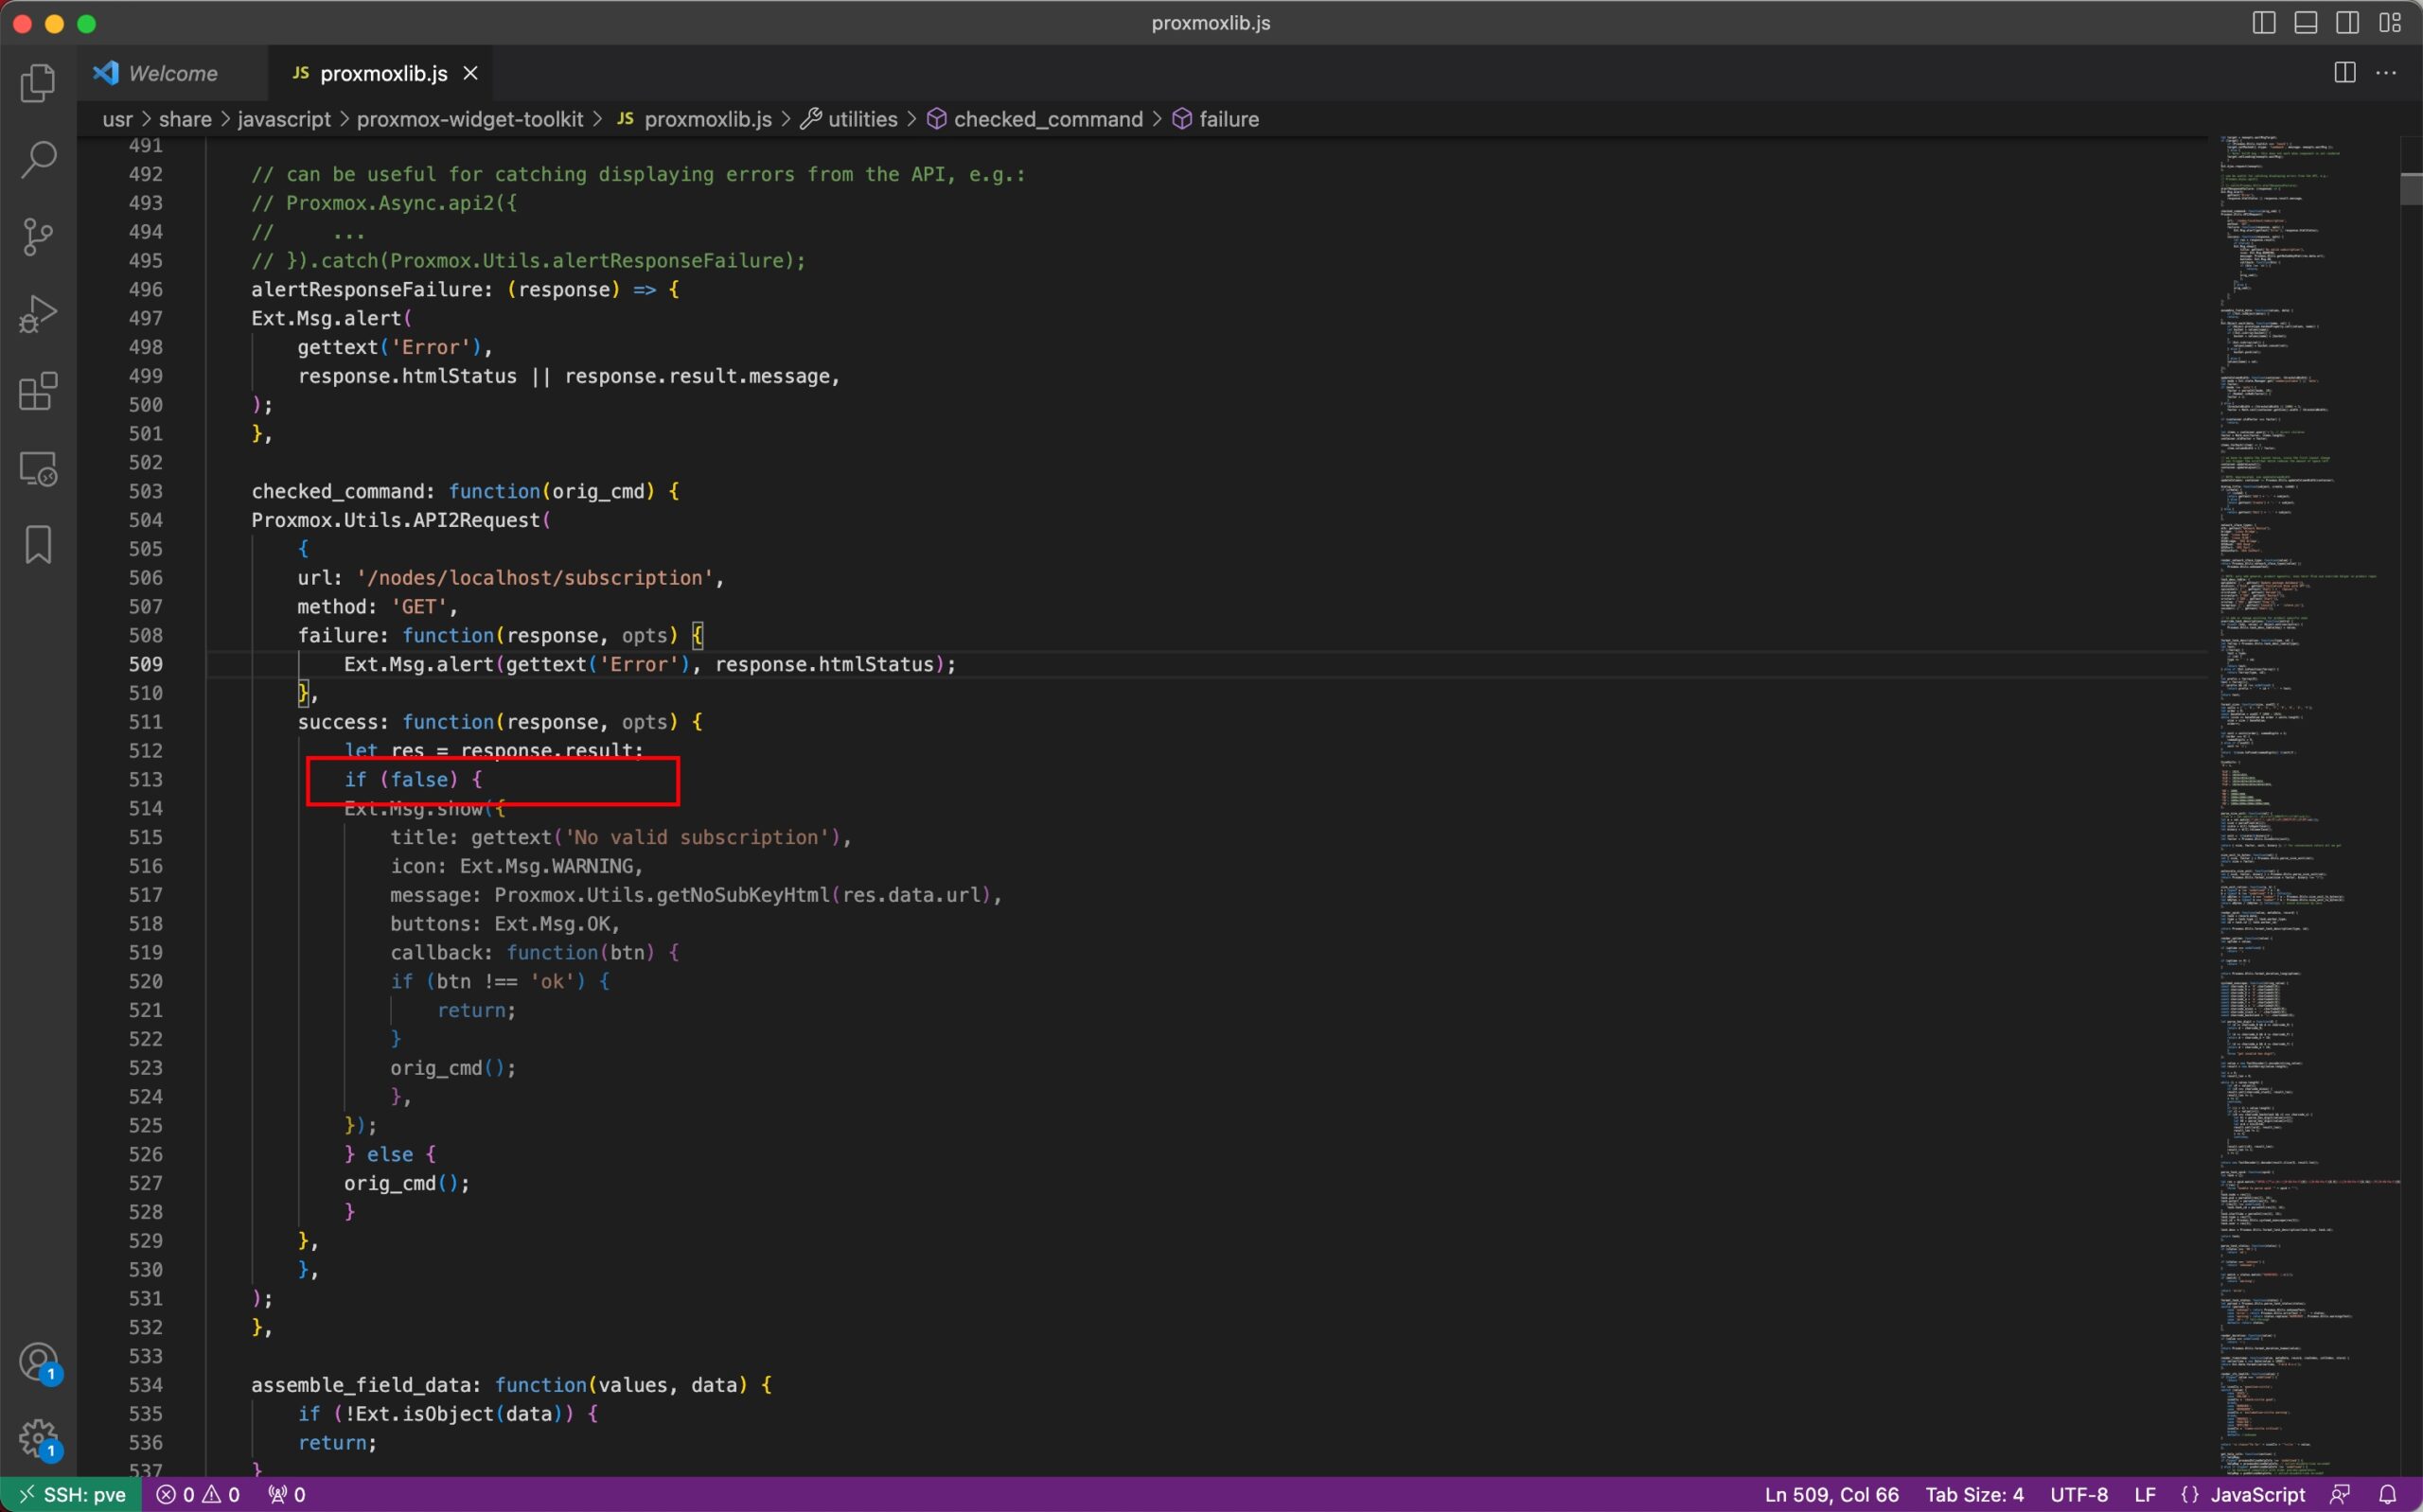
把截图中的位置
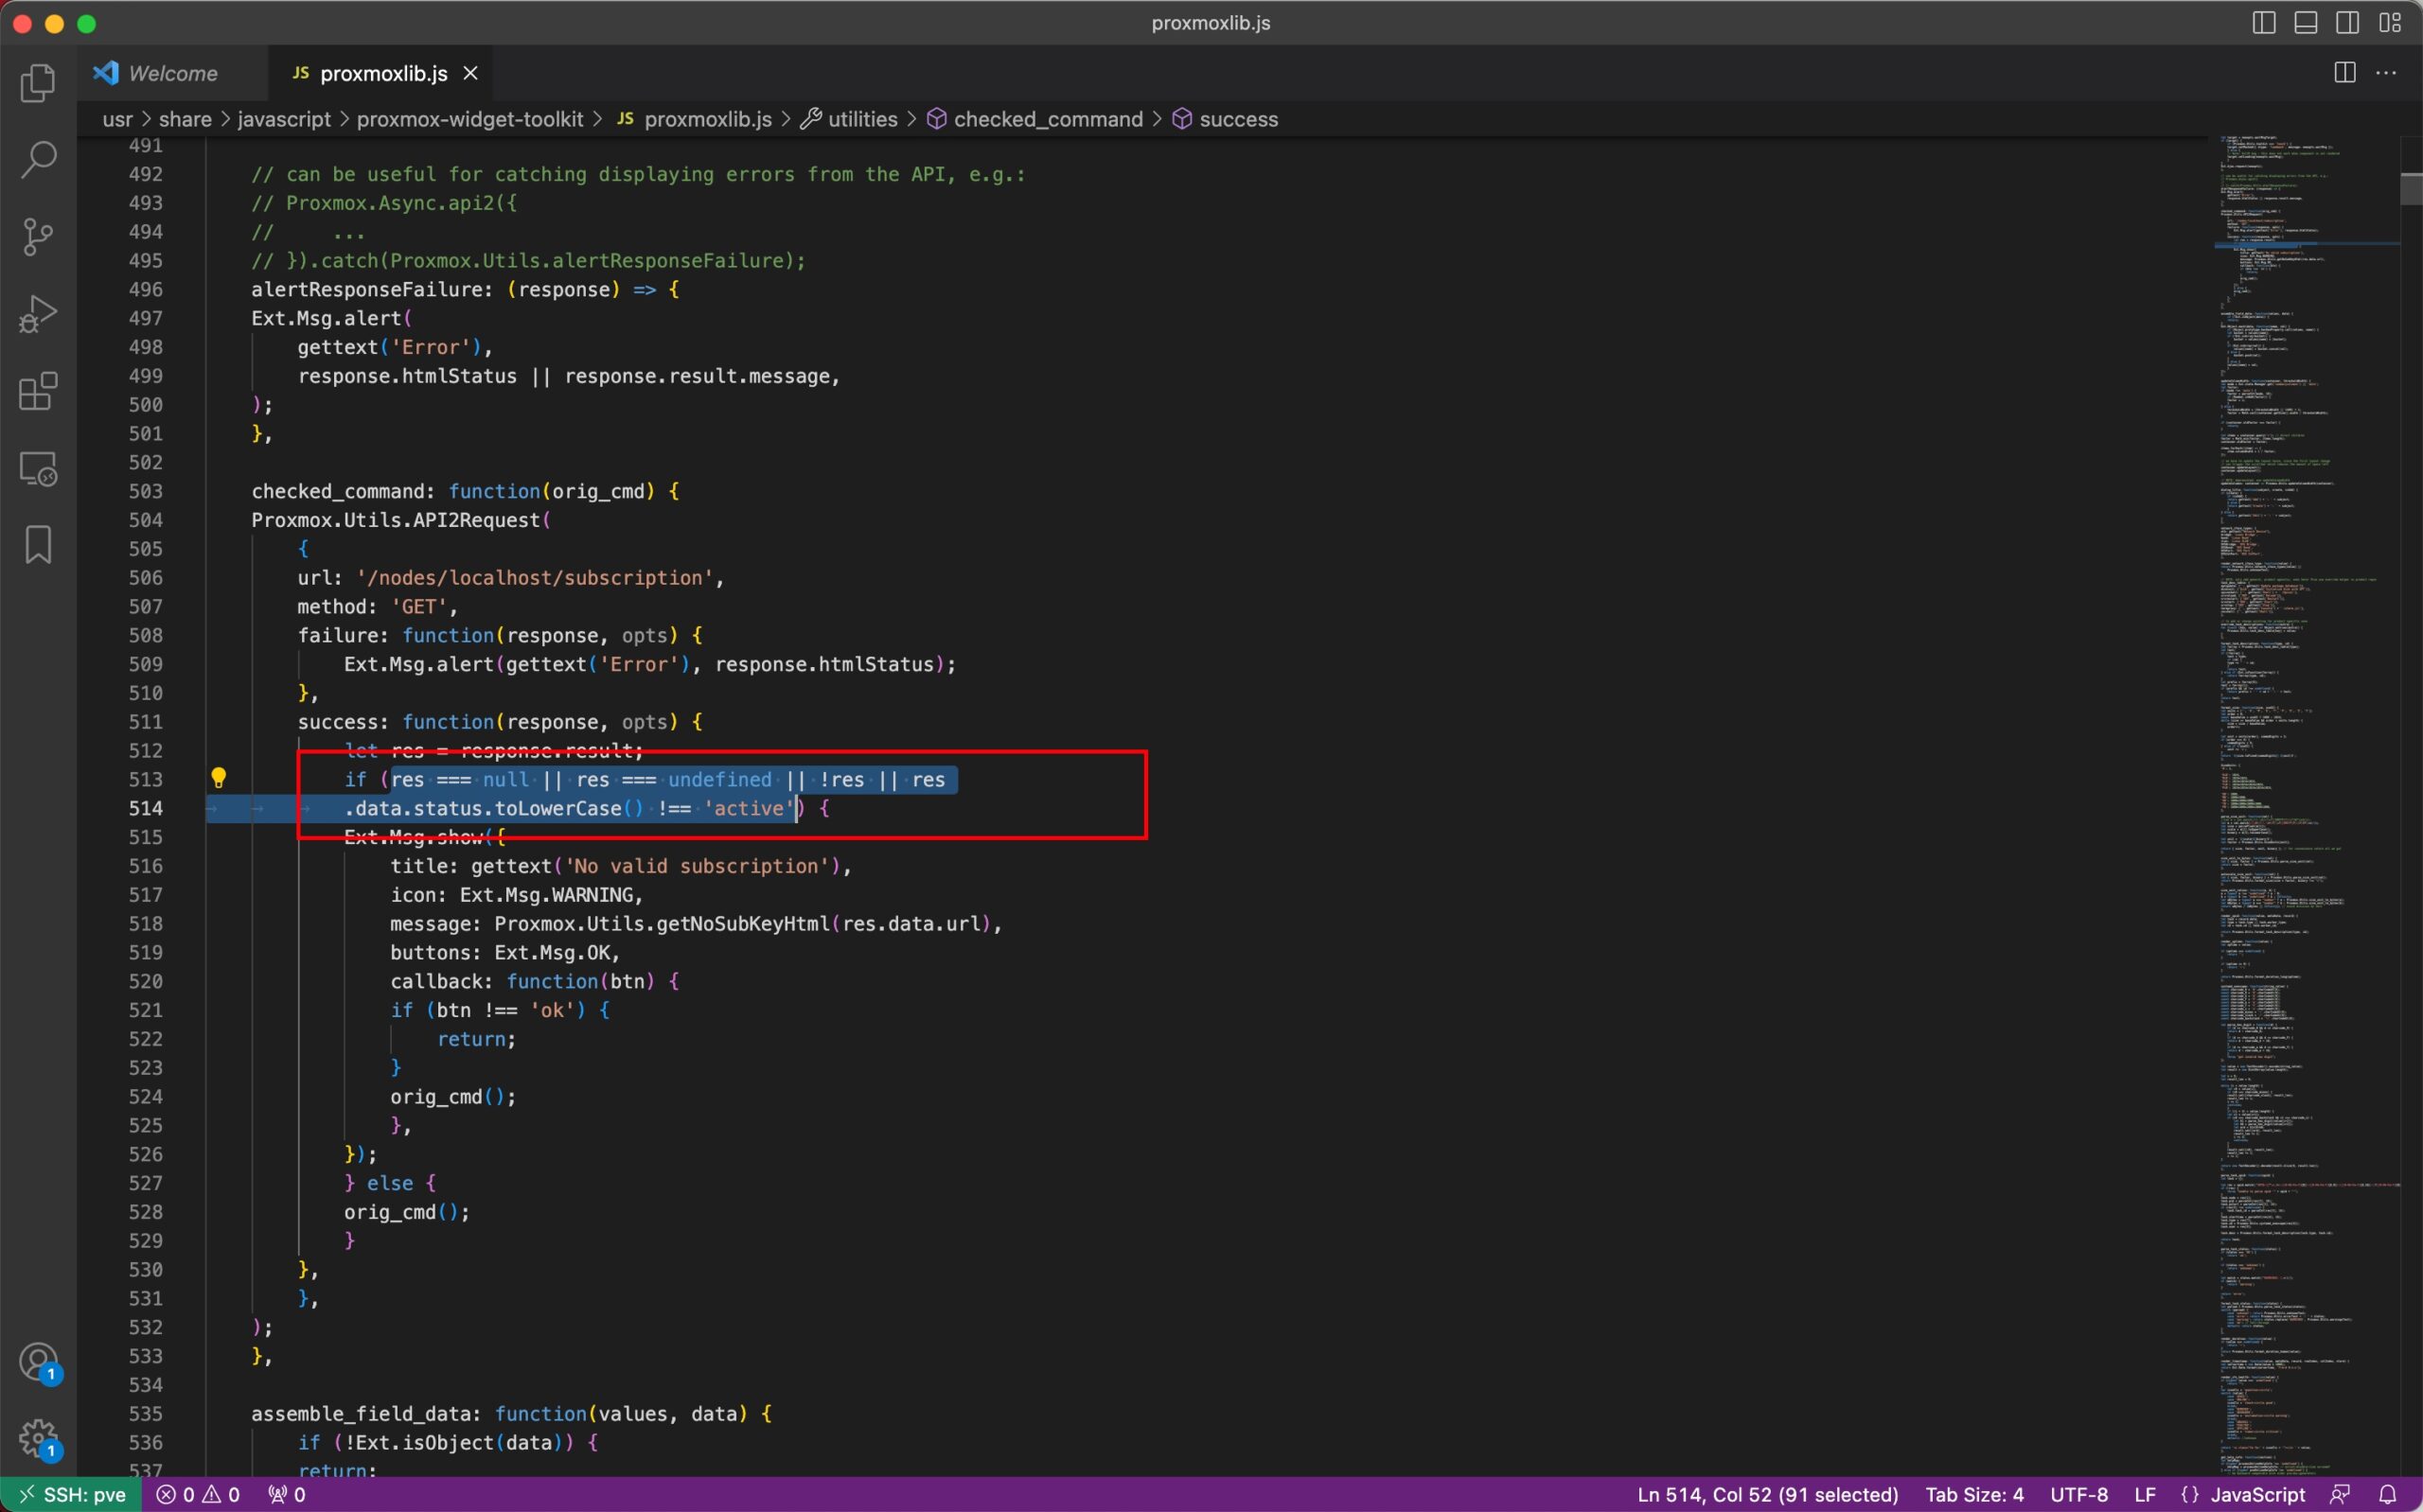
改为永久判定即可 false 即可,修改后如下
代码如下
ToolWindowManager.getInstance(project).getToolWindow(ToolWindowId.COMMIT)?.show()
其实不只是 commit toolwindow 还有很多,比如下面这些,只要更换 Id 即可
public interface ToolWindowId {
  String COMMANDER = "Commander";
  String MESSAGES_WINDOW = "Messages";
  String PROJECT_VIEW = "Project";
  String STRUCTURE_VIEW = "Structure";
  String FAVORITES_VIEW = "Favorites";
  String BOOKMARKS = "Bookmarks";
  String ANT_BUILD = "Ant";
  String DEBUG = "Debug";
  String RUN = "Run";

  /**
   * @deprecated Use {@link com.intellij.analysis.problemsView.toolWindow.ProblemsView}
   */
  @Deprecated(forRemoval = true)
  String INSPECTION = "Inspection Results";

  String FIND = "Find";
  String HIERARCHY = "Hierarchy";
  String TODO_VIEW = "TODO";
  String DEPENDENCIES = "Dependency Viewer";
  String VCS = "Version Control";
  String COMMIT = "Commit";
  String MODULES_DEPENDENCIES = "Module Dependencies";
  String DUPLICATES = "Duplicates";
  String EXTRACT_METHOD = "Extract Method";
  String DOCUMENTATION = "Documentation";
  String TASKS = "Time Tracking";
  String DATABASE_VIEW = "Database";
  String PREVIEW = "Preview";
  String SERVICES = "Services";
  String ENDPOINTS = "Endpoints";
}
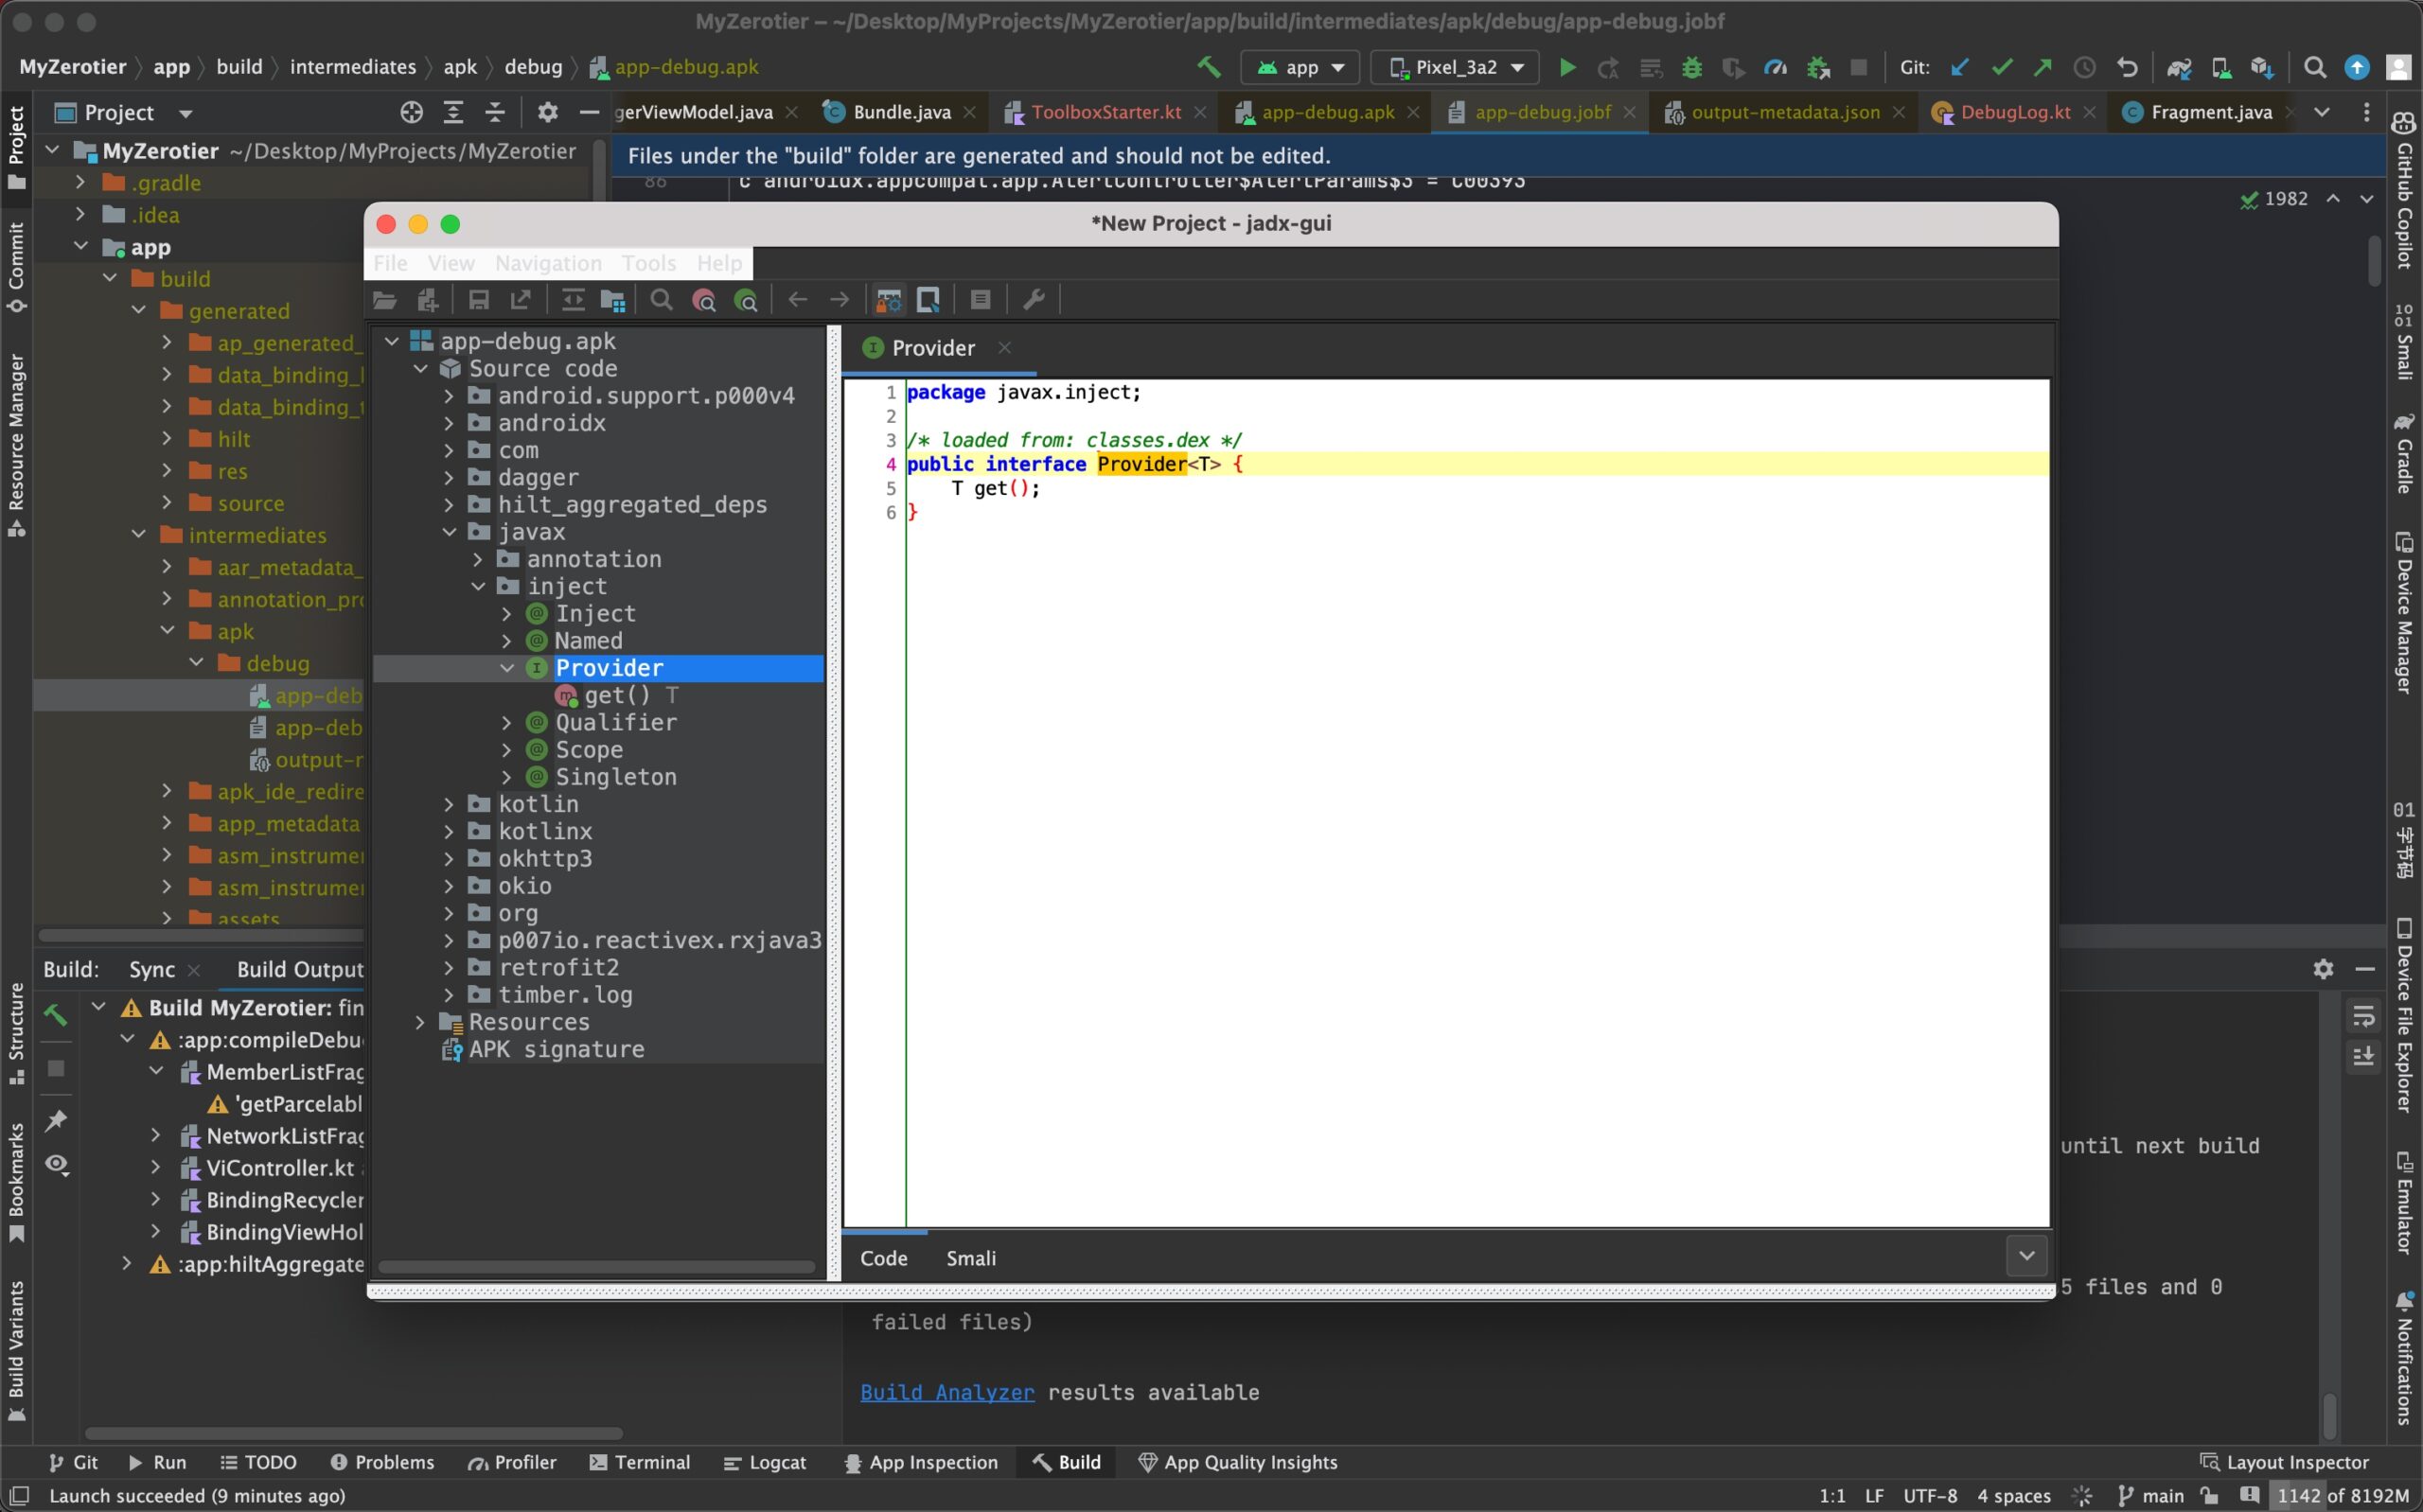
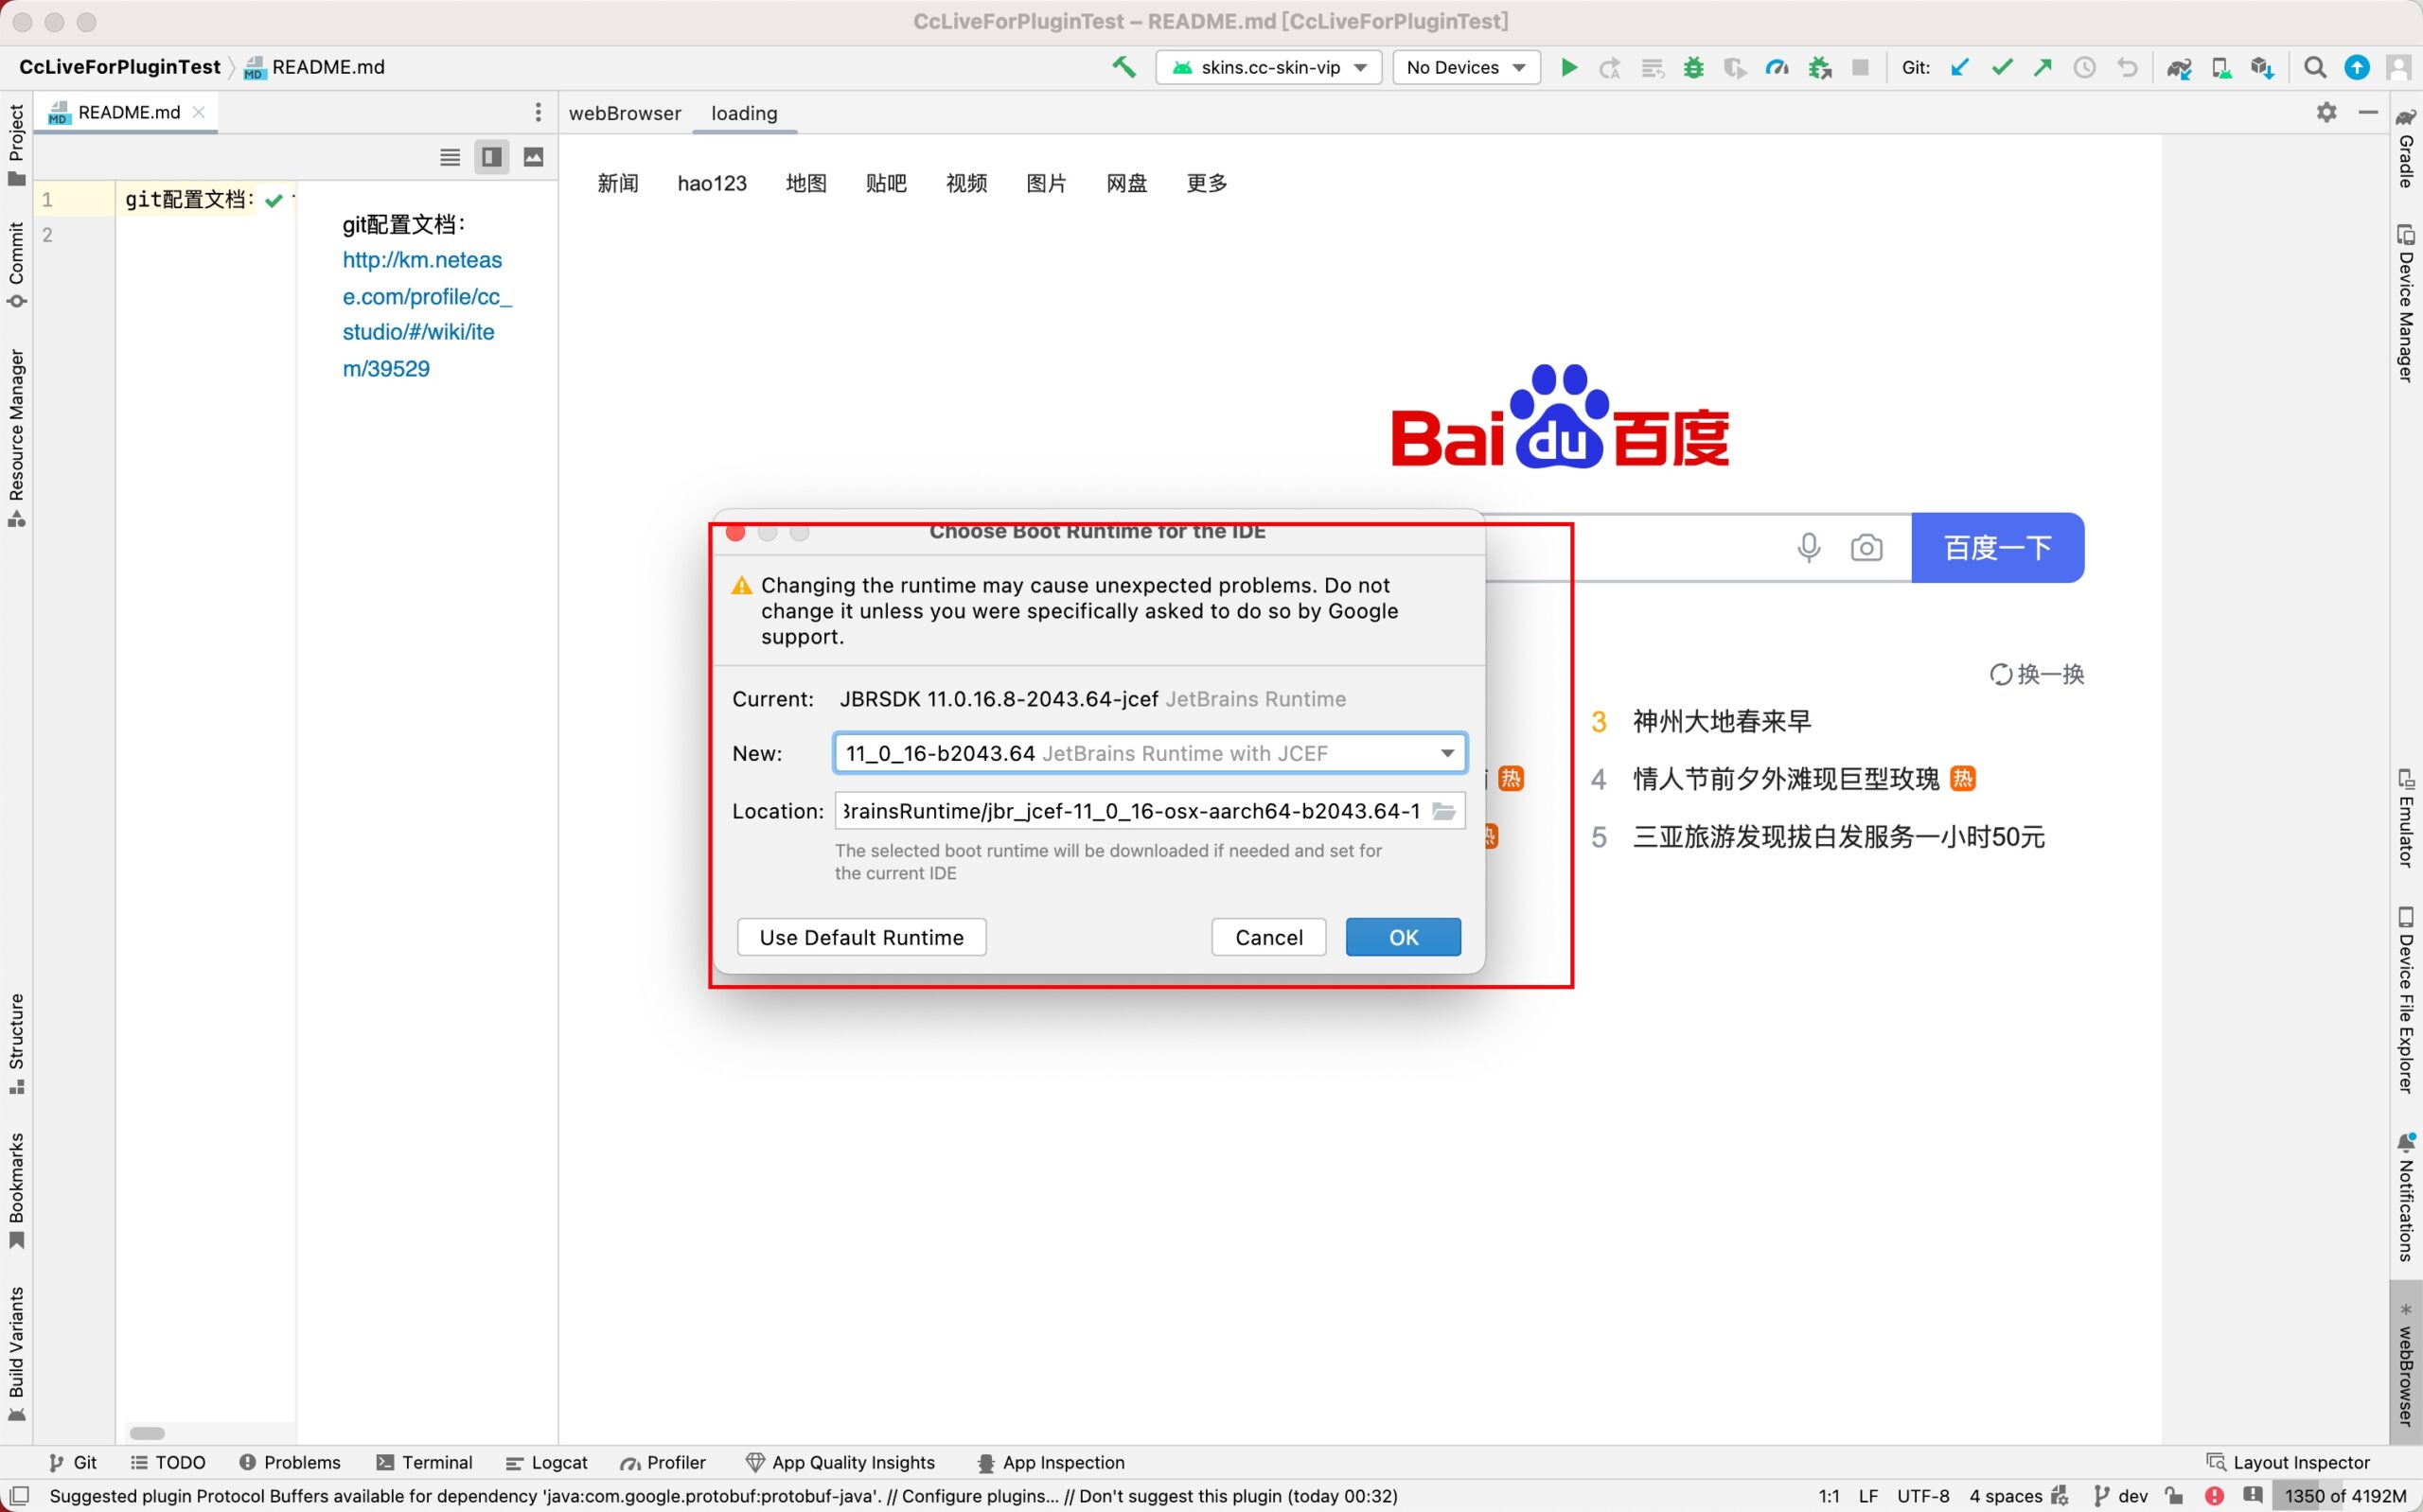
个人开发插件需要用 WebView 显示内容,官方的 idea 是支持直接使用 Jcef技术的,但是不知道为什么 android studio 的运行时是不支持的,开发的时候需要指定运行时才能出来
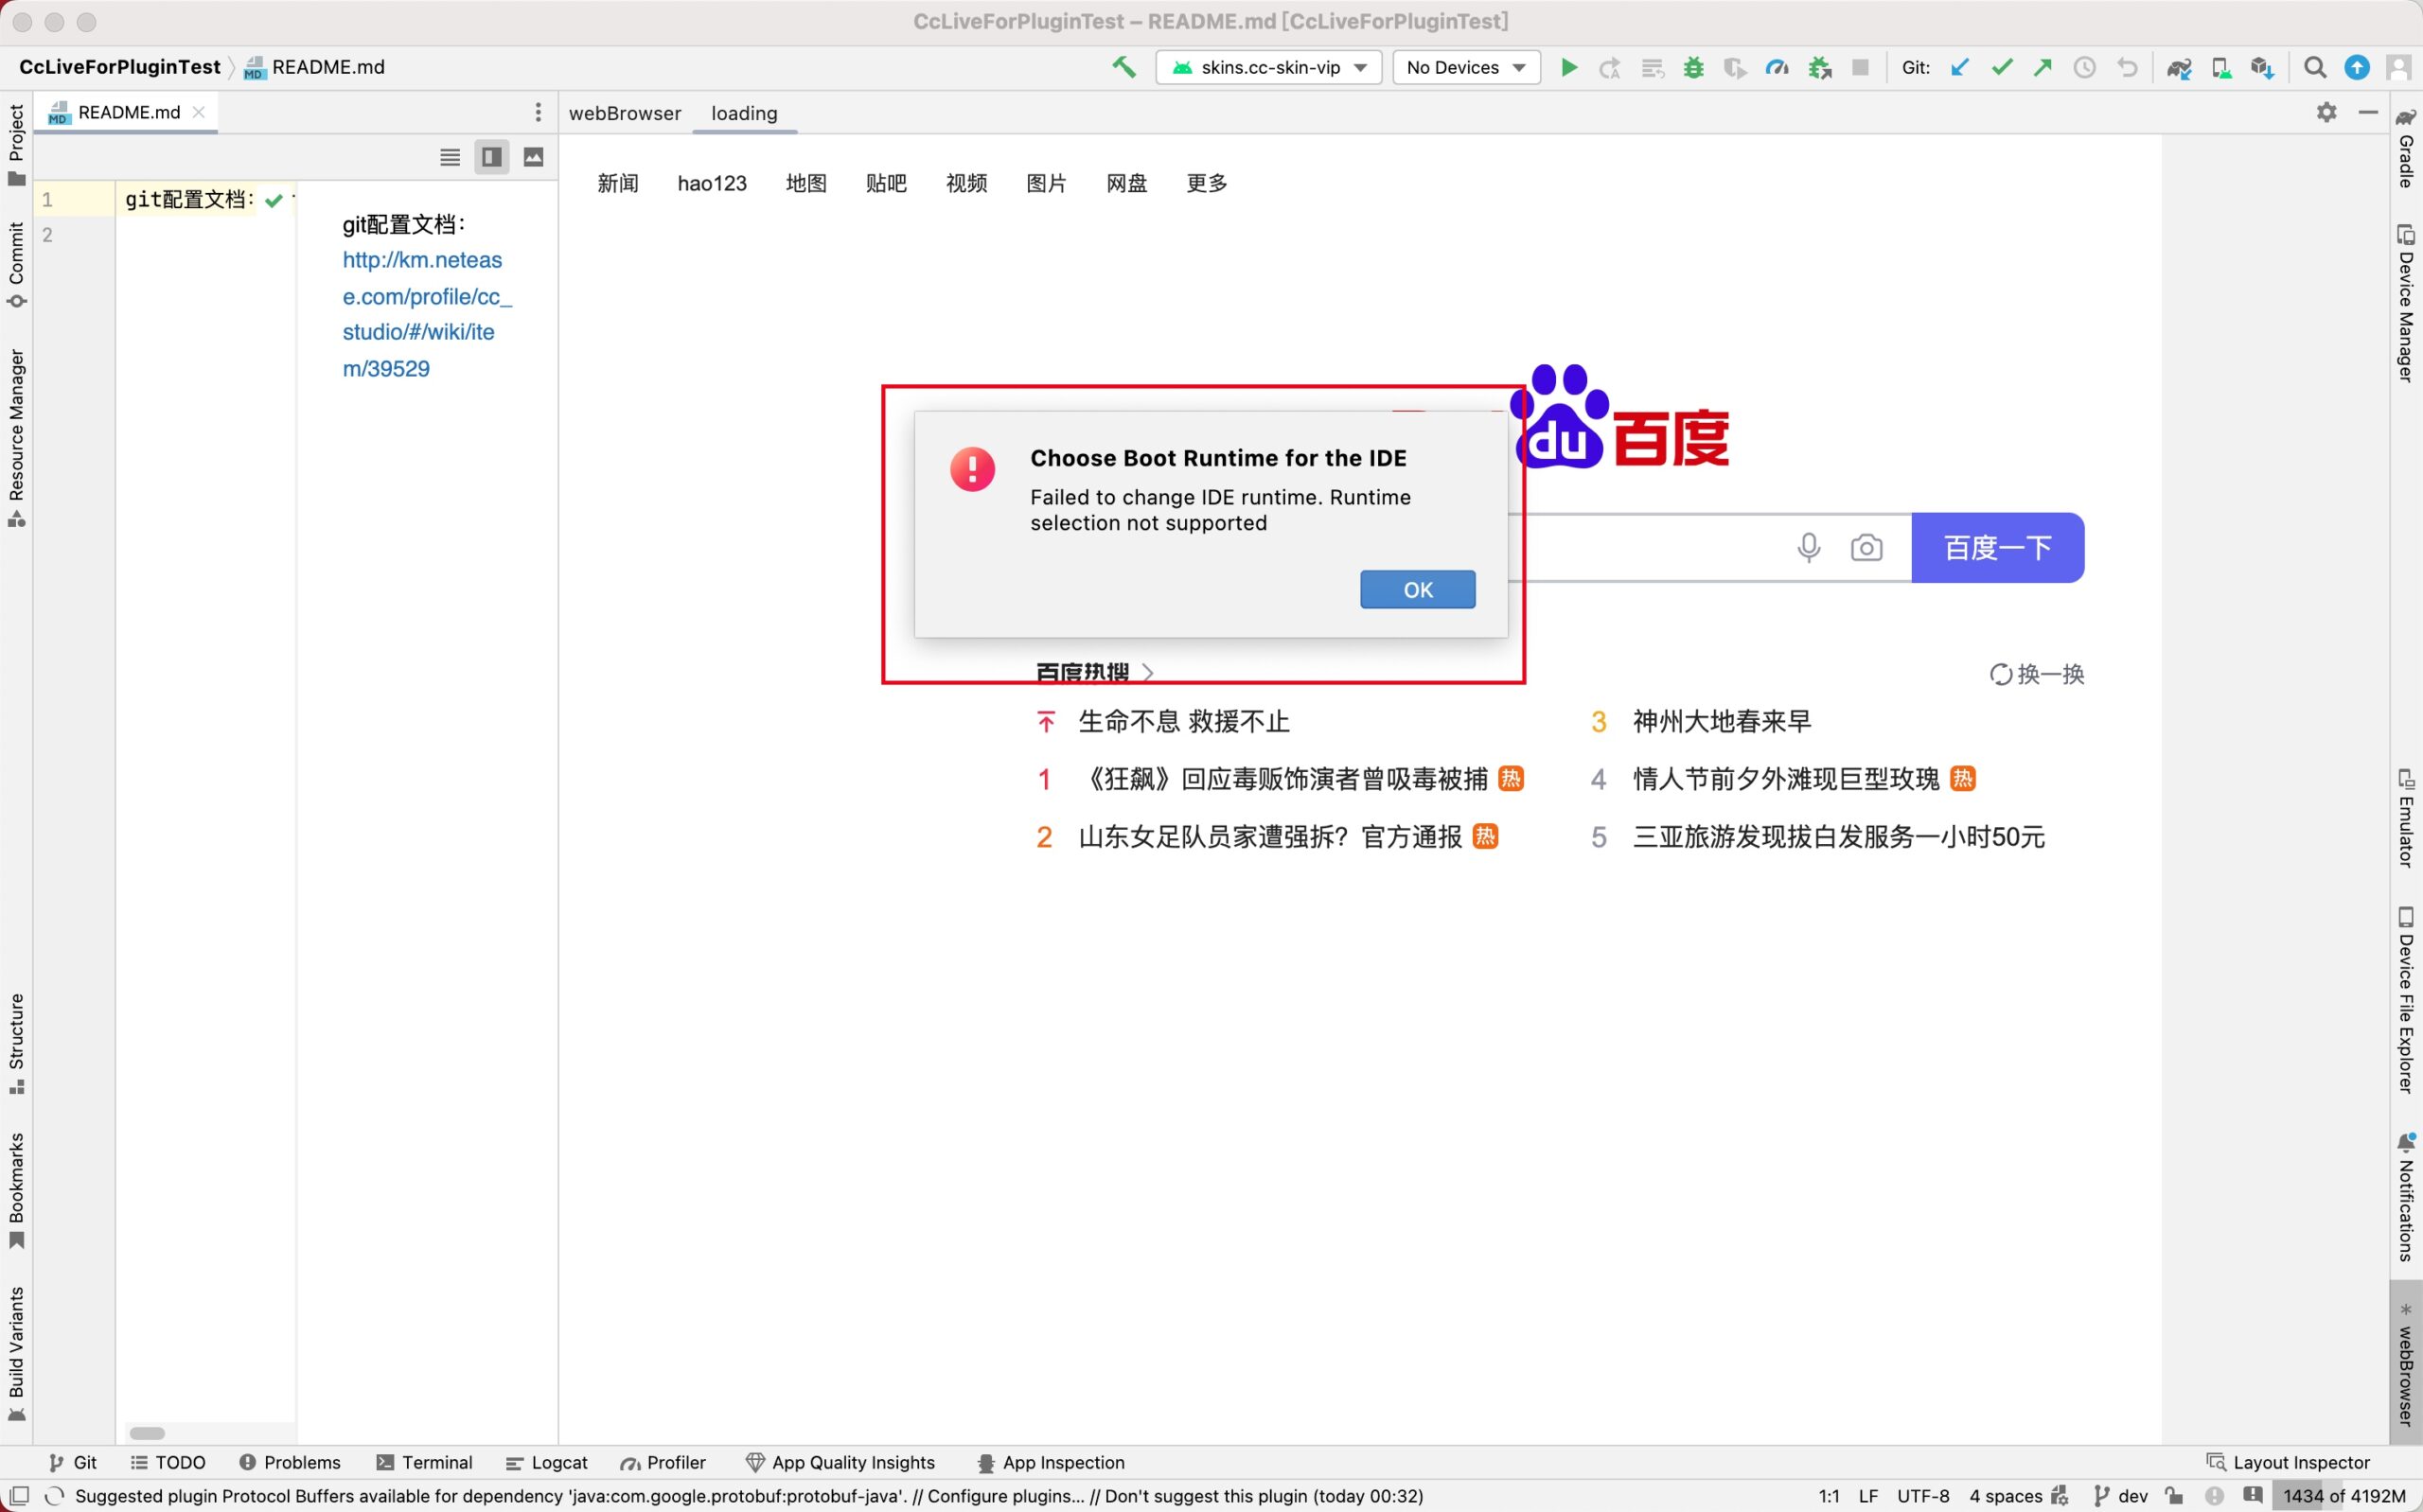
通过以下的框修改是不可以的
最后会出现以下弹窗
首先需要使用正常运行的 android studio,选择对应 java verion 的 JCEF 后缀版本的运行时,点击确认后会下载,再次打开就能看到下图红框中文件的位置信息
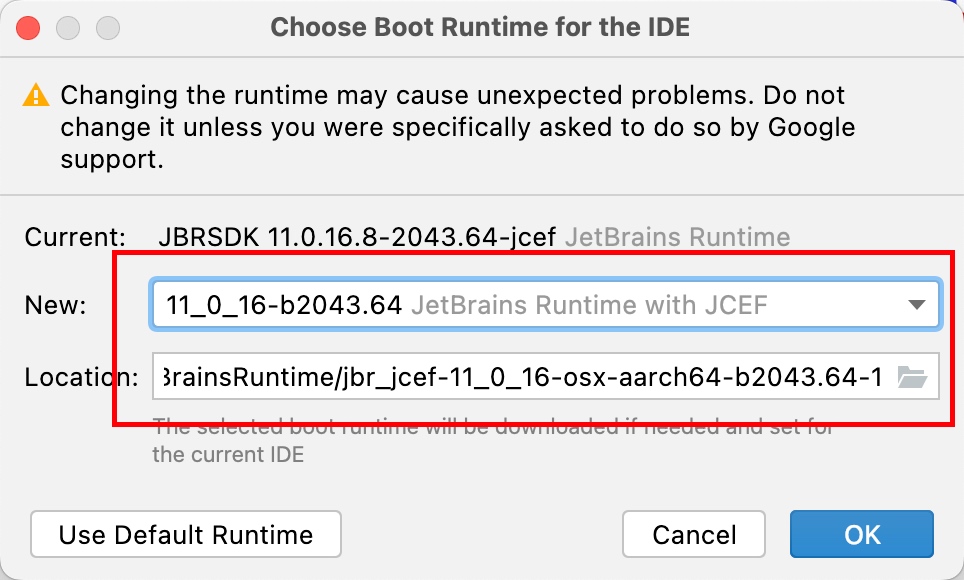
比如我的运行时下载位置就是 /Users/hangox/Library/Java/JetBrainsRuntime/jbr_jcef-11_0_16-osx-aarch64-b2043.64
下面只需要这样配置,也就是配置到 java 运行文件目录即可
runIde {
        projectExecutable.set("/Users/hangox/Library/Java/JetBrainsRuntime/jbr_jcef-11_0_16-osx-aarch64-b2043.64/Contents/Home/bin/java")
    }
我通过 github 上下载的 runtime 因为没有签名会导致直接运行不通过,下载地址是这里
https://github.com/JetBrains/JetBrainsRuntime,通过官方选择的下载就没这个问题,百思不得其解
在 org.jetbrains.intellij version 1.10.0 版本是根据 Gralde 运行时决定的,后续 1.12.0 后,修改了启动方法。个人感觉很好,这样不用老是提示我需要弄 jbr 的运行时
有谁知道 android studio 为什么和 idea 使用是不同的运行时吗?
记录个东西 Structuring Software Projects Sample,这是官方为 Gradle 写的 Demo ,有很多东西可以参考
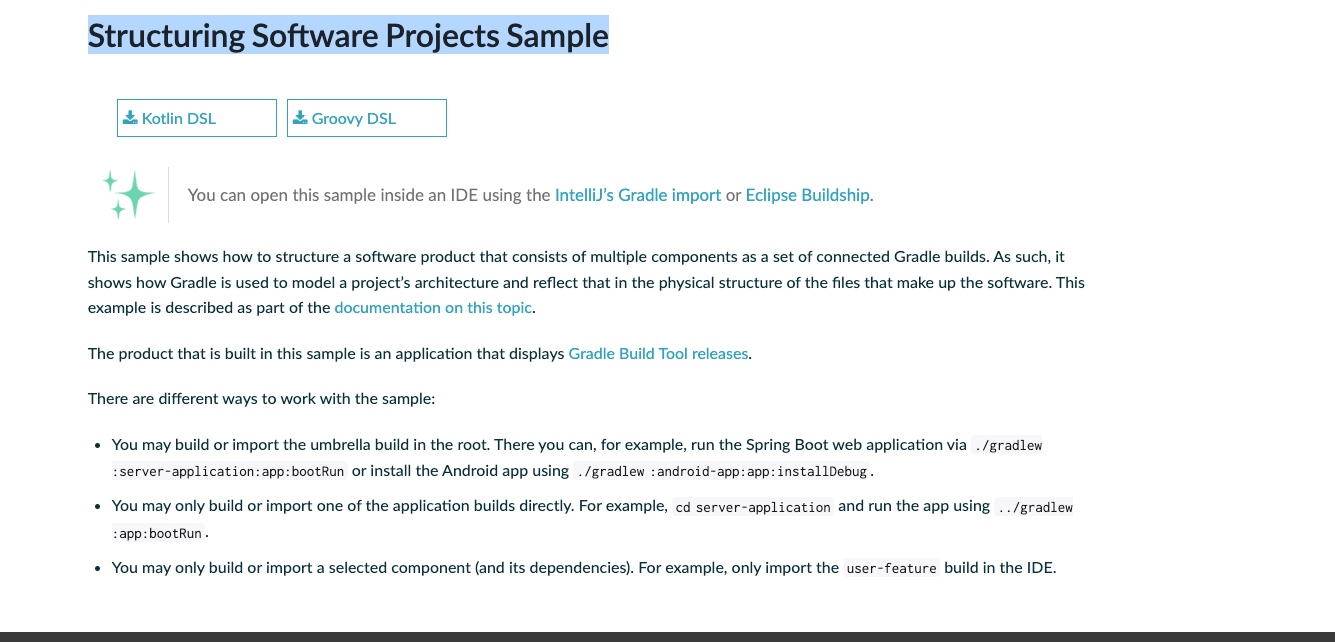
详解文档在这里 https://docs.gradle.org/current/userguide/structuring_software_products.html
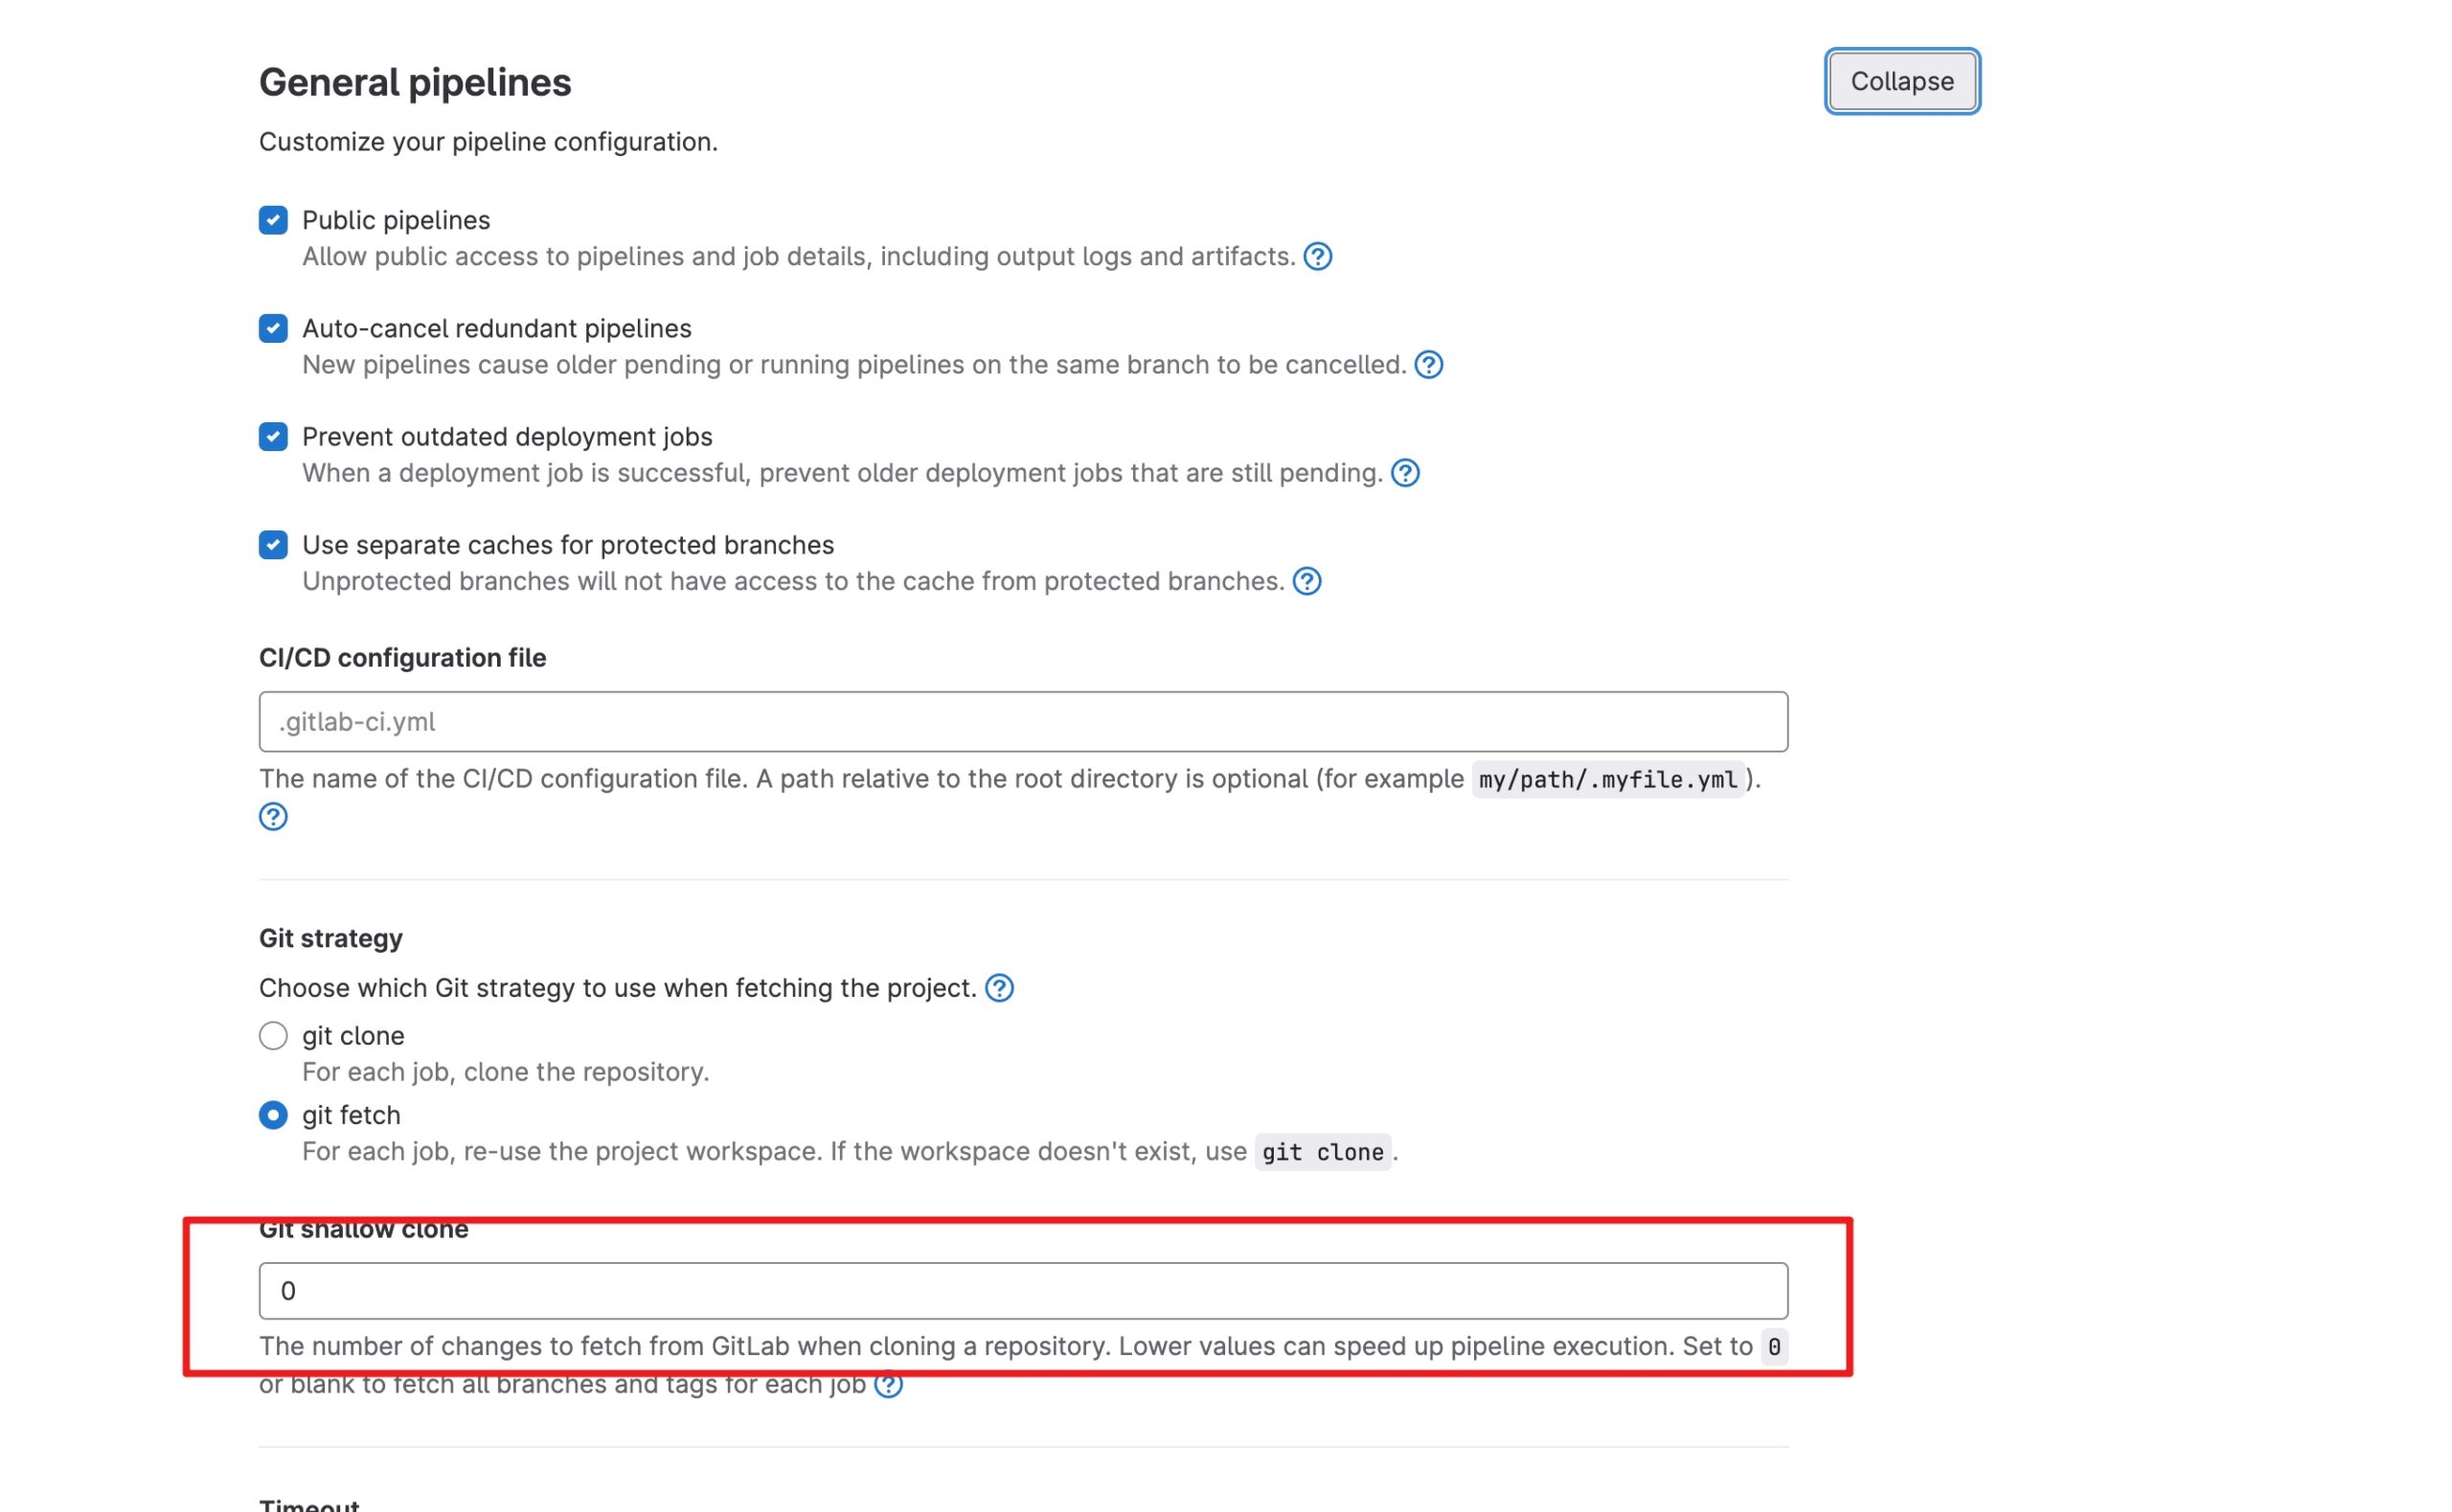
项目中是用 git commit 数目作为 version的,发现 gitlab runner 上获取到 commit 数量是不对的,看看 gitlab 上有个 git shallow clone 模式,这个模式可以简单的理解为只是下载源码,不在乎历史,目的是加快第一次加载的时间。但是因为没有了历史,通过 git commit 数量来作为 versionCode 就会出错,只能下把这个功能关闭先
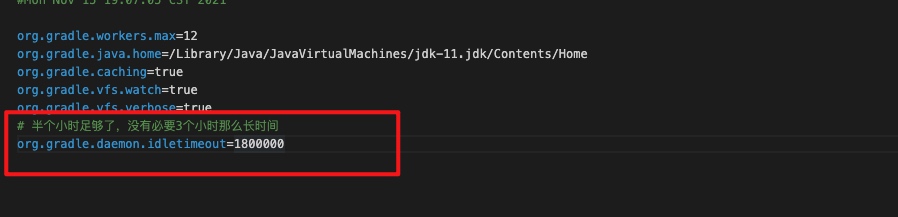
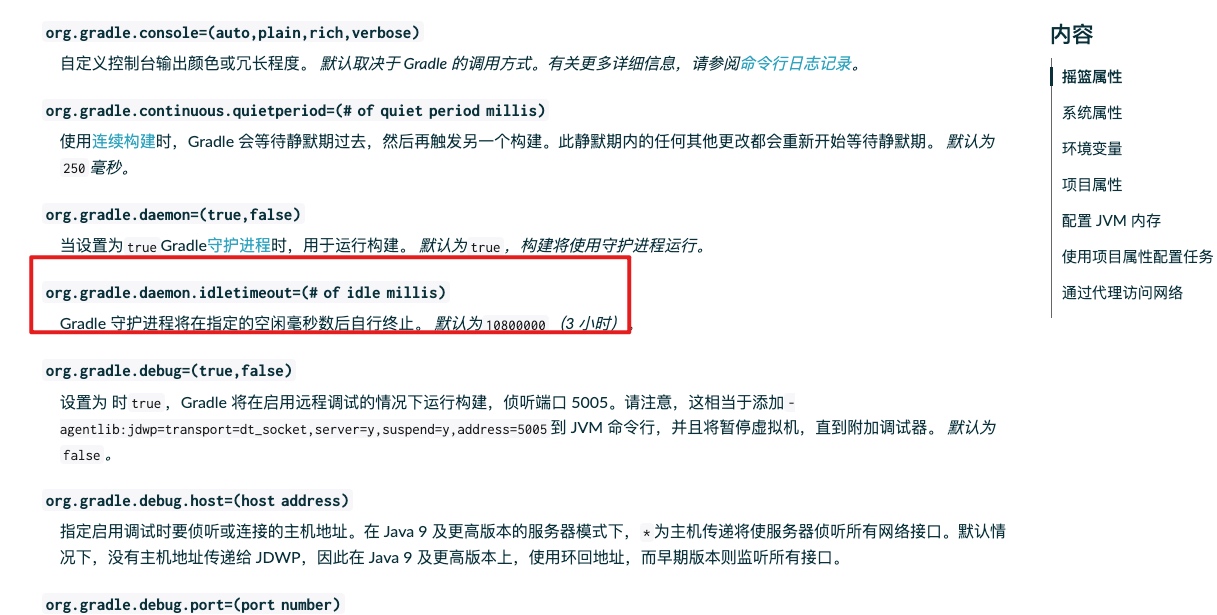
官方设定的 Gradle Daemon 存活的时间默认为 3 个小时,非常长,同时不同的 JVM 参数会导致 Gradle Daemon 新建一个新的实例。如果打开的项目比较多,Gradle Daemon 占用的内存将会非常可观。
为了解决这个问题,可以修改个 ~/.gradle/gradle.properties文件下 org.gradle.daemon.idletimeout 这个字段,把时间调整为 30 分,更改内容如下
# 半个小时足够了,没有必要3个小时那么长时间
org.gradle.daemon.idletimeout=1800000
更改后样式
官方说明
插件地址 Gradle Utilities
这个插件可以用来管理 Gradle 相关的文件,同时用来升级Gradle
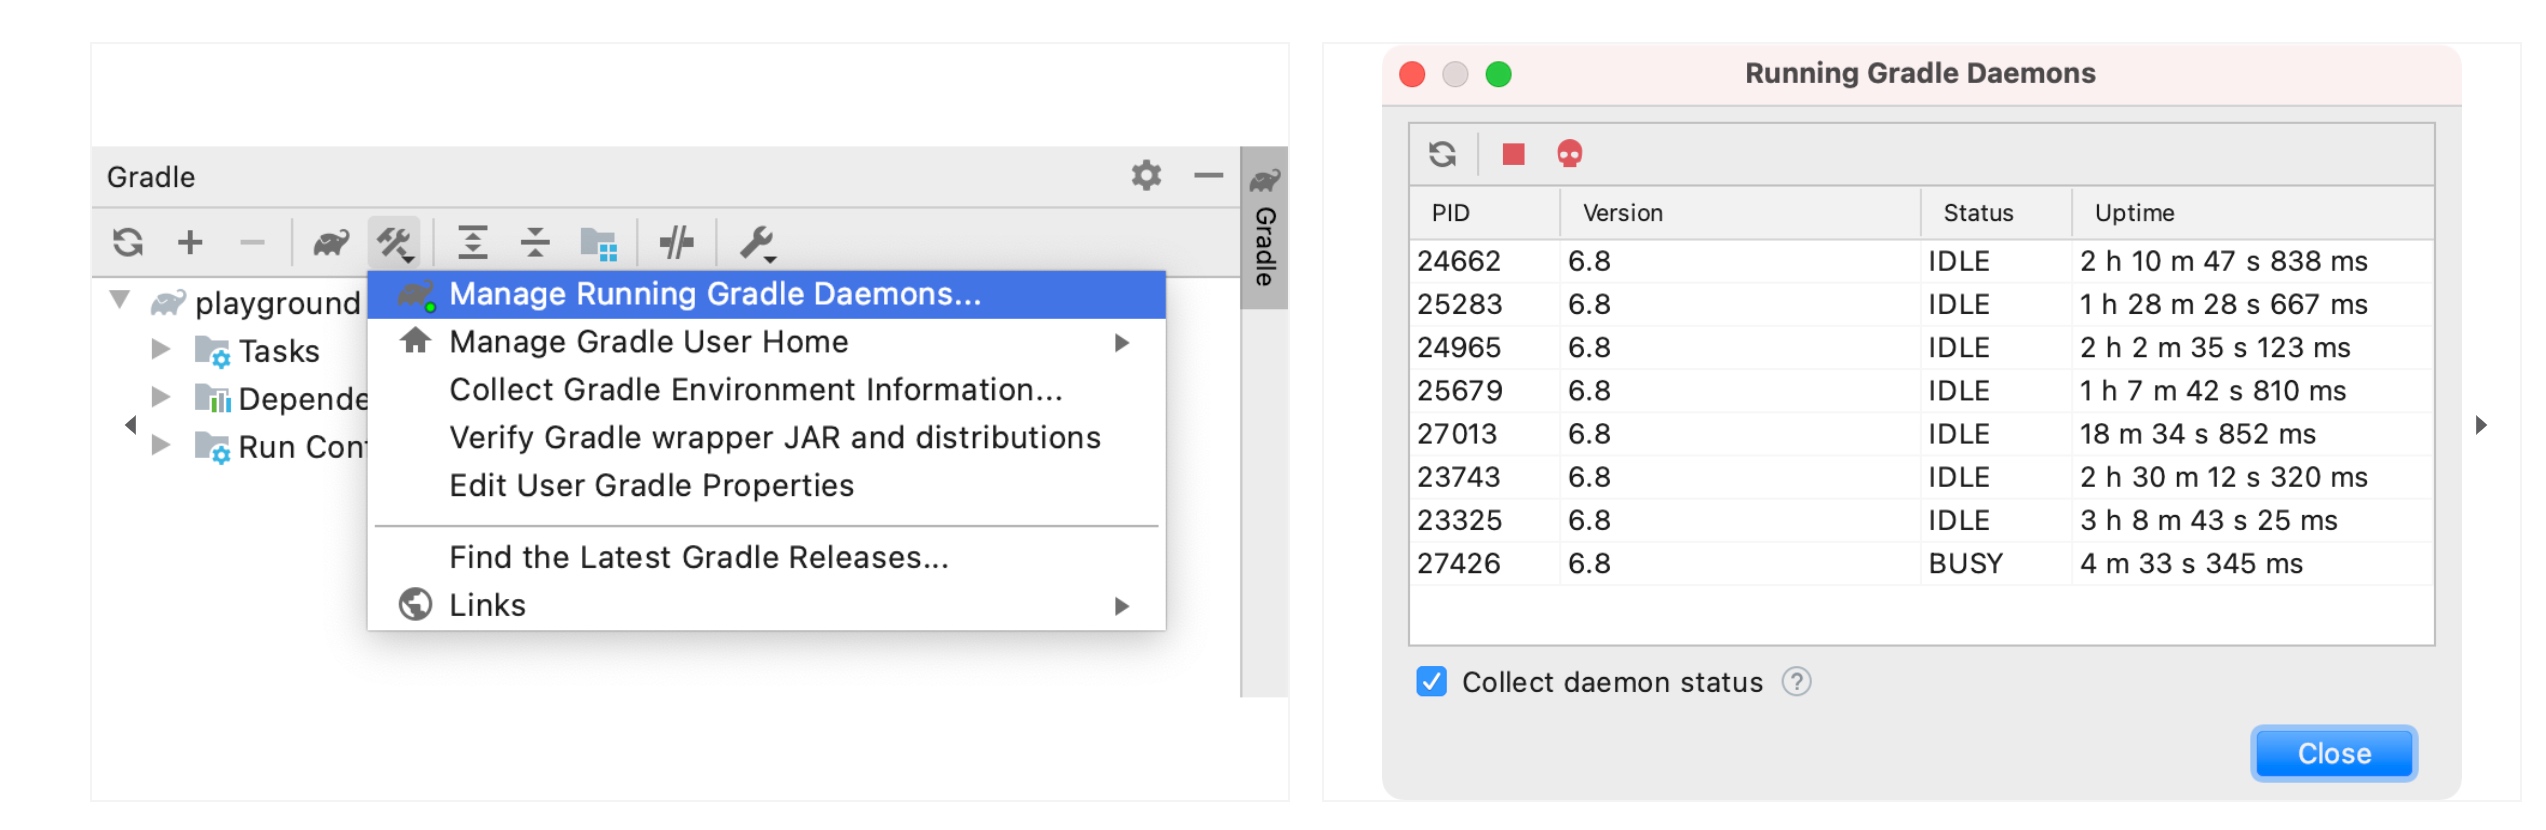
这个插件提供了一些有用的实用程序来支持 Gradle 的日常工作:
这些实用程序可通过 Gradle 工具窗口的工具栏(选择View | Tool Windows | Gradle)在Gradle Utilities操作弹出按钮下使用。
如果您有任何建议或发现错误,请在GitHub 上创建问题或使用插件主页上的联系表。
(此插件与官方 Gradle 项目无关。)
使用到的库
buildscript {
    repositories {
        gradlePluginPortal()
        google()
        mavenCentral()
    }
    dependencies {
        // ...
        classpath("org.eclipse.jgit:org.eclipse.jgit:5.0.2.201807311906-r")
    }
}
val git = org.eclipse.jgit.api.Git(FileRepositoryBuilder.create(rootProject.file(".git")))
val bigVersion = project.properties["plugin.version"]
version = "${bigVersion}.${git.log().call().toList().size}"
idea 编写 .gitlab-ci.yml 文件没有代码提示
正常来说,idea 会识别到类型自动下载的,但是有时候就是不会,很诡异,只能自己手动设置
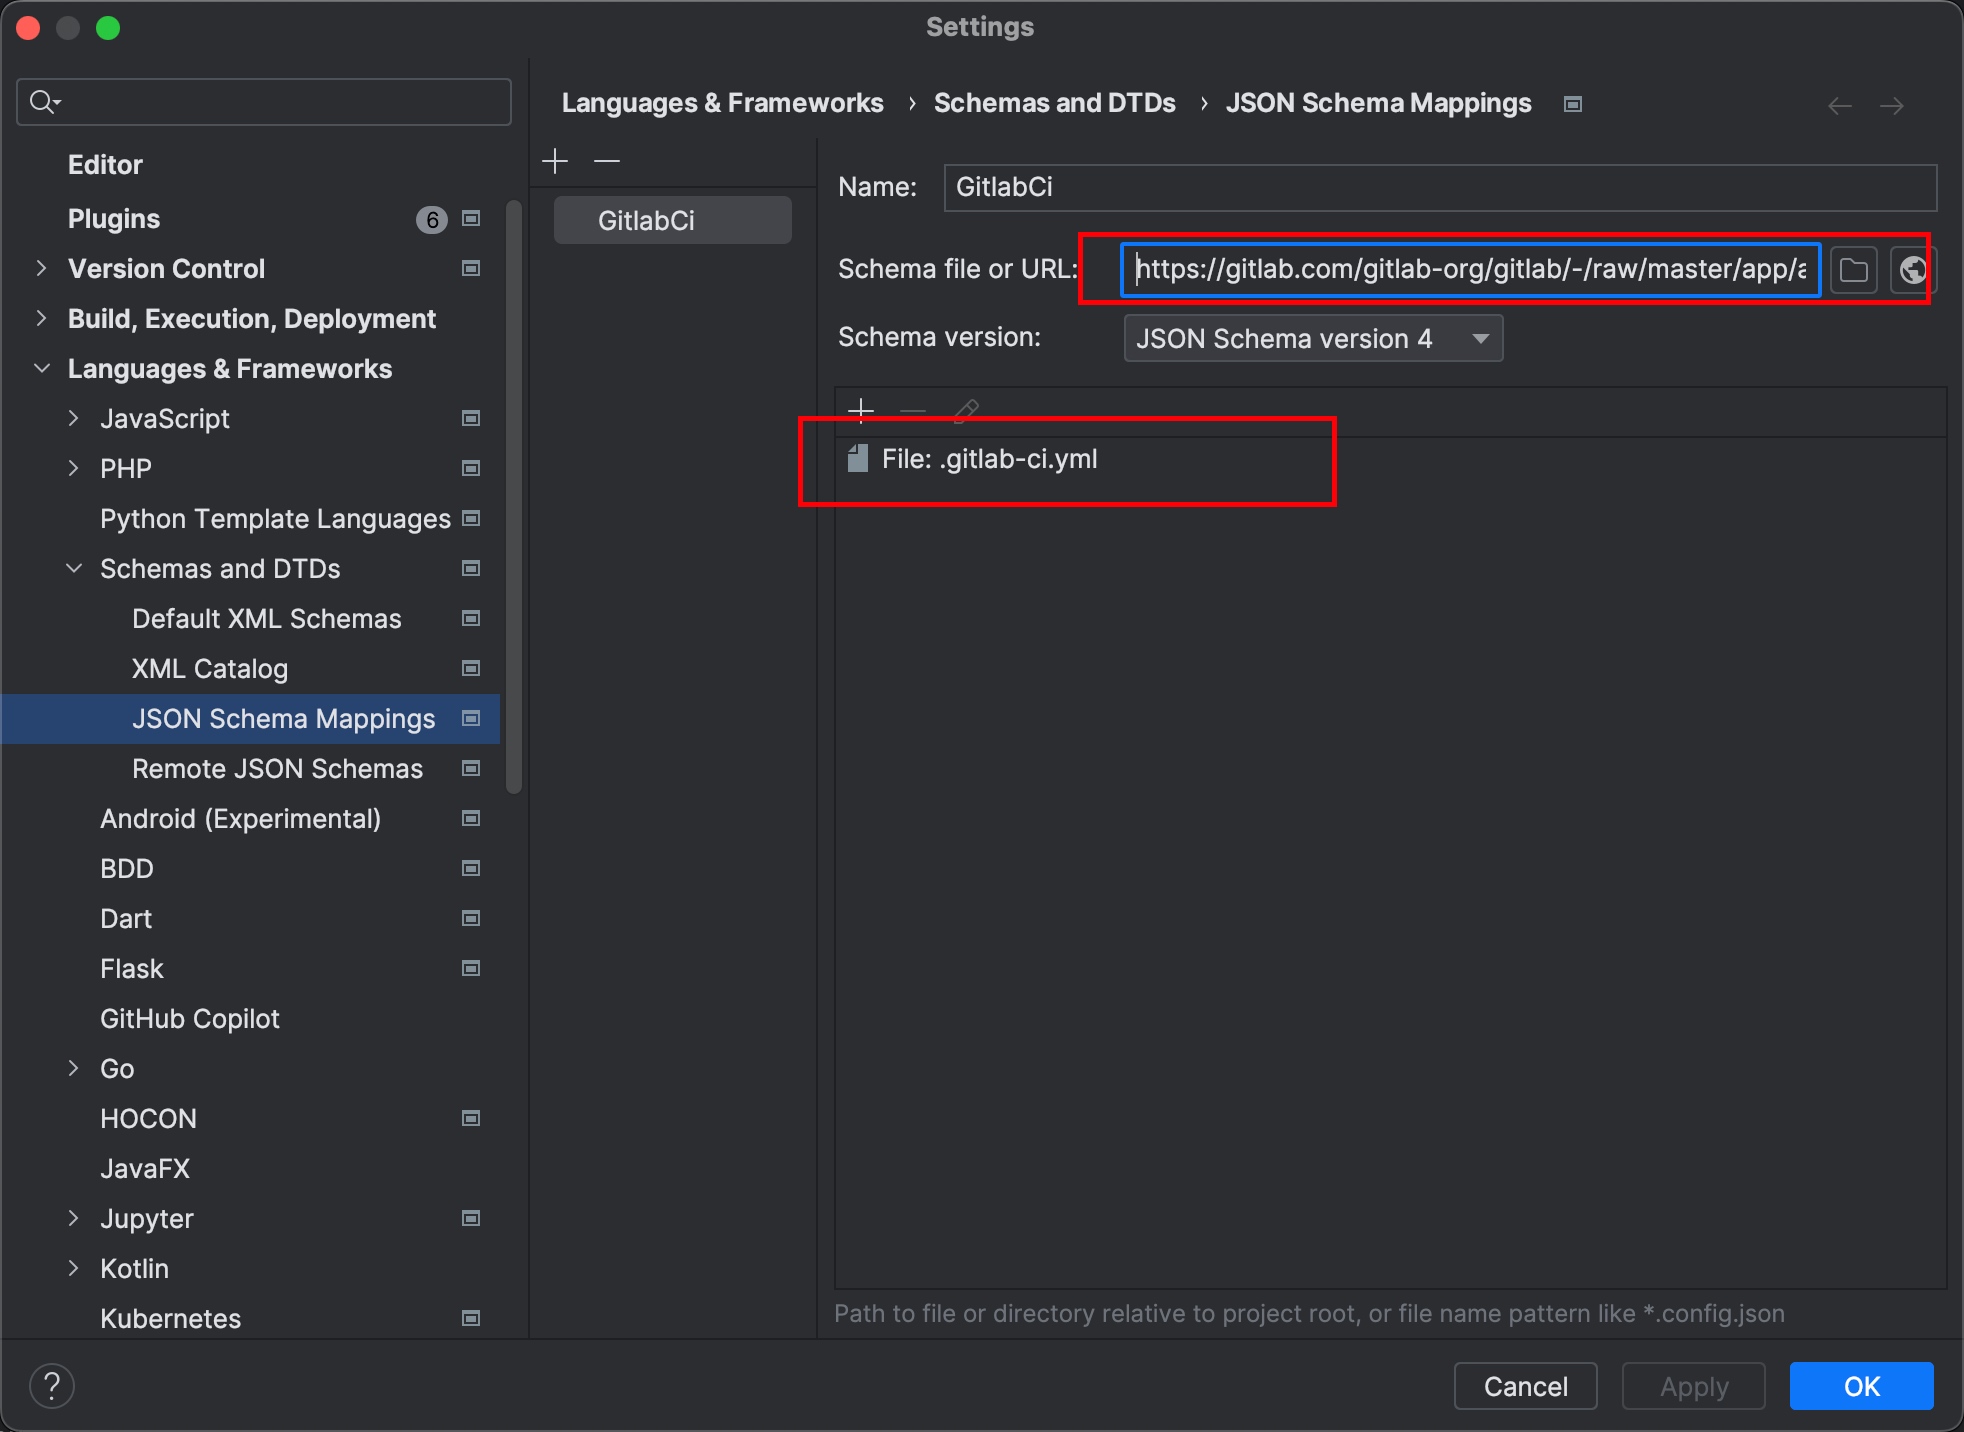
只需要添加一个 shcema 文件之后关联 .gitlab-ci.yml 文件即可
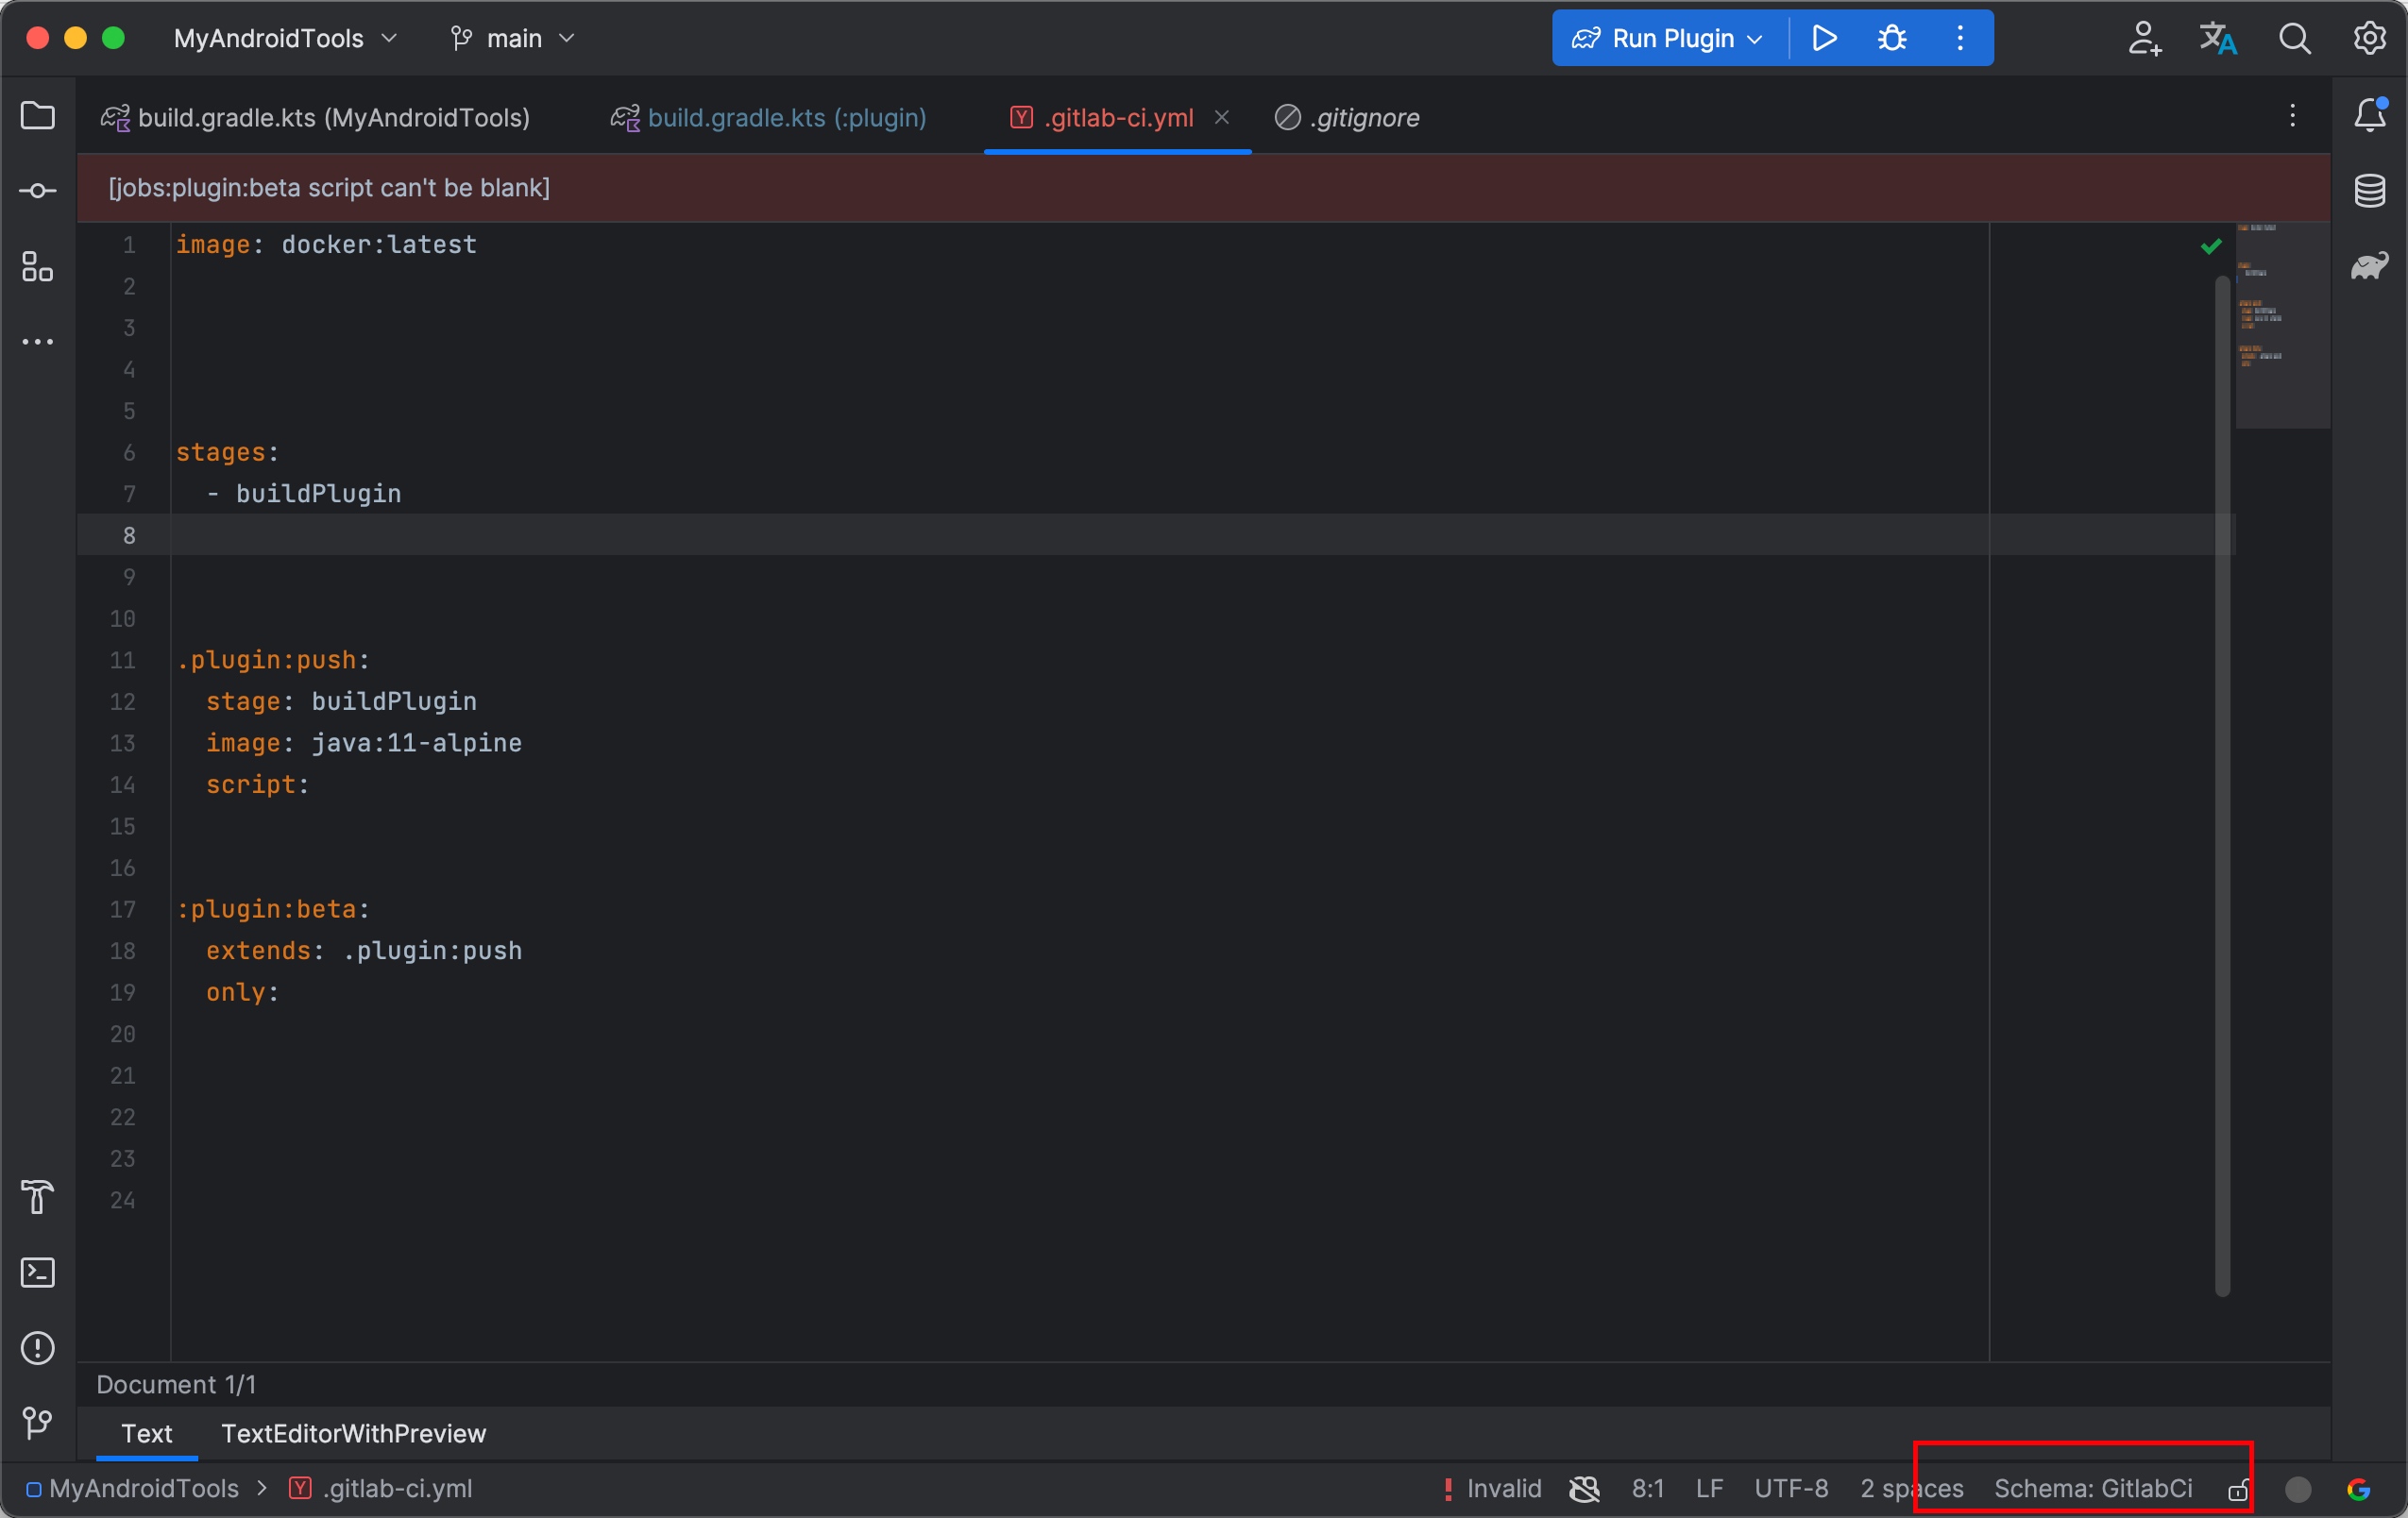
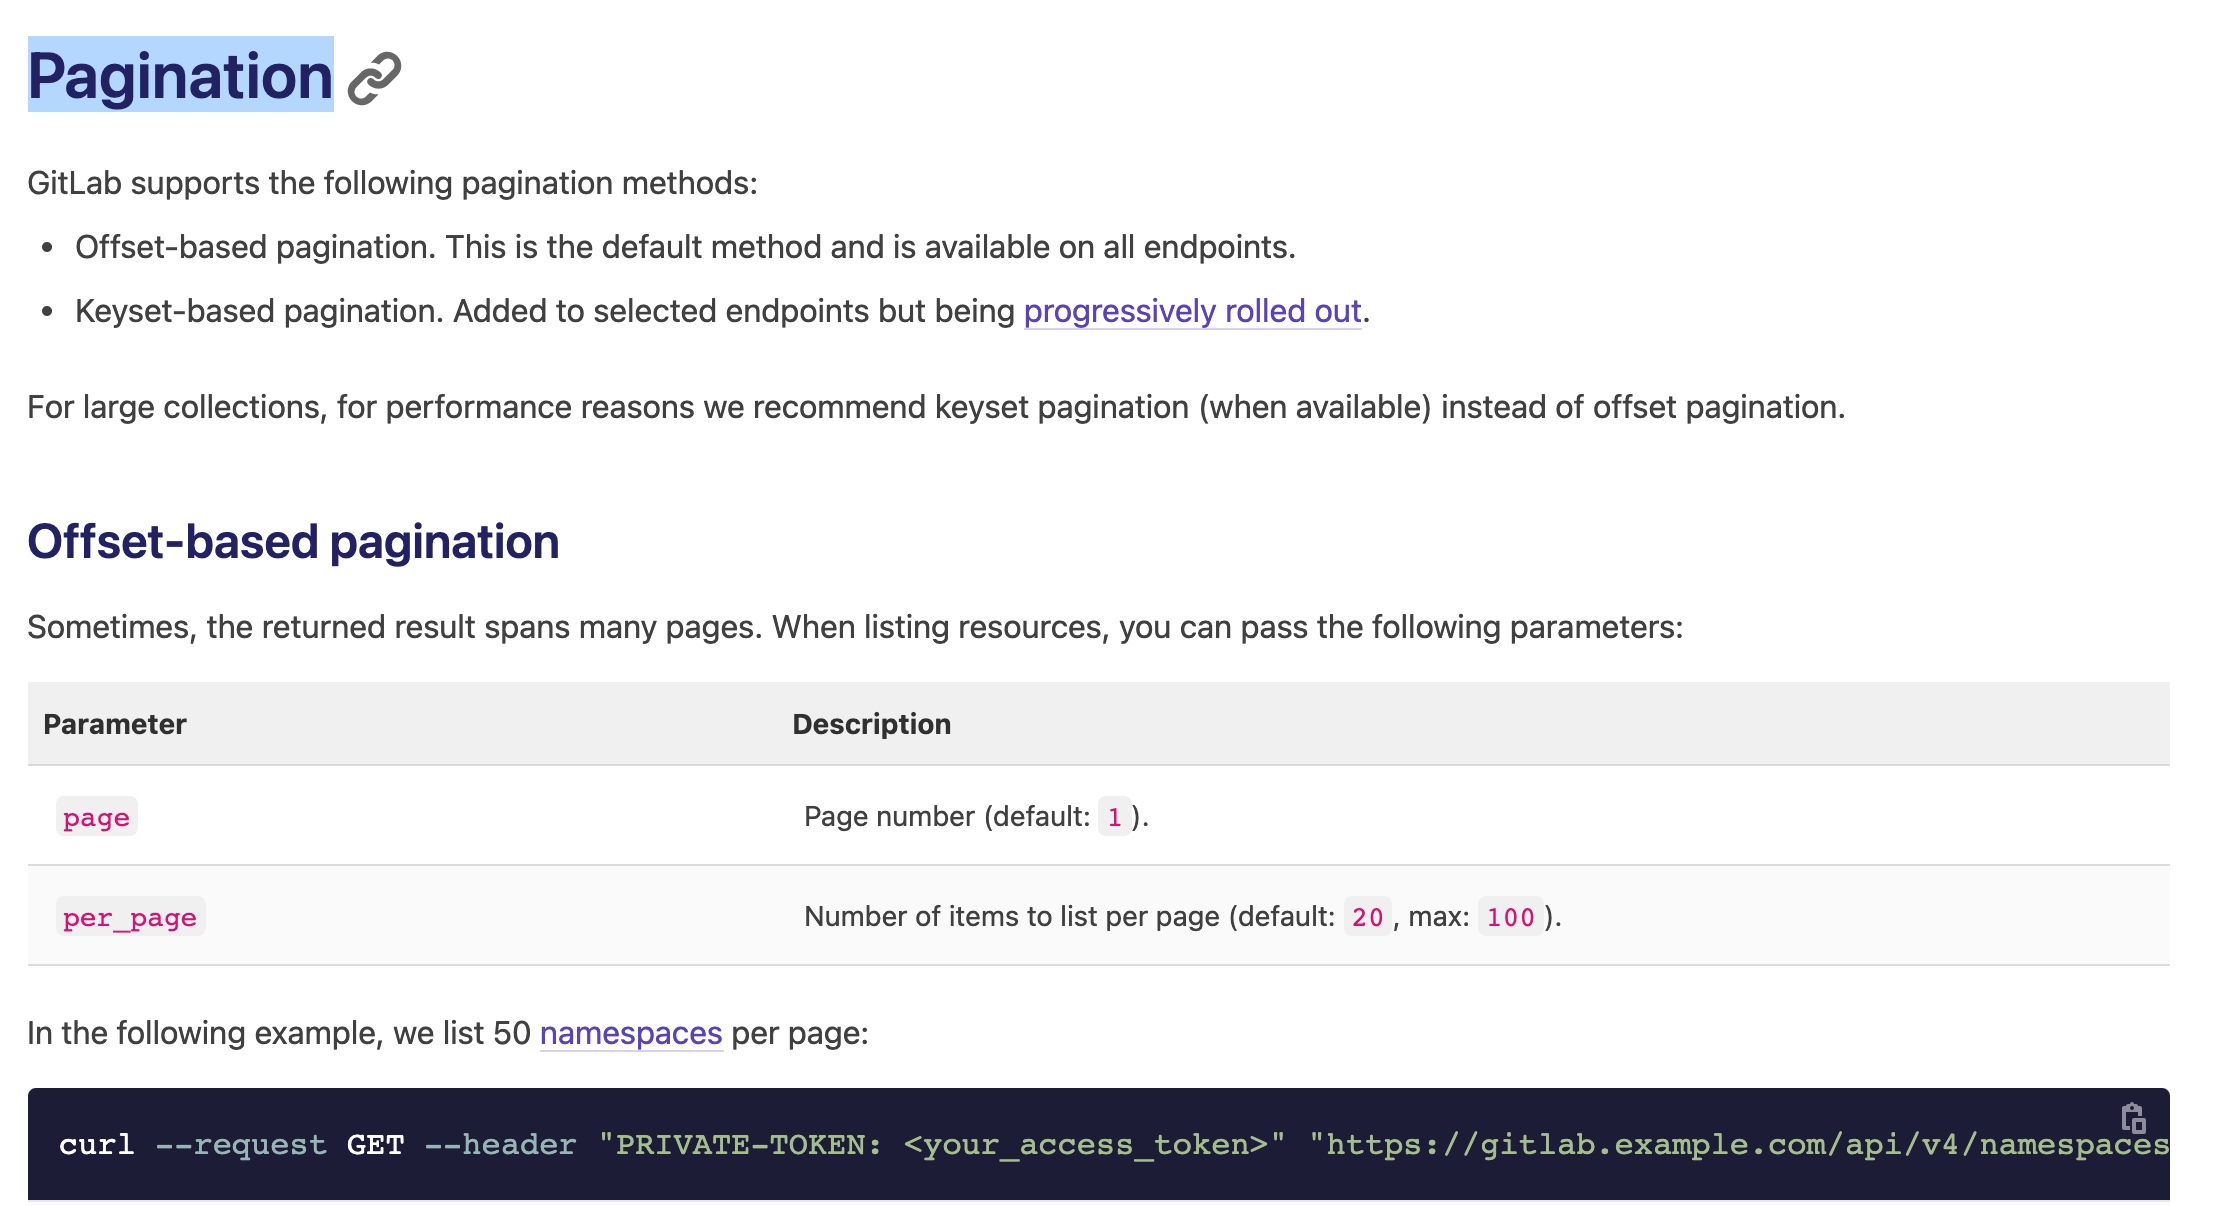
gitlab ci 的 json scheme 有官方支持网址是这个 https://gitlab.com/gitlab-org/gitlab-foss/-/issues/49679,但是 json scheme 有个官方的网站可以查询,https://www.schemastore.org/json/
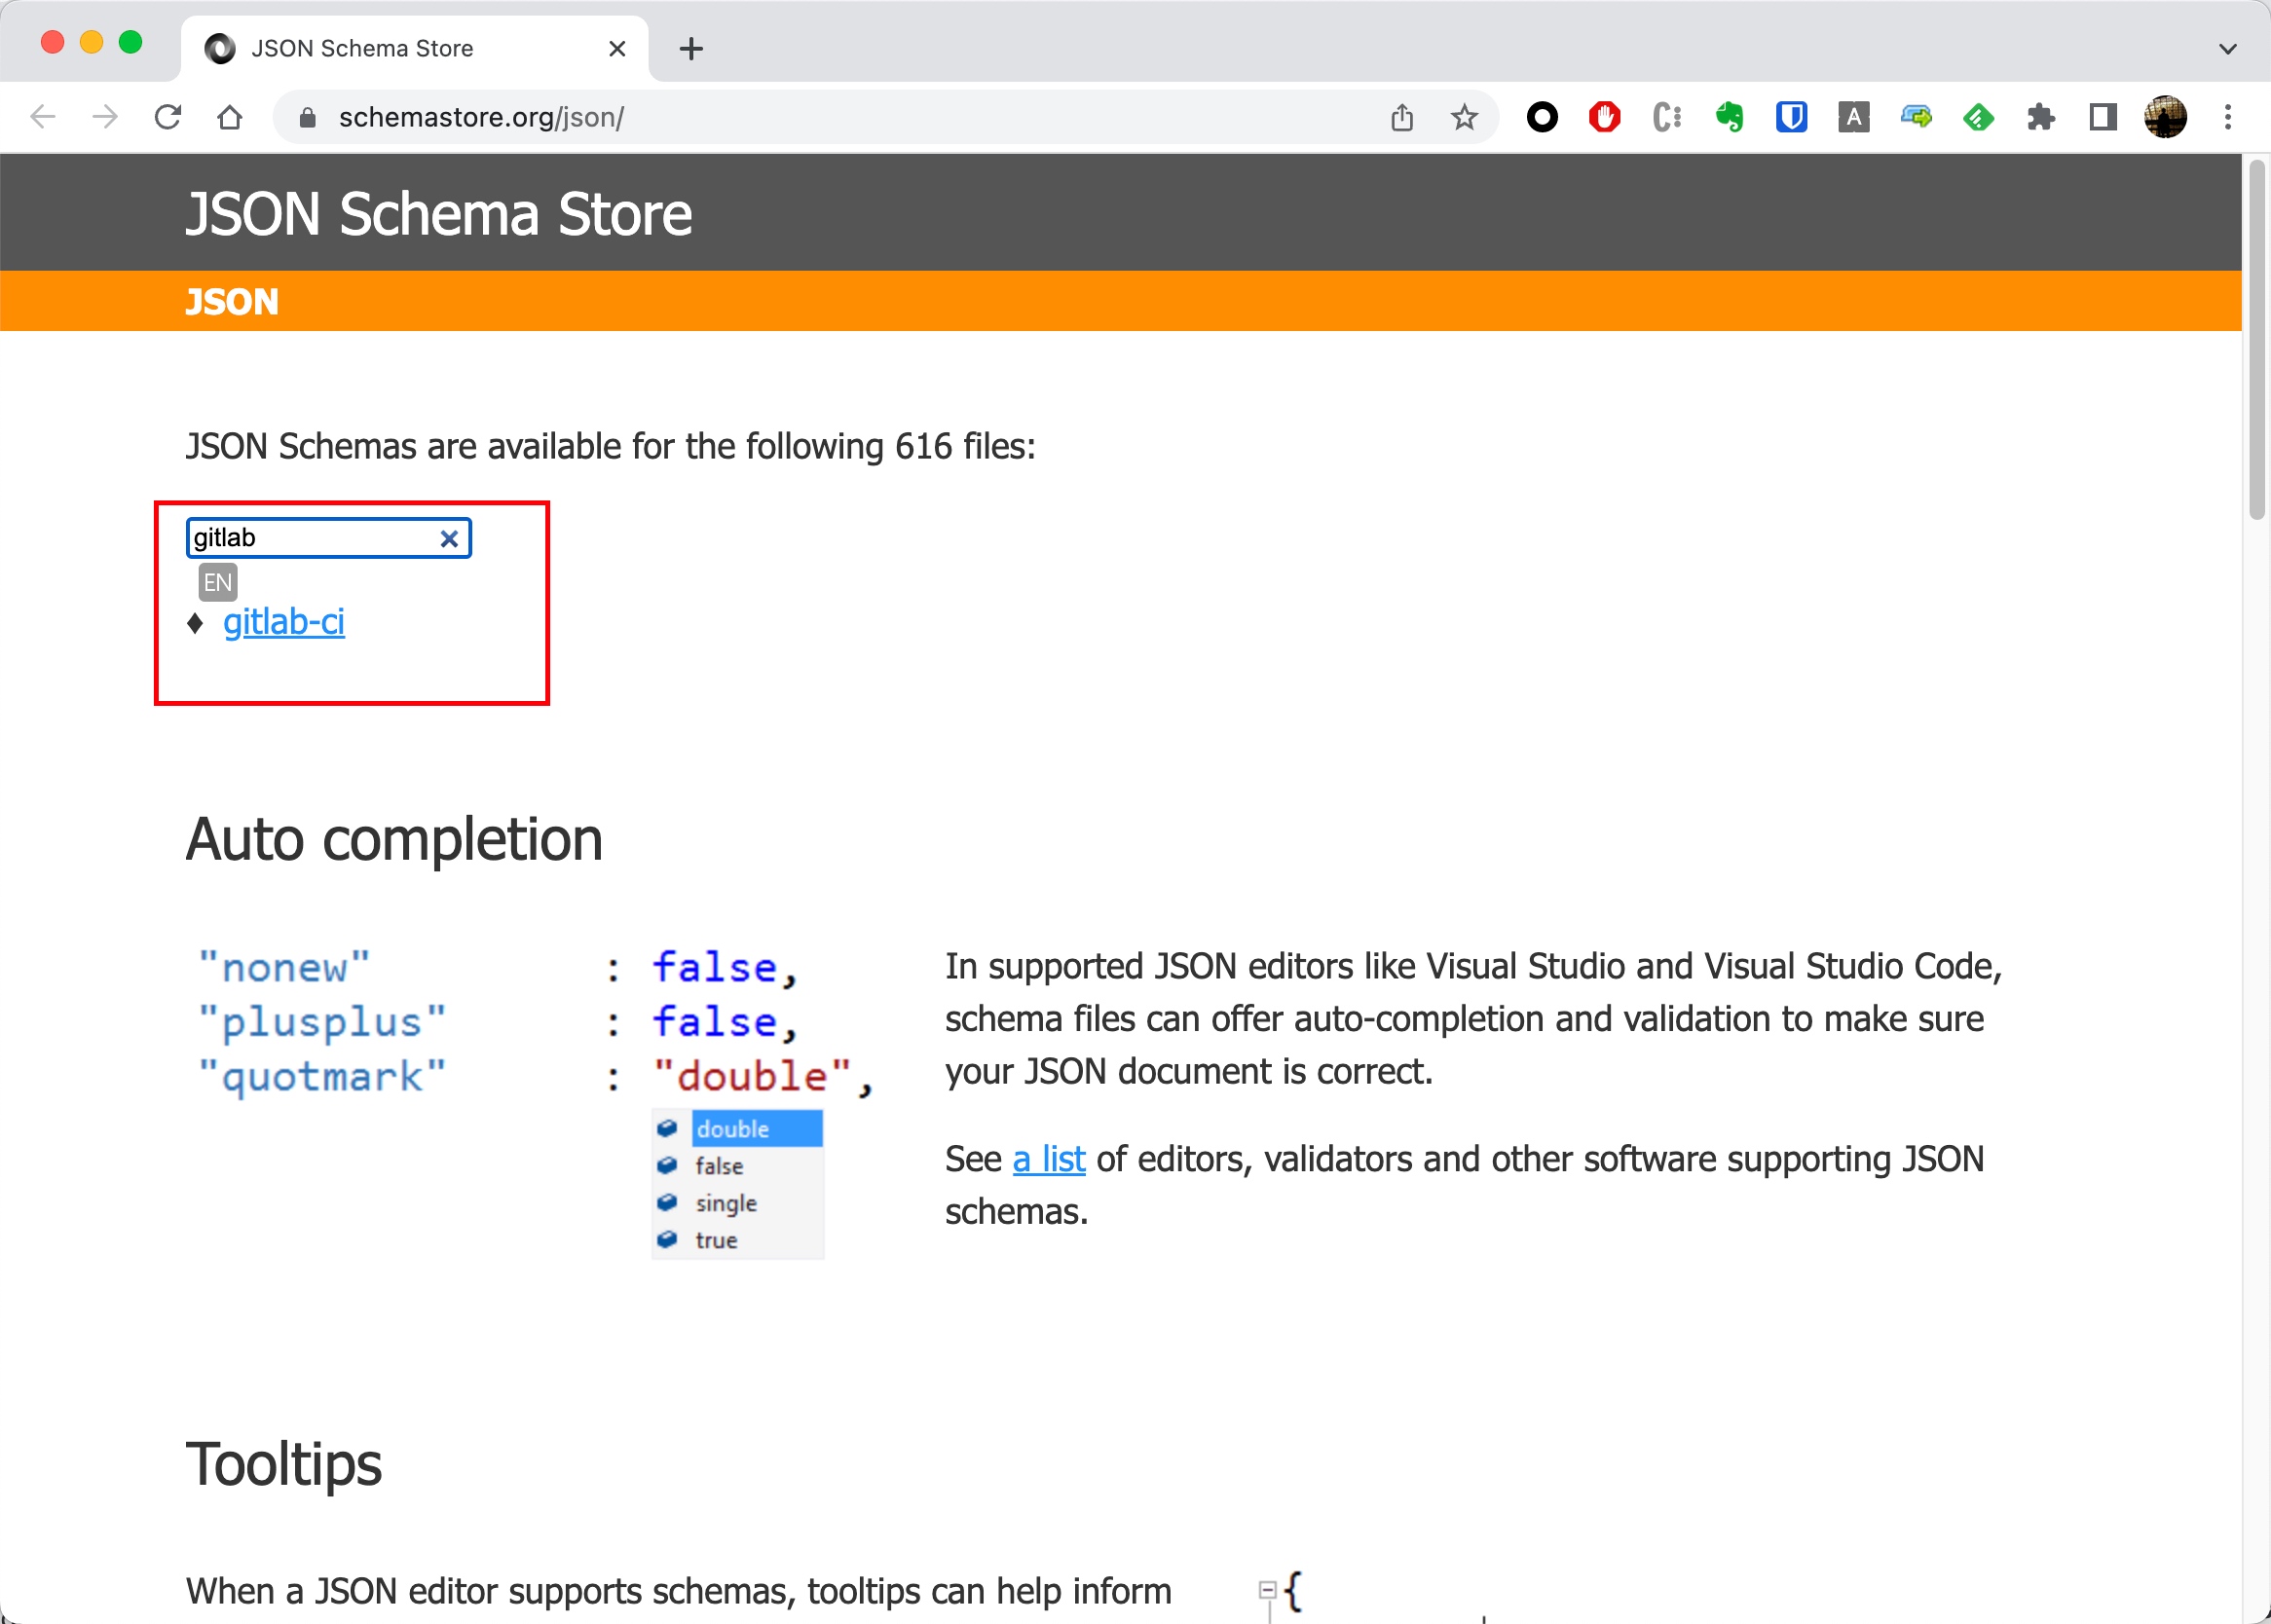
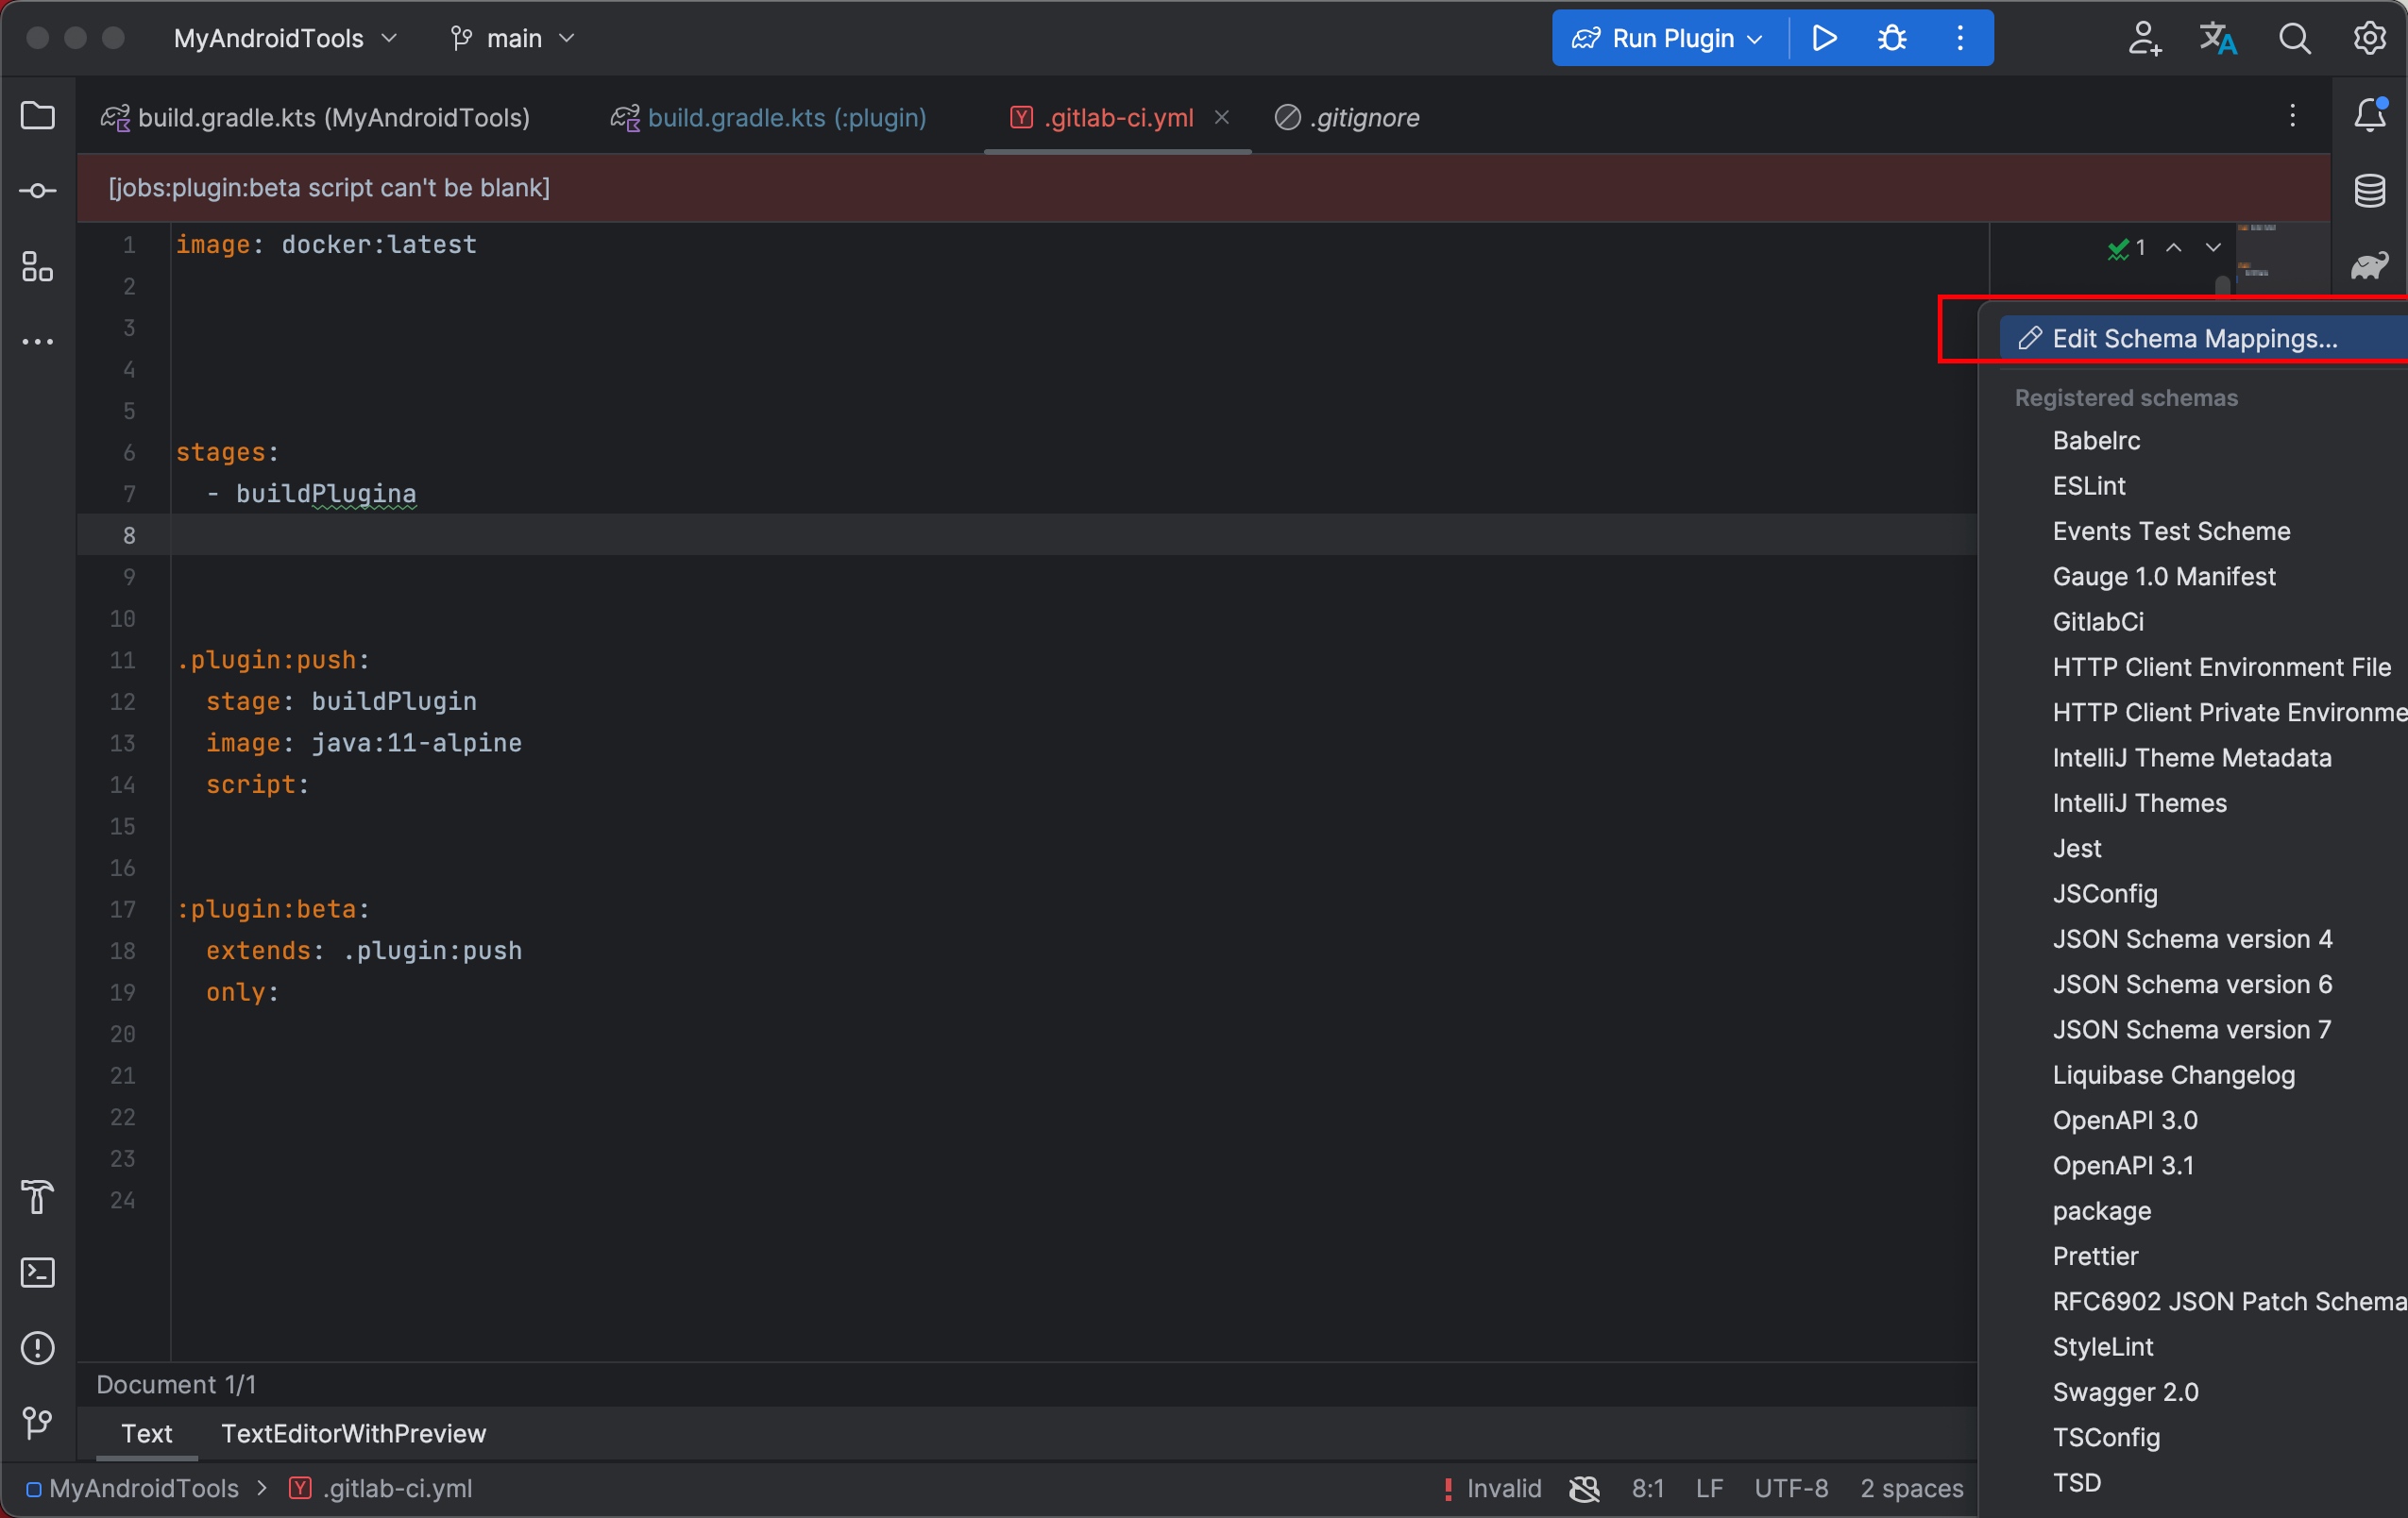
输入 gitlab 下面那个地方就是链接地址了
下图那样,粘贴得到的网址 'https://gitlab.com/gitlab-org/gitlab/-/raw/master/app/assets/javascripts/editor/schema/ci.json',file 文件要设定为 .gitlab-ci.yaml ,然后按确定即可
brew install socat
or
apt-get install socat
使用
sudo socat TCP4-LISTEN:43363,fork TCP4:192.168.199.145:43363
sudo socat TCP4-LISTEN:5555,fork TCP4:192.168.199.119:5555
cc 使用的是 dagger2.38.1 版本,这次需要修改这个版本,所以编译的是这个版本。
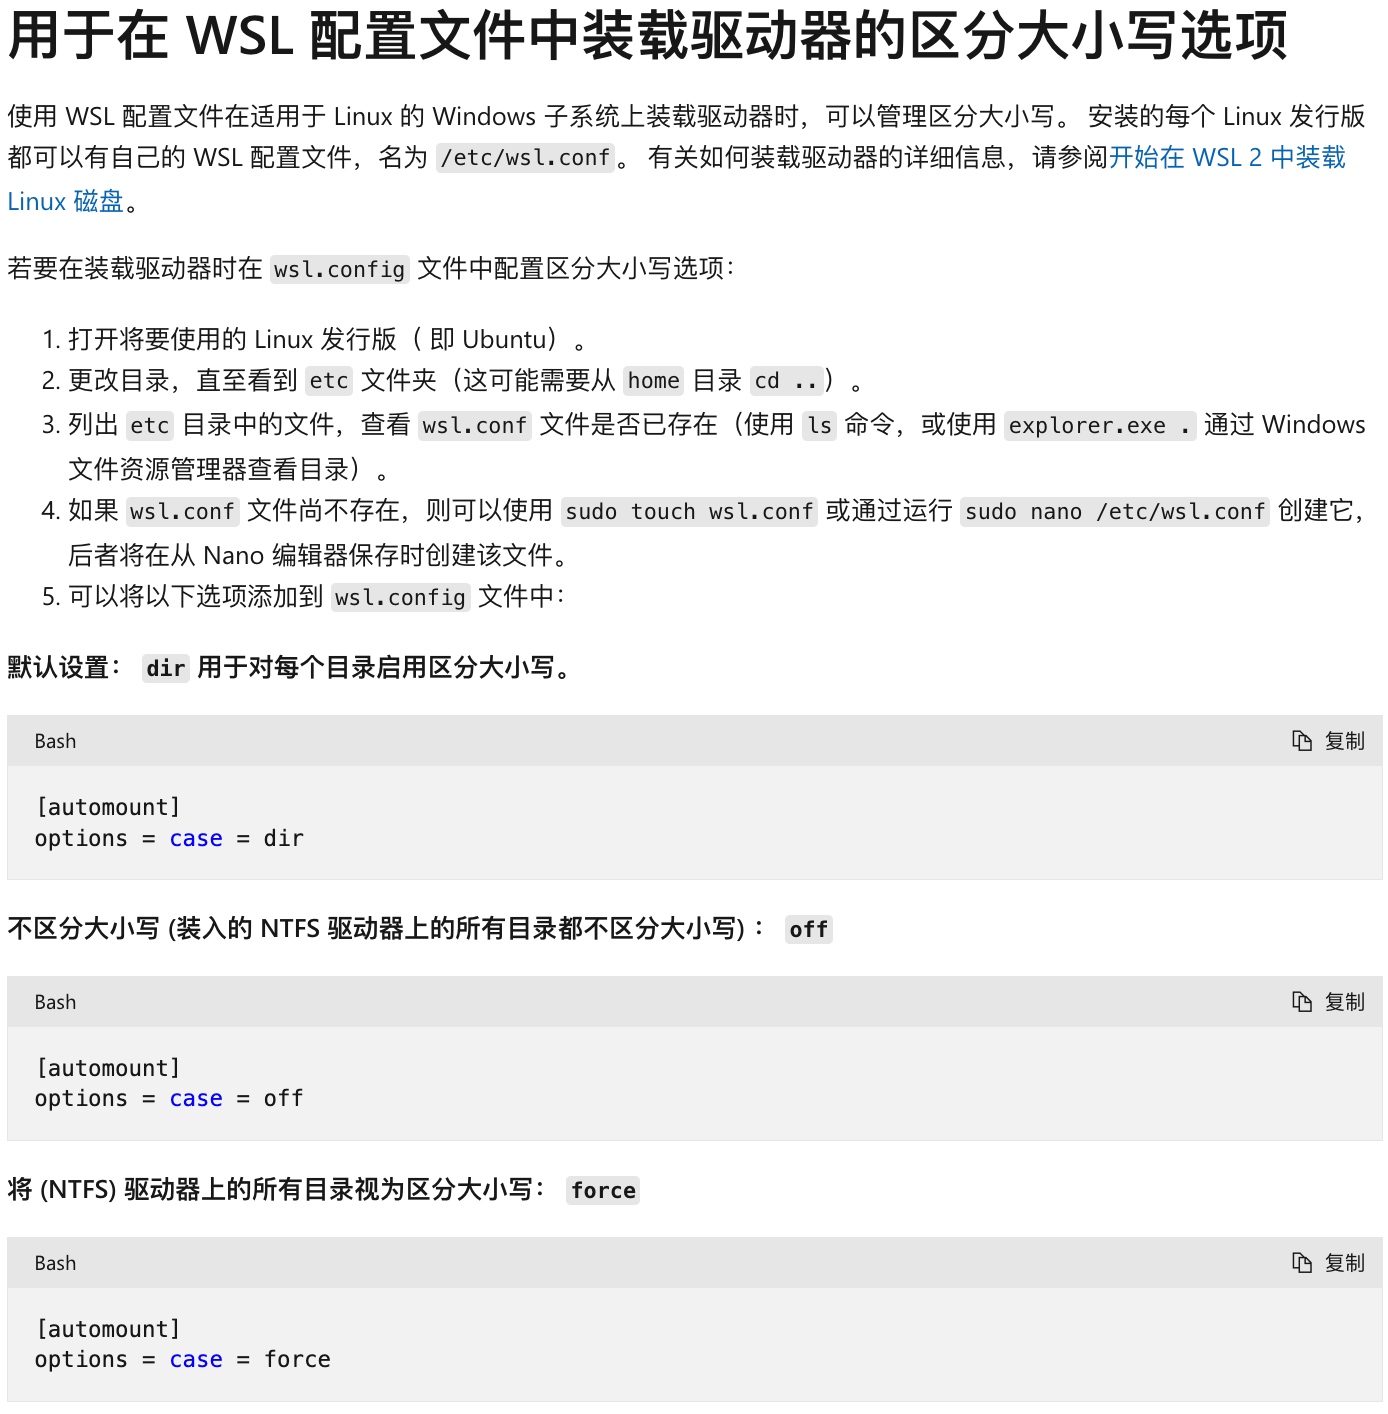
需要这个的原因是,dagger2 使用 bazel 构建,bazel 在每个构建分区上都存在一个 BUILD 文件,用来描述如何构建,其中一个分区是使用 gradle 构建的,gradle 会再当前目录构建一个 build 文件夹用来存放构建输出文件。如果磁盘不区分大小写,这两个东西就会冲突,导致 BUILD 这个文件消失了
可以参考这个设置大小写
直接使用
docker编译也可以,我做好了编译镜像
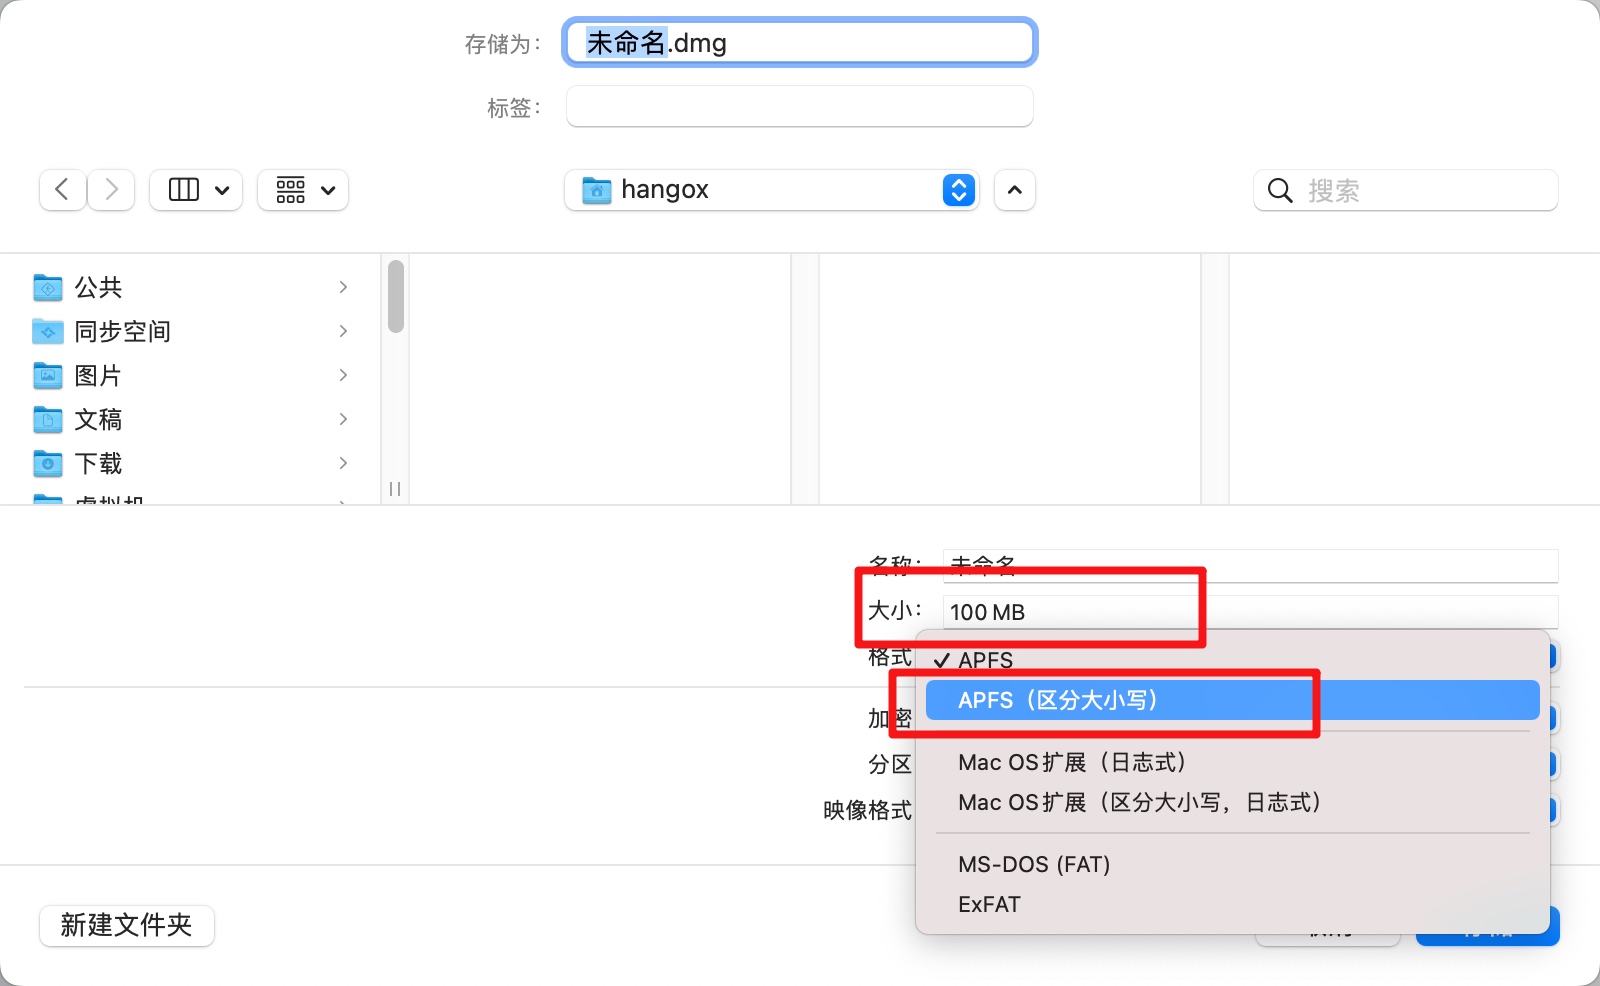
对于 mac 来说,默认也不是区分大小写的,可以使用磁盘分区工具创建一个 dmg 存放代码,用来编译 dagger,按一下截图操作即可
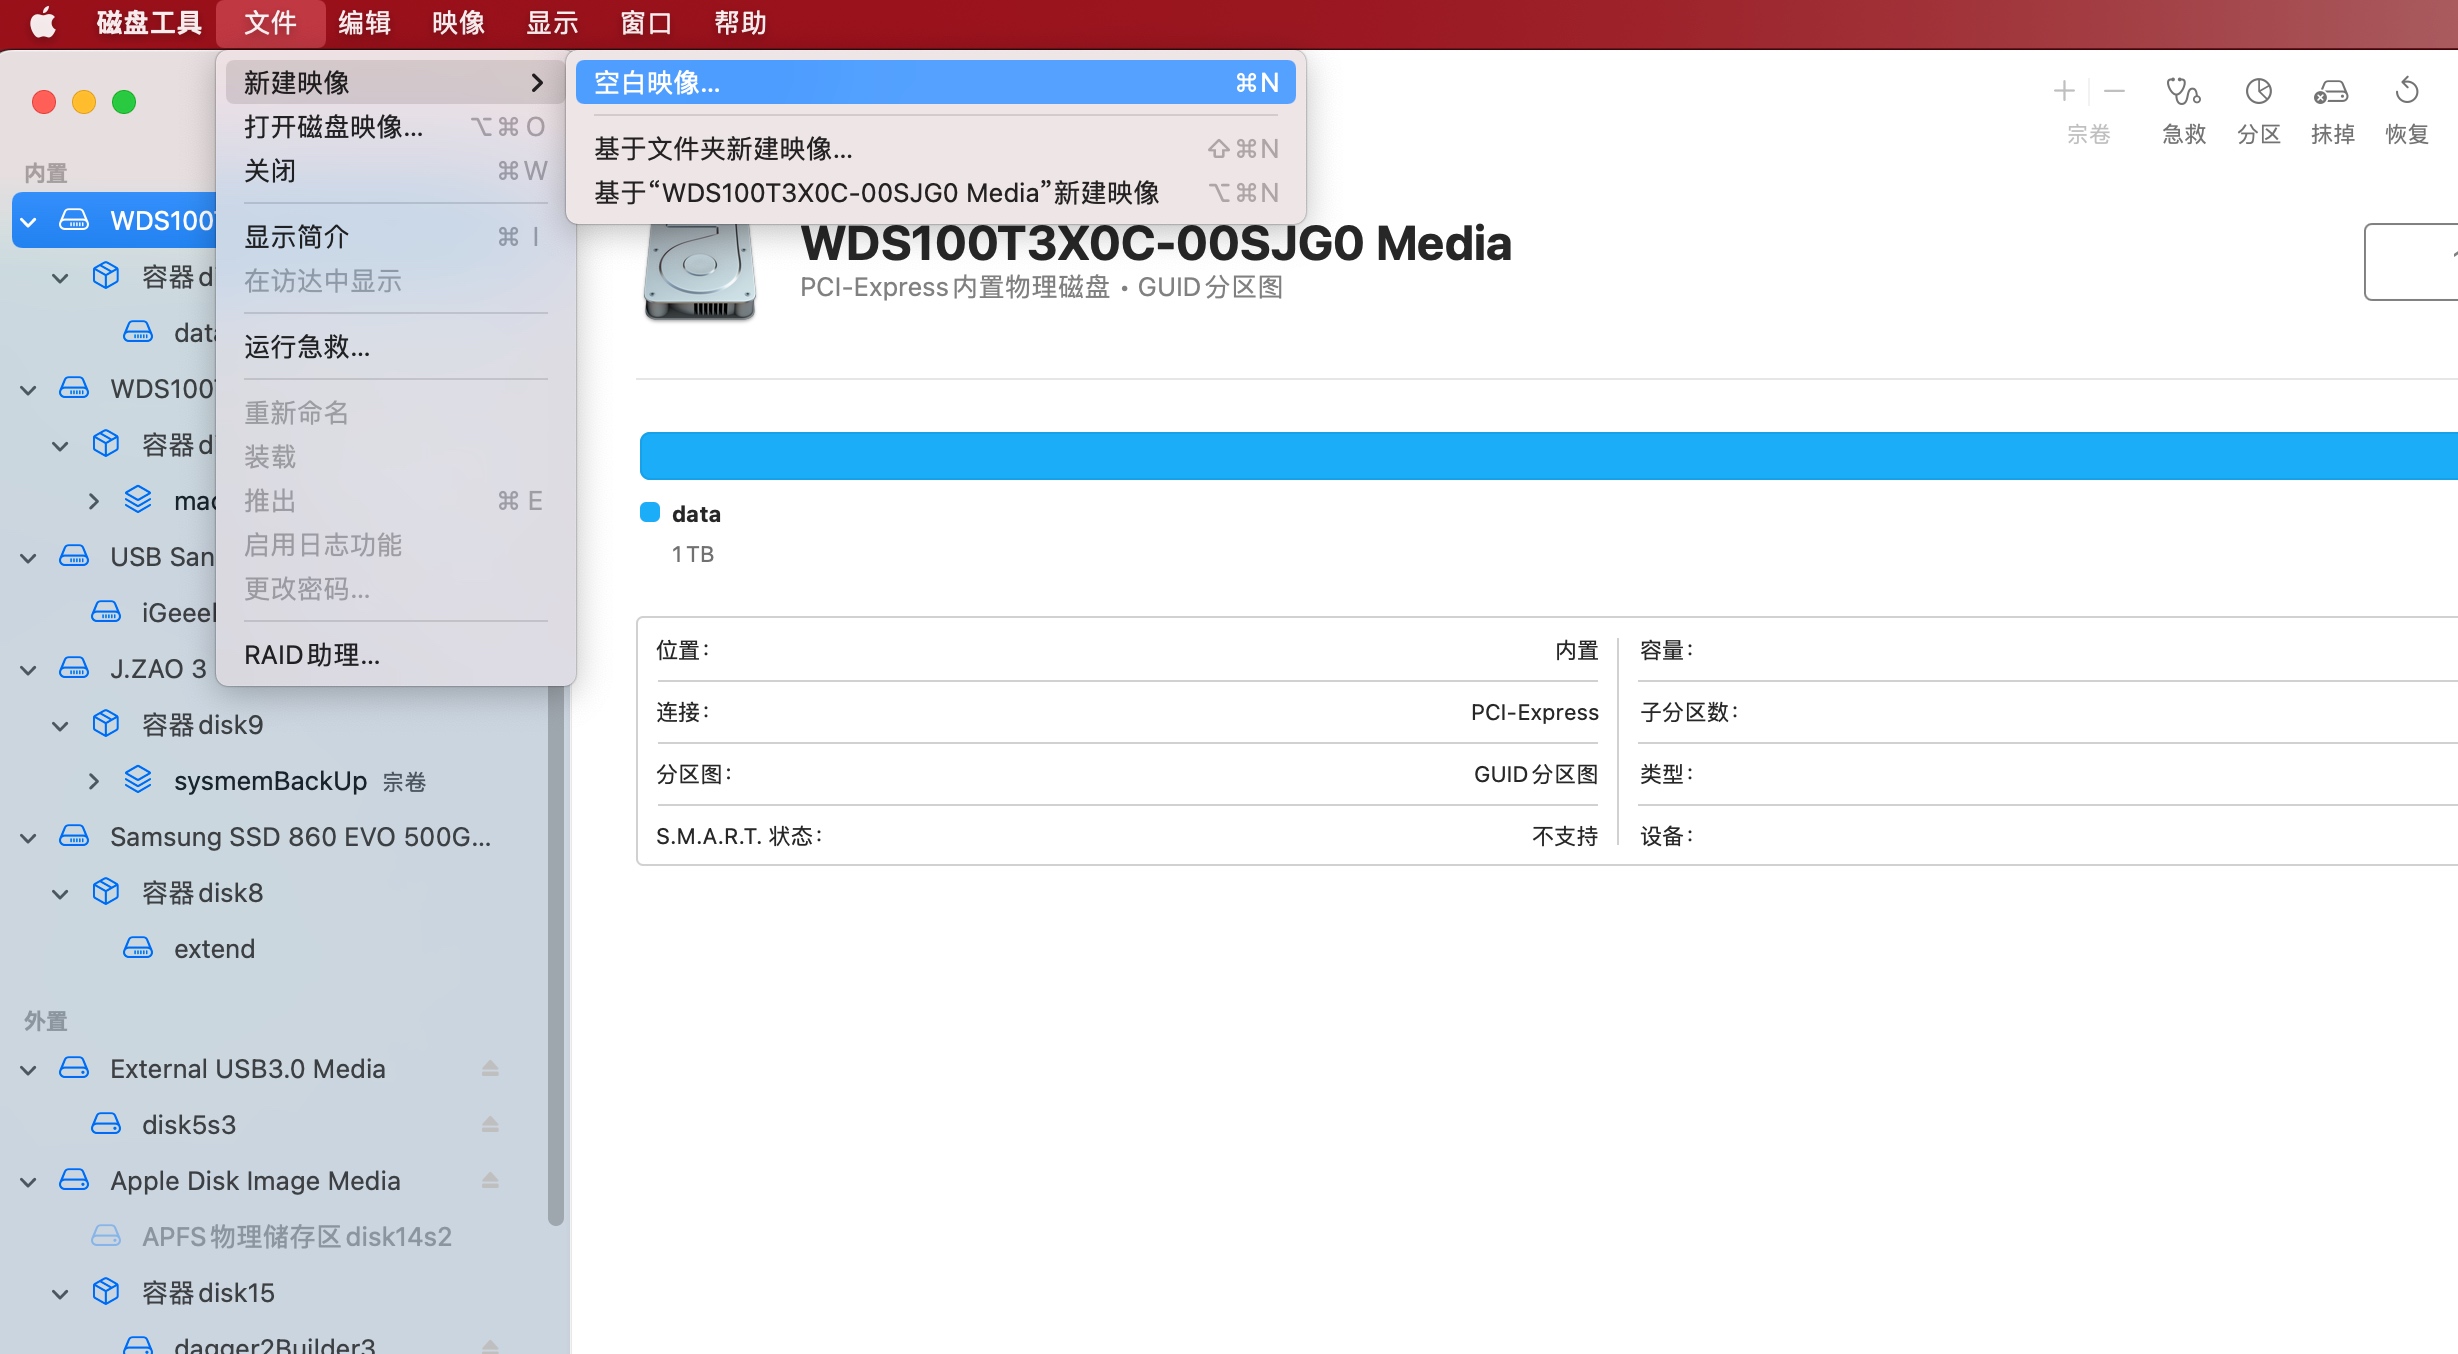
大小建议设置为 2G
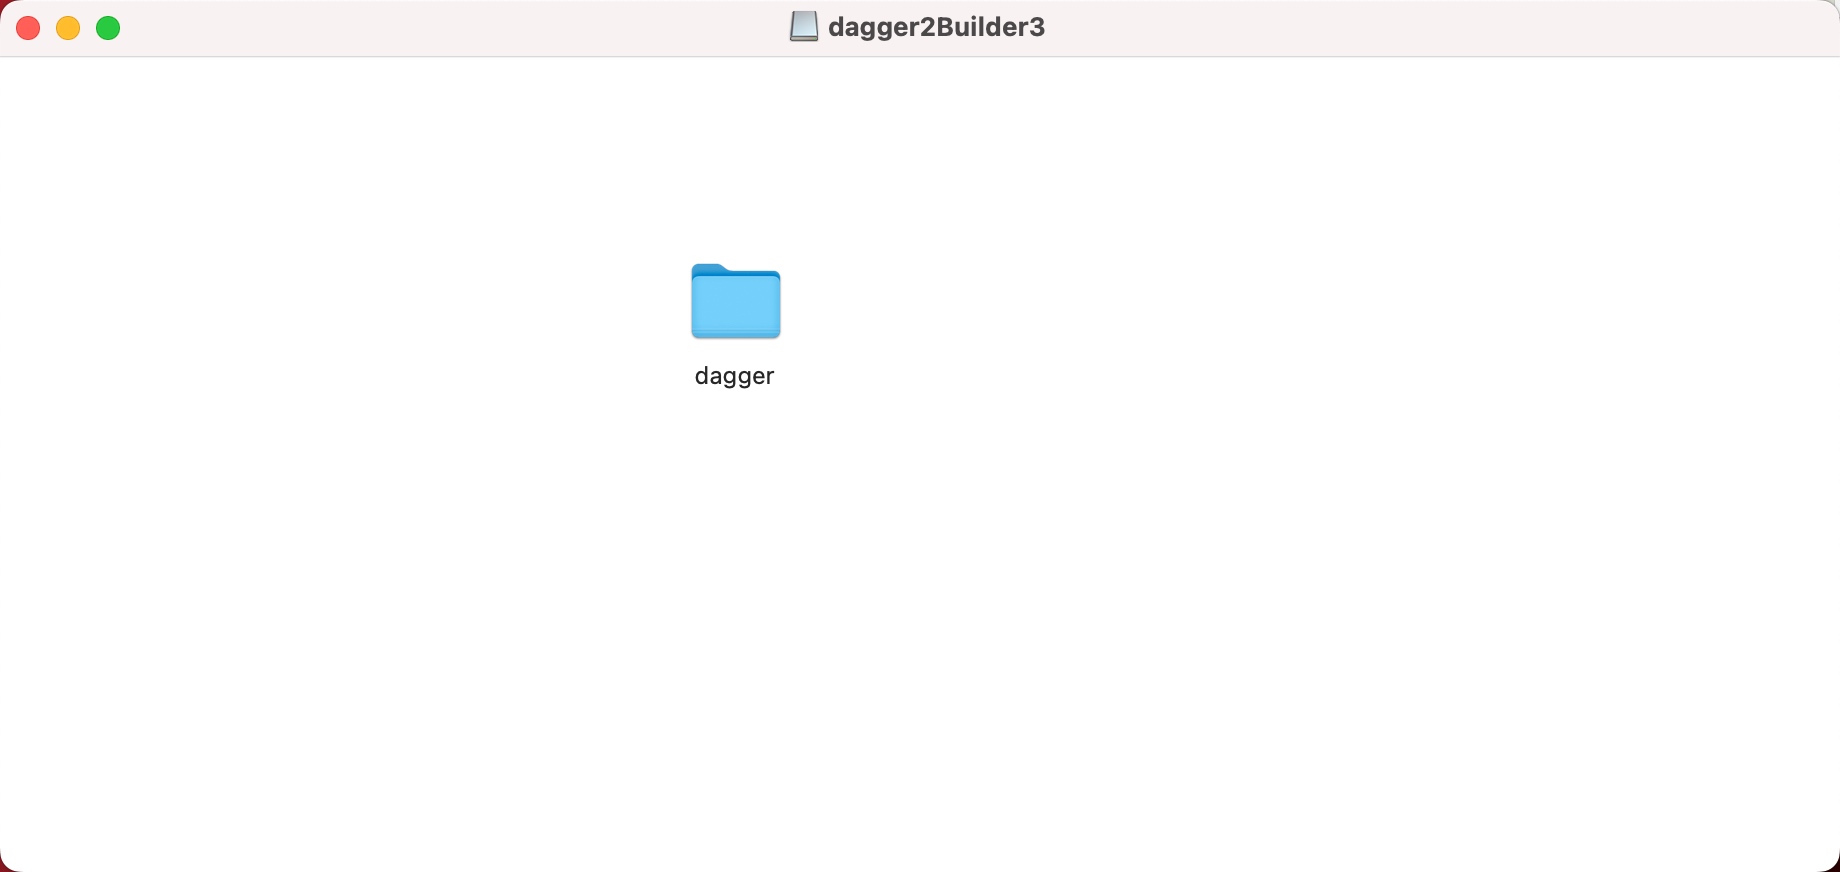
双击加载磁盘

放入项目
官方安装文档
建议安装的是 Bazelisk
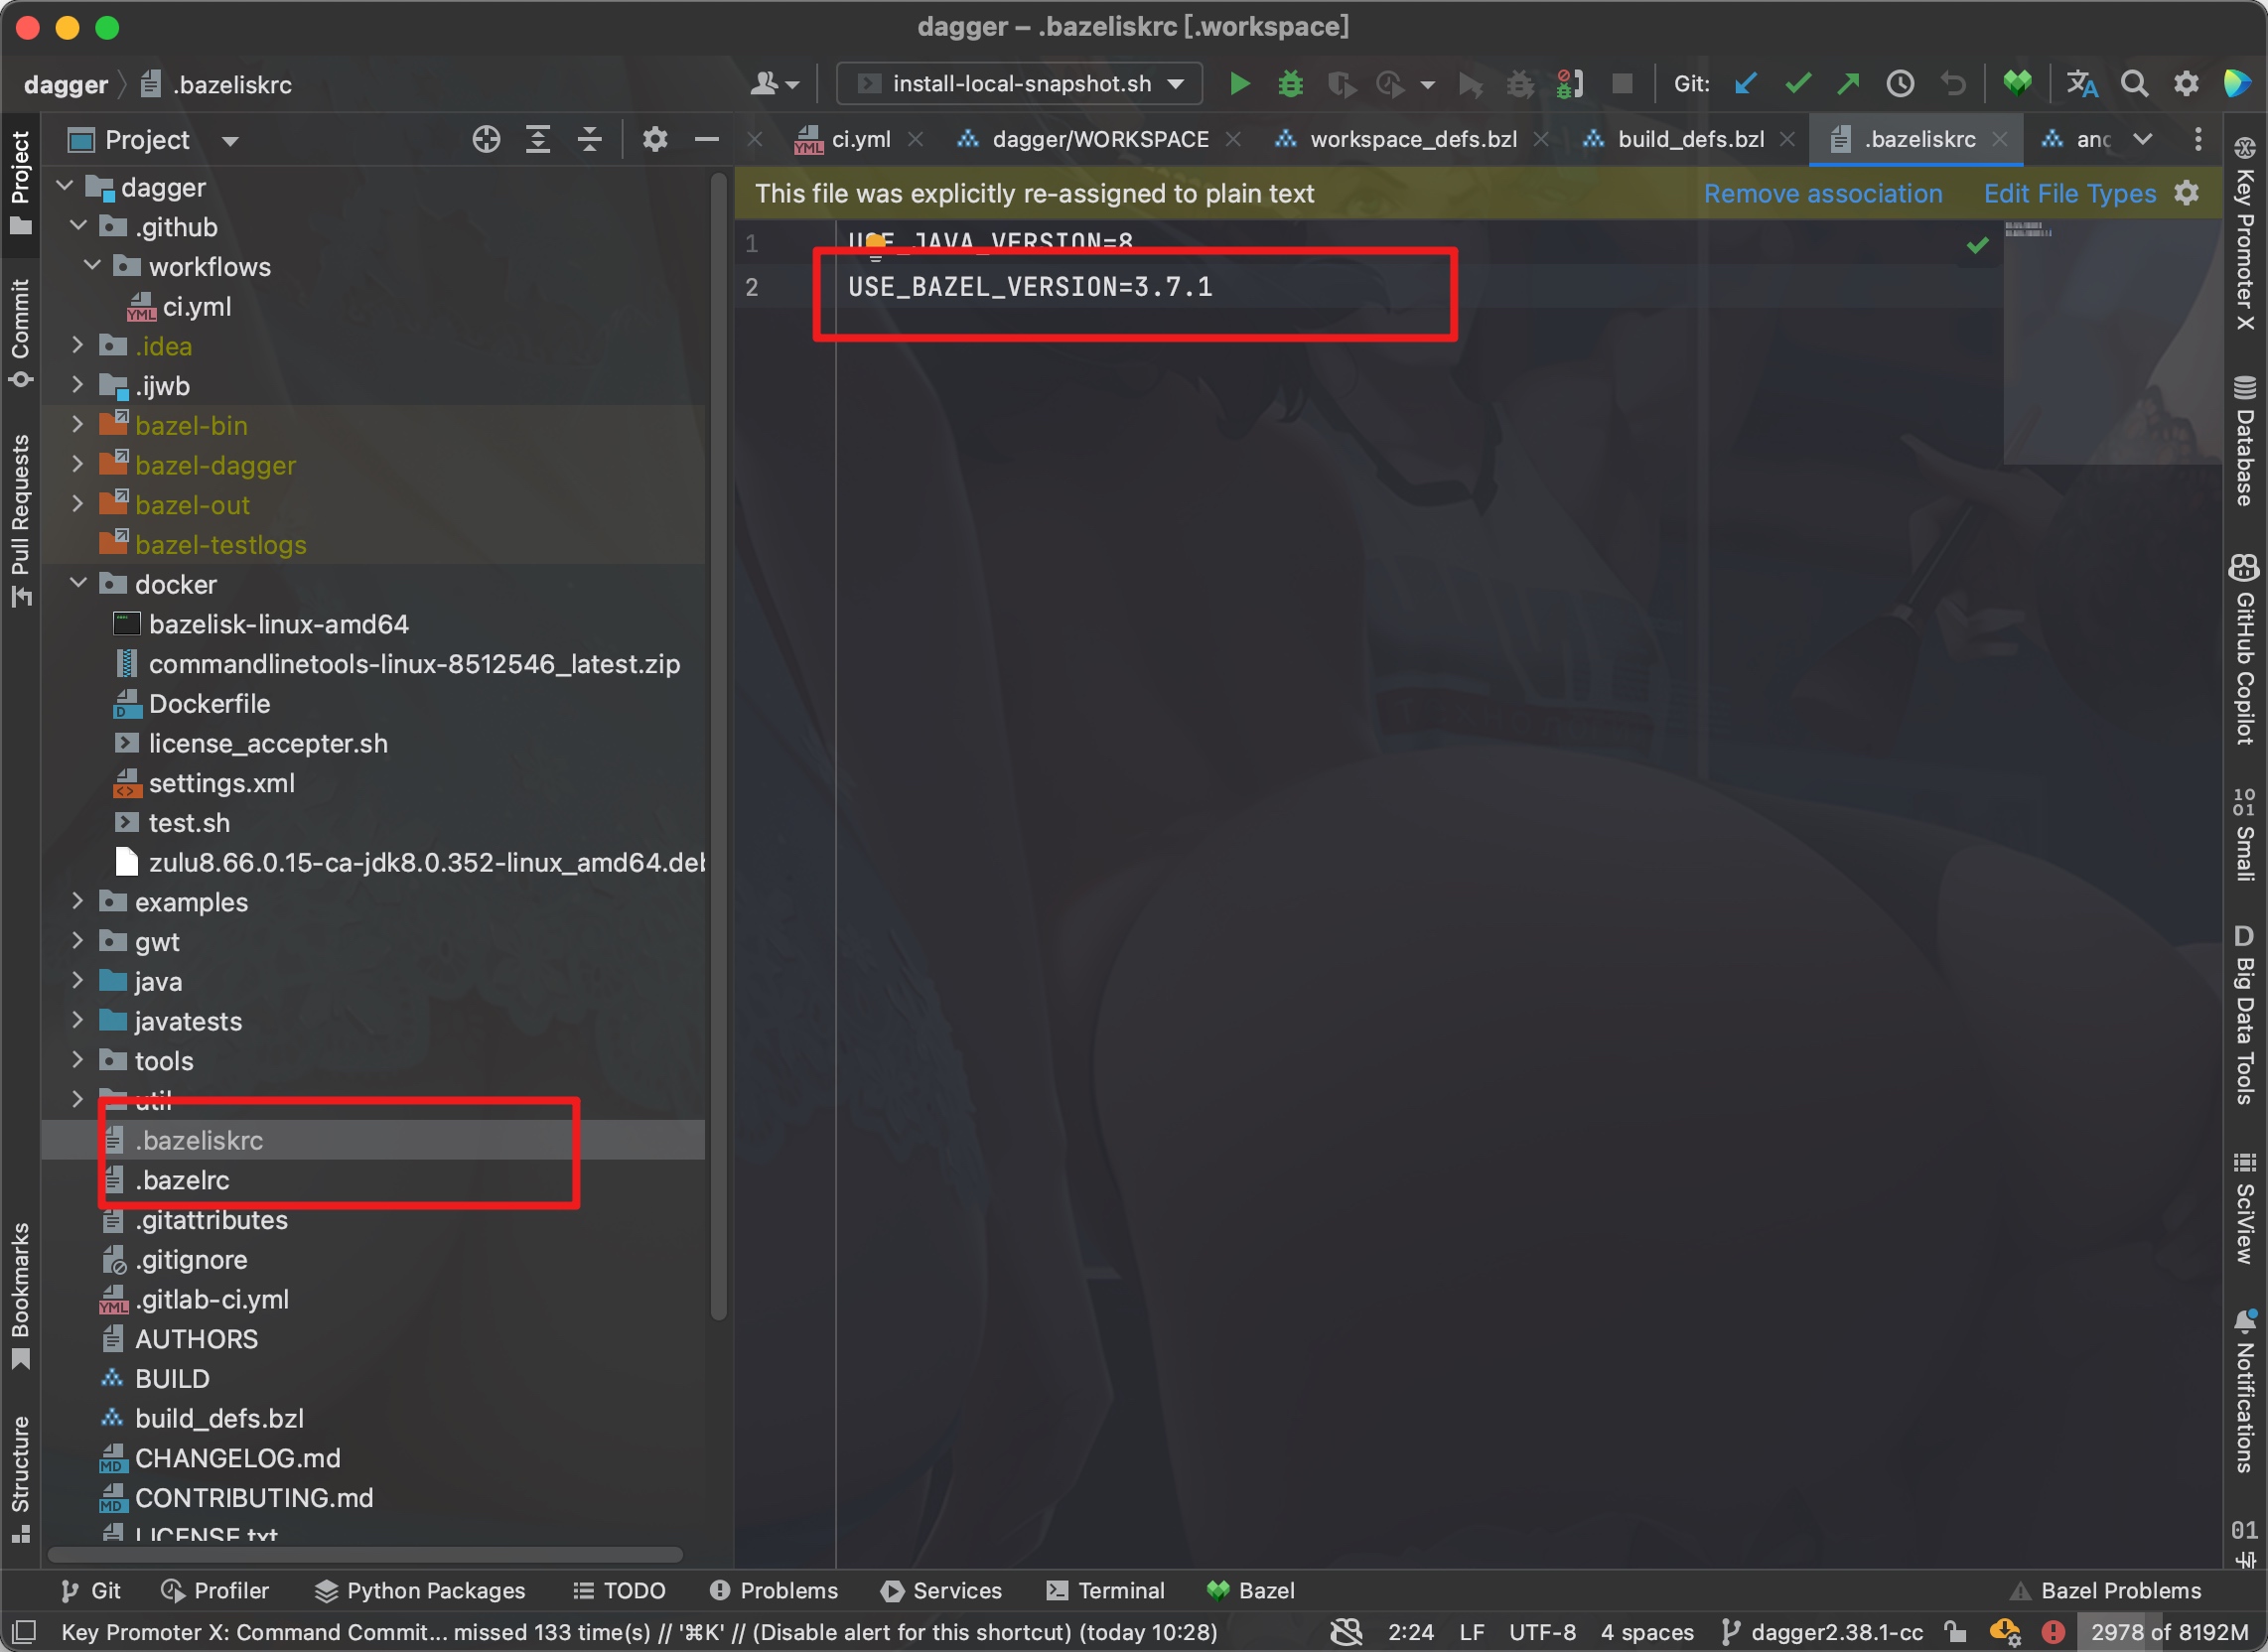
bazelisk 带了版本管理功能,能自动根据不同项目使用,不同的项目使用的版本是不同,dagger2.38.1 使用的是3.7.1
brew install bazelisk

plugin 市场安装 bazel 即可,安装后使用 bazel 模式重新打开项目就能同步
可以是 python3 ,但是需要 python 命令,可以直接 ln -s python3 python
brew install g++
bazel 需要调用 unzip 命令
我编译的版本是 2.38.1 使用 jdk8 编译,不要尝试 11,我试过了,不行
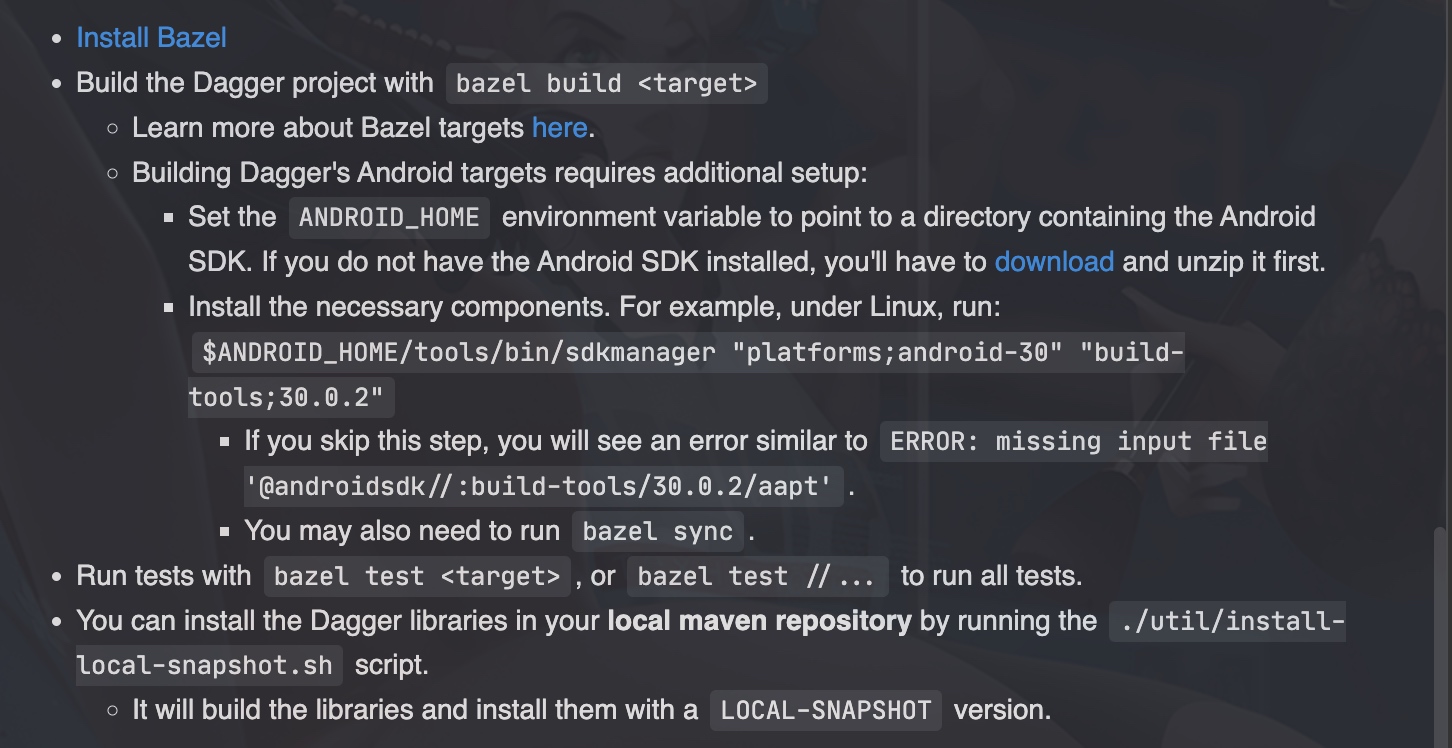
ANDROID_HOME 需要定义ANDROID_NDK_HOME 需要定义,指向 21.4.7075529 这个版本platforms;android-30 这个版本的 android sdk如果不确定,可以直接通过 sdkmanager 安装
sdkmanager "ndk;21.4.7075529" "platforms;android-30" "build-tools;30.0.2"

CI 实际上能跑的东西,基本上包含了所有的环境
这个文件包含了 Android 的环境
没有说明 ndk 环境,ndk是我编译不过之后加的
因为我使用的是 bazelisk 需要在项目中新建一个文件 .bazeliskrc 来告诉 bazelisk 我使用的是哪个版本
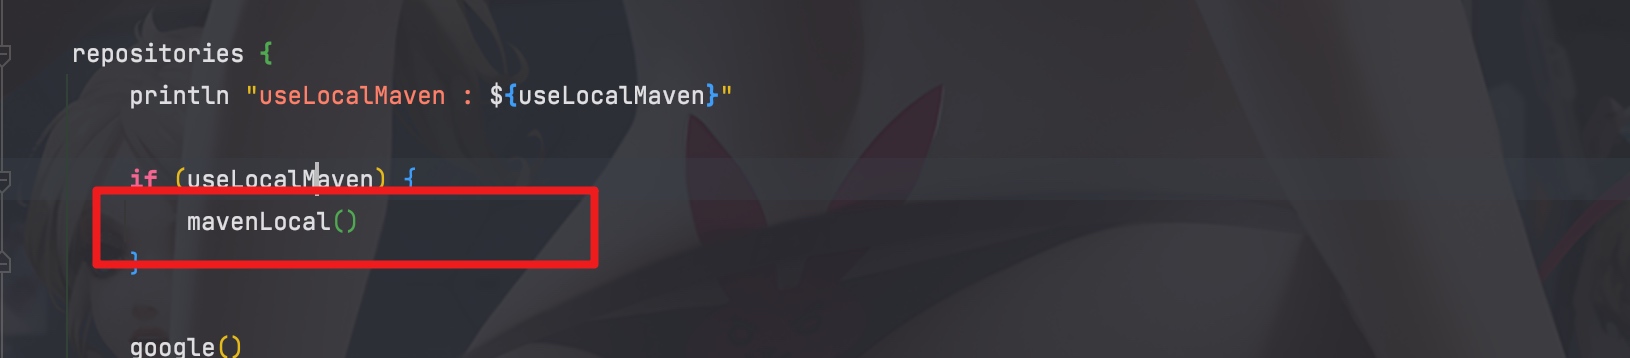
dagger 在 uitl 文件夹中提供了丰富的脚本
install-local-snapshot.sh 这个用来本地测试,运行之后会在 mavenLocal(~/.m2) 编译出来一个版本,项目中增加 mavenLocal() 也就是这样就能直接使用了
publish-snapshot-on-commit.sh 这个脚本是发布到 nexus 仓库上
如果进行修改的话,一般都是发布到自己内部的仓库上,所以我们可以基于,publish-snapshot-on-commit.sh 这个脚本更改
新建一个文件 publish-to-my.sh,内容如下
set -eux

bash $(dirname $0)/deploy-all.sh \
  "deploy:deploy-file" \
  $1 \
  "-DrepositoryId=cc-nexus-release" \
  "-Durl=http://nexus.cc.163.com/repository/releases/" \
  "--settings=$(dirname $0)/settings.xml"

echo -e "Published maven snapshot"
新建 settings.xml
<settings>
    <servers>
        <server>
            <id>cc-nexus-snapshots</id>
            <username>${nexusUsername}</username>
            <password>${nexusPassword}</password>
        </server>
        <server>
            <id>cc-nexus-release</id>
            <username>${nexusUsername}</username>
            <password>${nexusPassword}</password>
        </server>
        <server>
            <id>sonatype-nexus-snapshots</id>
            <username>${env.CI_DEPLOY_USERNAME}</username>
            <password>${env.CI_DEPLOY_PASSWORD}</password>
        </server>
    </servers>
    <mirrors>
        <mirror>
            <id>cc-nexus</id>
            <mirrorOf>central</mirrorOf>
            <name>cc-nexus</name>
            <url>https://nexus.cc-mobile.cn/repository/maven-public/</url>
        </mirror>
        <mirror>
            <id>cc-nexus</id>
            <mirrorOf>google</mirrorOf>
            <name>cc-nexus</name>
            <url>https://nexus.cc-mobile.cn/repository/maven-public/</url>
        </mirror>
    </mirrors>
</settings>
想要键盘只能显示数字

主要使用 inputType 的 numberPassword 实现
<EditText
    android:id="@+id/input"
    android:textColor="#18181A"
    android:maxLines="1"
    android:textSize="14sp"
    android:focusable="true"
    android:layout_marginStart="12dp"
    android:layout_marginEnd="12dp"
    android:layout_marginBottom="14sp"
    android:layout_marginTop="14sp"
    android:inputType="numberPassword"
    android:hint="1-20,000"
    android:layout_marginRight="16dp"
    android:background="@color/transparent"
    android:layout_toStartOf="@+id/unit"
    android:layout_width="match_parent"
    android:layout_height="match_parent"
android:importantForAutofill="no" />binding.input.transformationMethod = object : TransformationMethod {
override fun getTransformation(source: CharSequence?, view: View?): CharSequence? {
// 直接显示密码
return source!!
}
override fun onFocusChanged(view: View?, sourceText: CharSequence?, focused: Boolean, direction: Int, previouslyFocusedRect: Rect?) {
}
}创建 dmg 文件项目地址
A shell script to build fancy DMGs.
Create-dmg is mostly maintained by @aonez and the contributors who send pull requests.
The project home page is https://github.com/create-dmg/create-dmg.
We will merge any pull request that adds something useful and does not break existing things.
If you're an active user and want to be a maintainer, or just want to chat, please ping us on Gitter at gitter.im/create-dmg/Lobby, or email Andrew directly.
Create-dmg was originally created by Andrey Tarantsov.
In May 2020 Andrew Janke helped vastly with the project.
You can install this script using Homebrew:
brew install create-dmg
You can download the latest release and install it from there:
make install
You can also clone the entire repository and run it locally from there:
git clone https://github.com/create-dmg/create-dmg.git
create-dmg [options ...] <output_name.dmg> <source_folder>
All contents of source_folder will be copied into the disk image.
Options:
#!/bin/sh
test -f Application-Installer.dmg && rm Application-Installer.dmg
create-dmg \
  --volname "Application Installer" \
  --volicon "application_icon.icns" \
  --background "installer_background.png" \
  --window-pos 200 120 \
  --window-size 800 400 \
  --icon-size 100 \
  --icon "Application.app" 200 190 \
  --hide-extension "Application.app" \
  --app-drop-link 600 185 \
  "Application-Installer.dmg" \
  "source_folder/"
See the examples folder in the source tree for more examples.
Nothing except a standard installation of macOS/OS X is required.
We think this works in OS X 10.6 Snow Leopard and later.
We'd like to keep it working in as many versions as possible, but unfortunately, we just don't have test boxes running old versions of OS X adequate to make this happen. Development and testing mostly happens in the last 3-5 years' worth of macOS releases; as of 2020, this means macOS 10.12 and later.
But if you find a bug in an older version, go ahead and report it! We'll try to work with you to get it fixed.
If you're running OS X 10.5 or later, you're SOL. That's just too hard to deal with in 2020. 😉
最近在开发一个名为 timeGO 的 macOS 应用程序,一款倒计时应用。看到网上别人家 app 的 dmg 安装包,美得很,本文就以这个 app 为例说一下如何将自己的应用发布并打包成带图标和安装提示背景的 dmg 安装包。
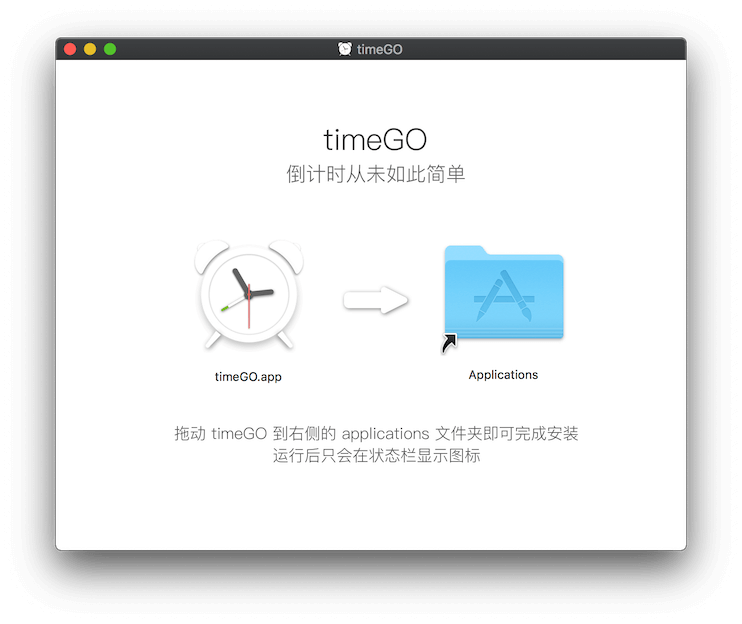
十里使用 xcode 开发 timeGO 这款应用,因为要精美所以本身应用也得精美对吧!所以十里为应用开发专门设计了精美的 appIcon (图标),这样导出的 app 会有精美的图标。发布 app 的方式有很多种,这里说一个比较常用的发布到本地的方式。
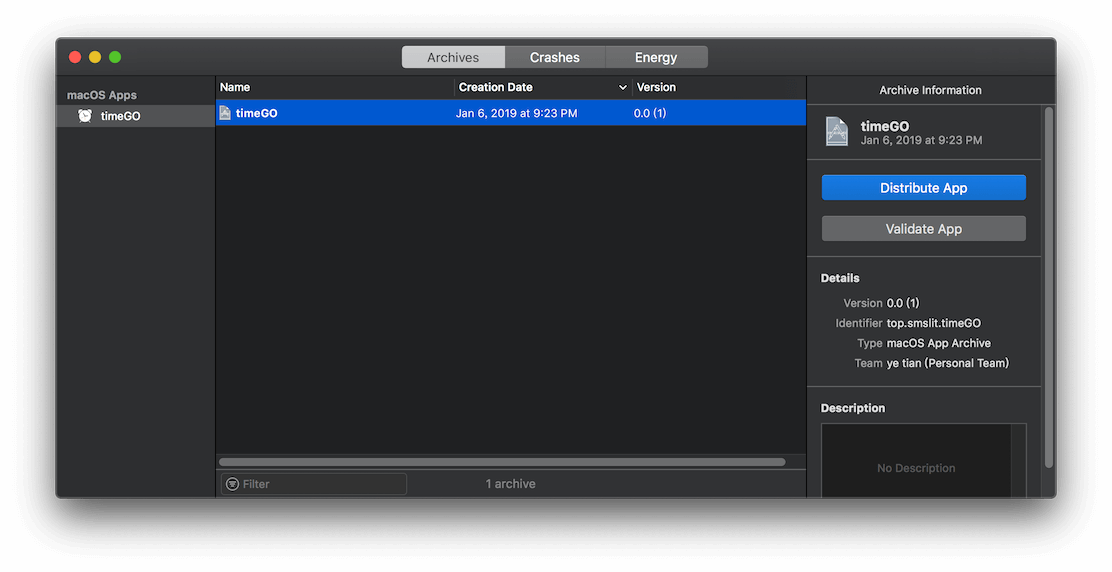
xcode 打开应用工程
菜单栏选择 product -> Archive,此时 xcode 就会打包应用,完成后会跳到类似如下的包管理窗口:
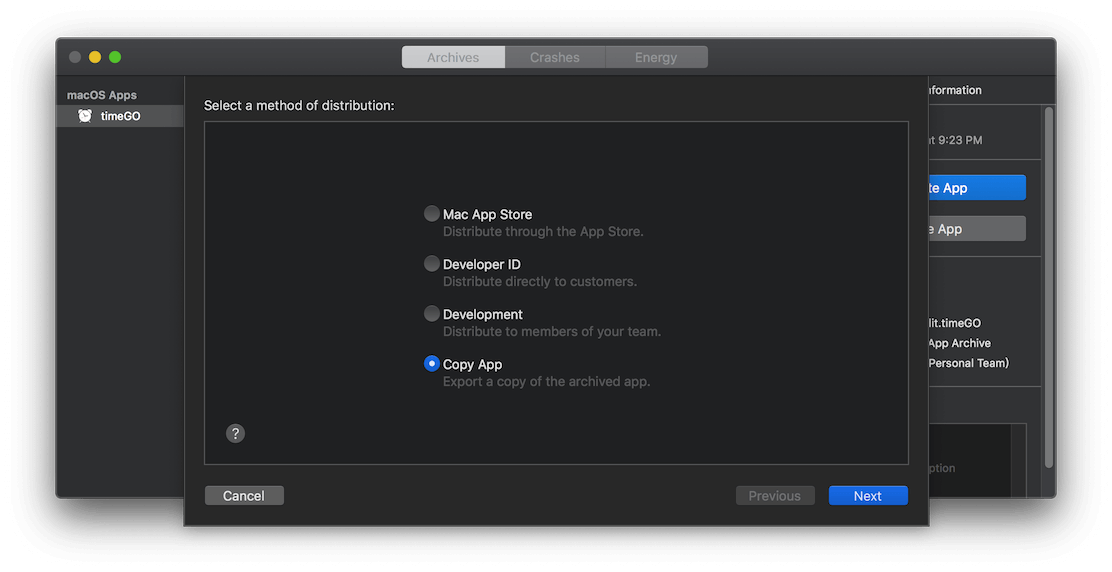
点击 Distribute App 按钮,选择 Copy App:
点击 Next,选择导出名称和目录,这里名称使用默认,目录选择 Desktop:
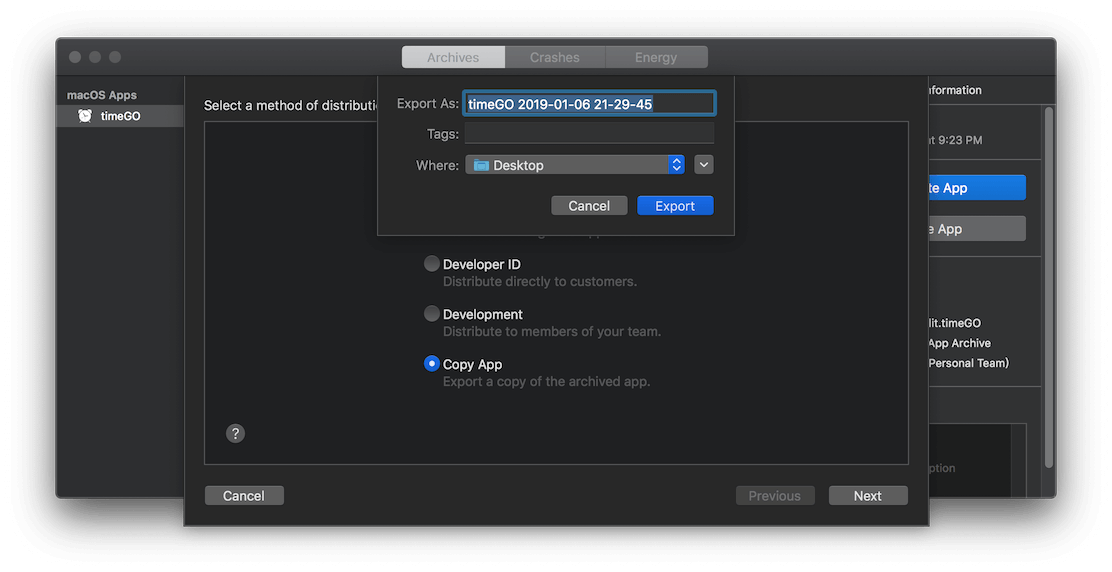
点击 Export 之后,就会在 Desktop 中看到一个步骤4中的名称相同的目录,里面就是导出的 app:
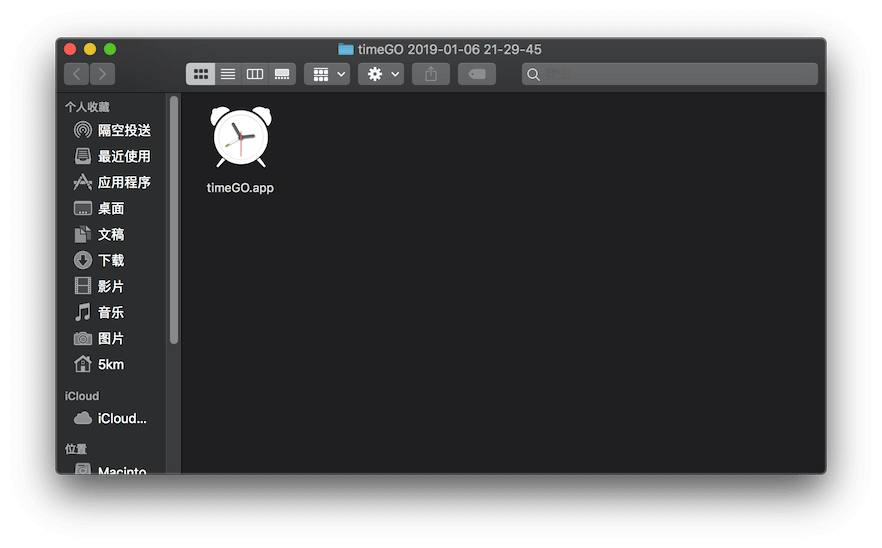
以上就完成了 app 的发布。
设置腾讯云在 minio client 中
mc alias --debug set tc https://cos.ap-guangzhou.myqcloud.com $accessKey $secretKey
mc 默认会校验 path ,腾讯云不支持这个功能,导致出现这个问题
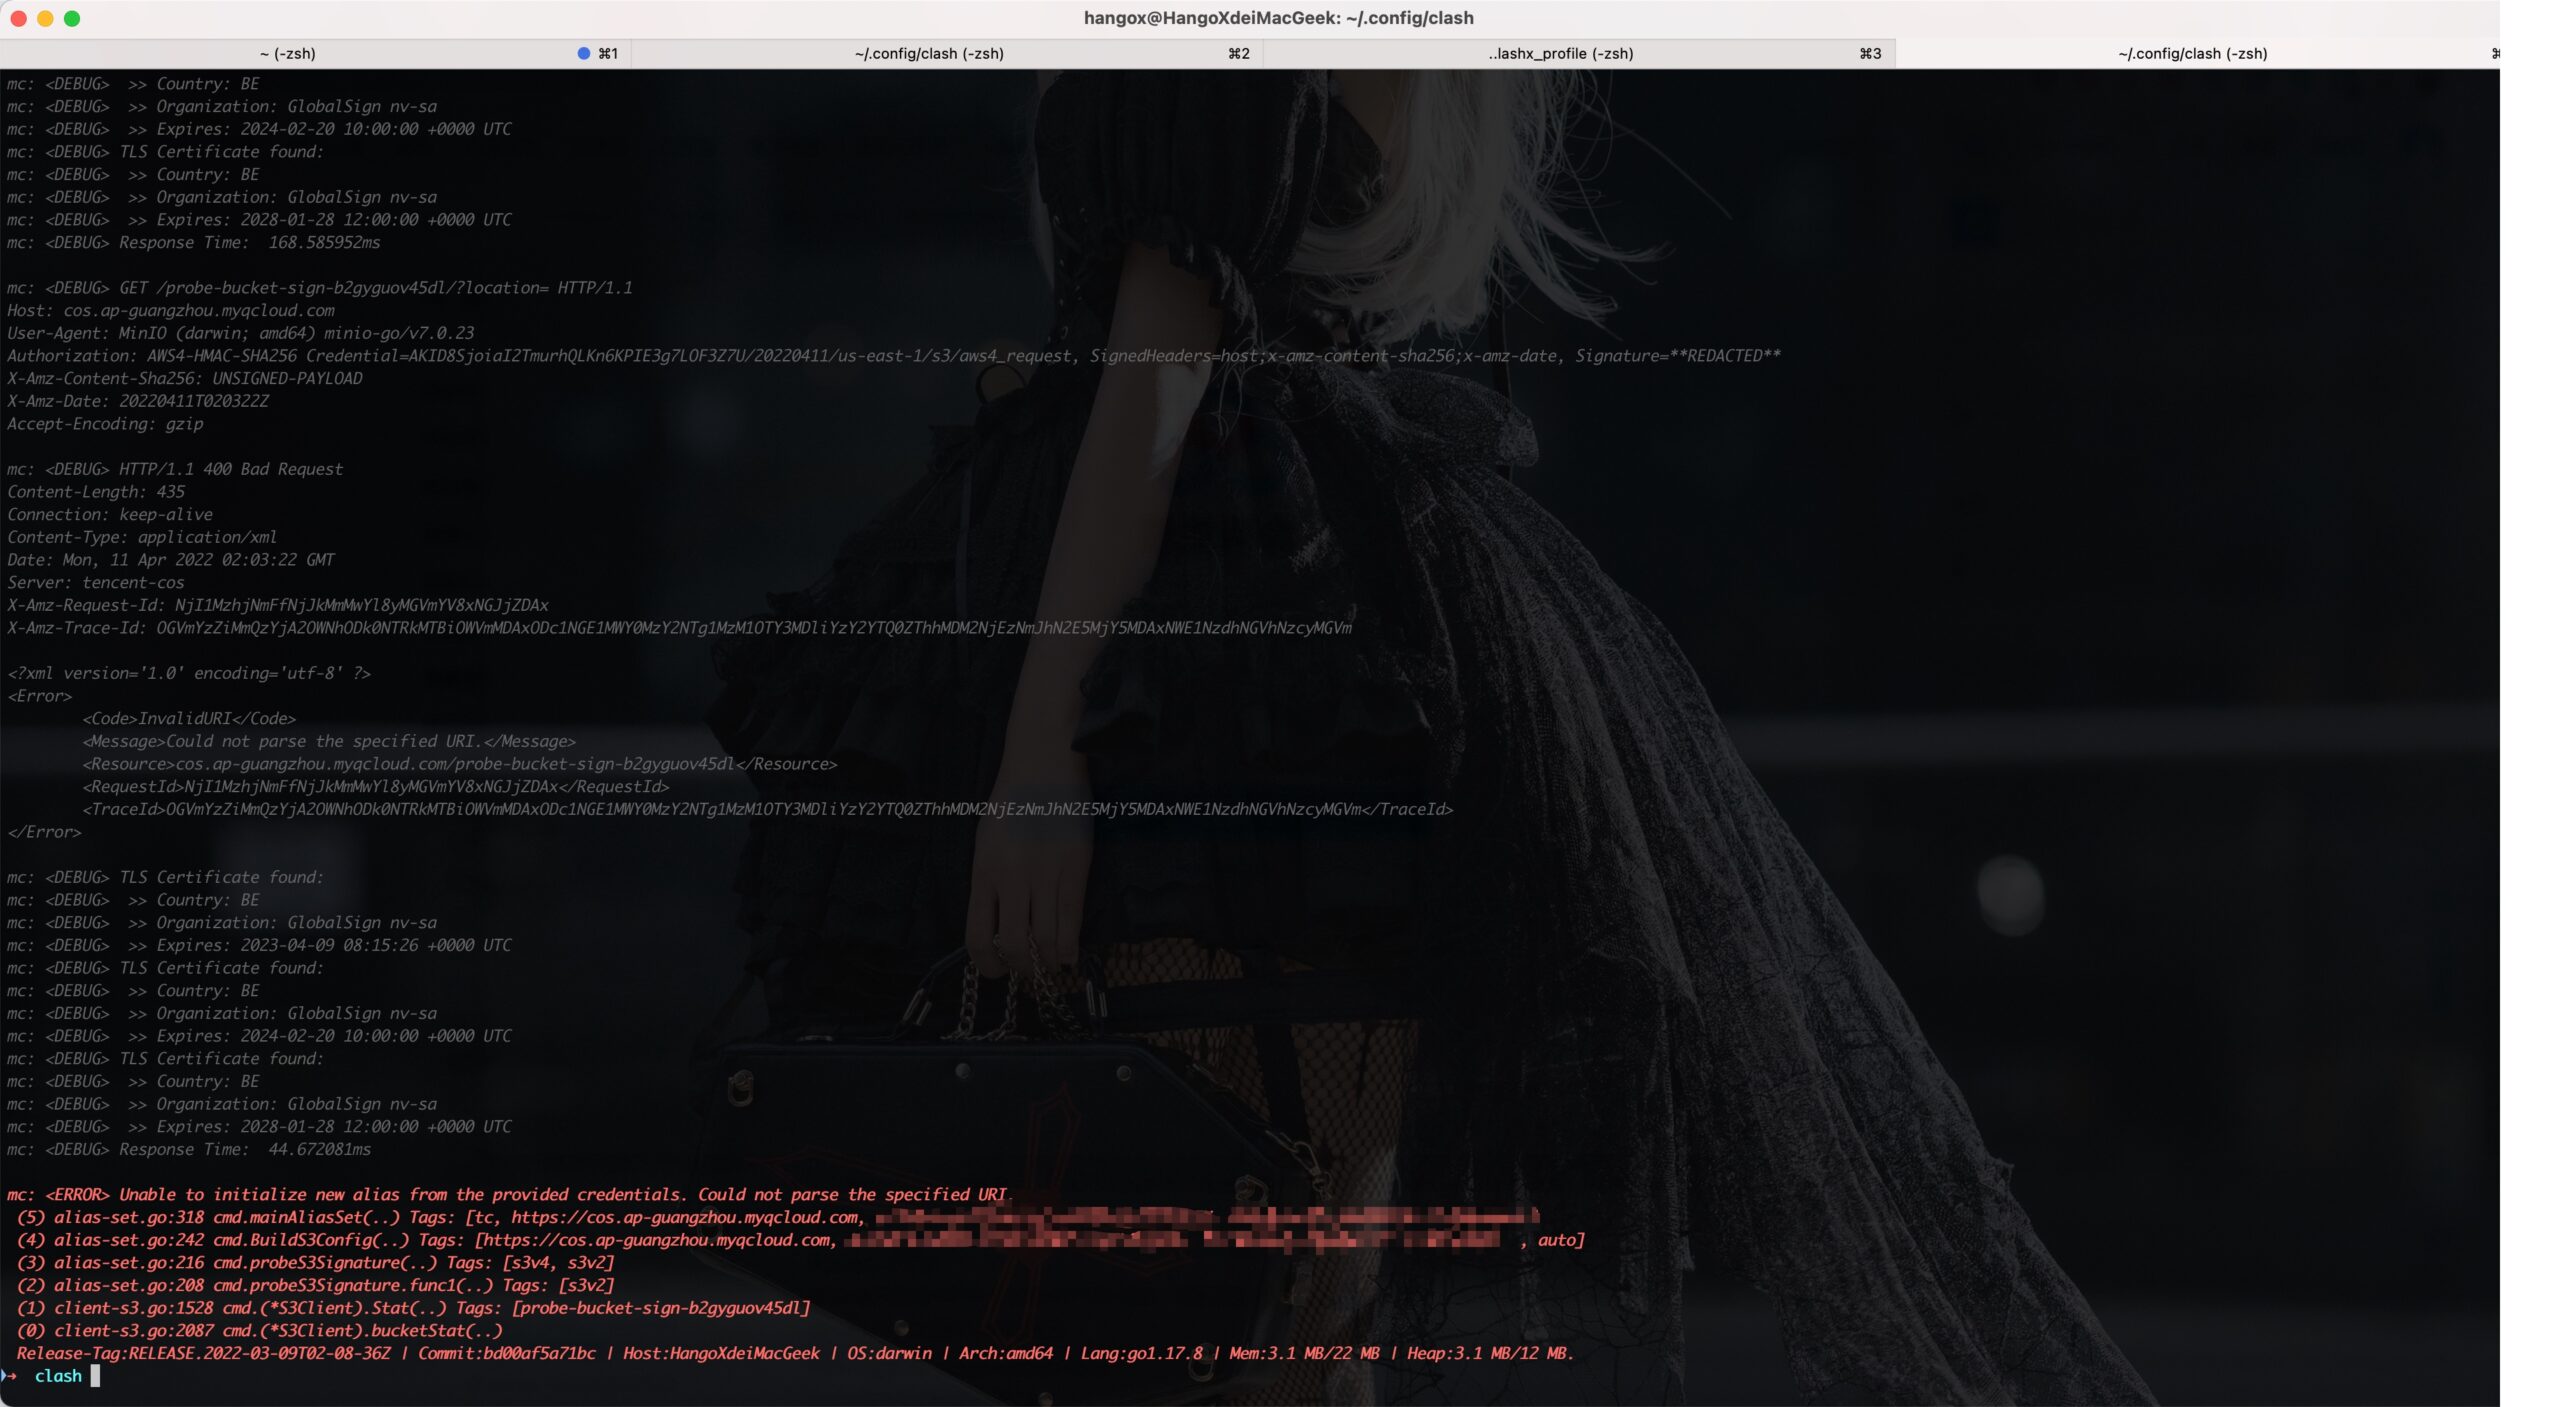
需要在后面加上 --path "off" ,让 mc 不要校验
mc alias --debug set tc https://cos.ap-guangzhou.myqcloud.com $accessKey $secretKey --api "s3v4" --path "off"
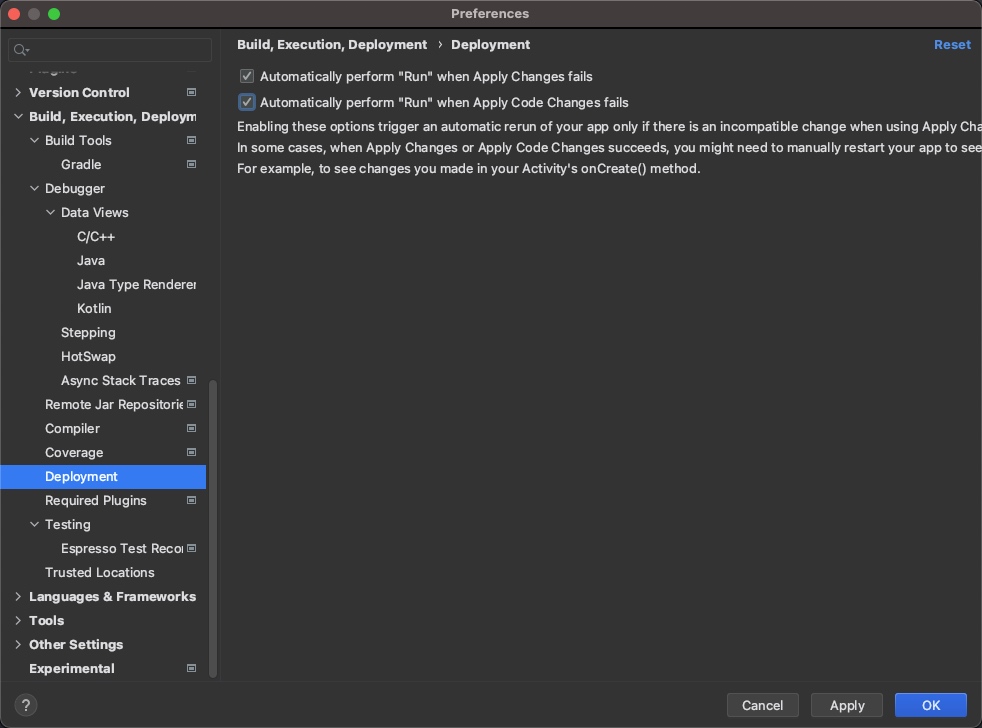
关键词是这个 『workspace-trust』官方描述在这里
简单来说就是是否信任打开的文件夹,如果信任的话,就会开启所有功能,不信任就是开启有限的功能
有小伙伴反馈安装插件后无法看到插件,面对面解决后发现小伙伴没有打开一个文件夹,并且选择信任,导致插件检测到非信任区间,不加载插件。
因为我们的插件和工作区间其实没有关系,完全可以在不信任的工作区间上打开,所以决定改为非信任模式先也能运行,解决方案也很简单,在 package.json 加上以下代码即可
{
 .....
 "capabilities": {
    "untrustedWorkspaces": {
      "supported": true
    }
  }
  .....
}
加上后表示支持不受信区间支持
import Foundation


extension URL {2021年9月2日
    var typeIdentifier: String? { (try? resourceValues(forKeys: [.typeIdentifierKey]))?.typeIdentifier }
    var localizedName: String? { (try? resourceValues(forKeys: [.localizedNameKey]))?.localizedName }
}

let url = URL(fileURLWithPath: "filelocation")
print(url.typeIdentifier!)
我看 apk 是可以获取的,但是 dex 就不行。难道是要把 dex 声明位自己创建的文件类型?
还是用文件名后缀支持会好点
如下图,编译到最后会告诉你出现重复类的问题

原因是我们正在拆分CC中d的库,会把类的位置挪动,比如 CollectionUtils 这个类会从 basic-common 移动到tiny-utils这个库上,因为 basic-common 的 build 目录已经编译出 CollectionUtils.class 文件,android构建也不会自动删除这个文件,导致两个module 都会出现 CollectionUtils.class 这个文件,最后就出现重复了
找到 CollectionUtils.class 这个文件在原本哪个 module 上,比如在basiclib-common 的 build 目录下删除即可
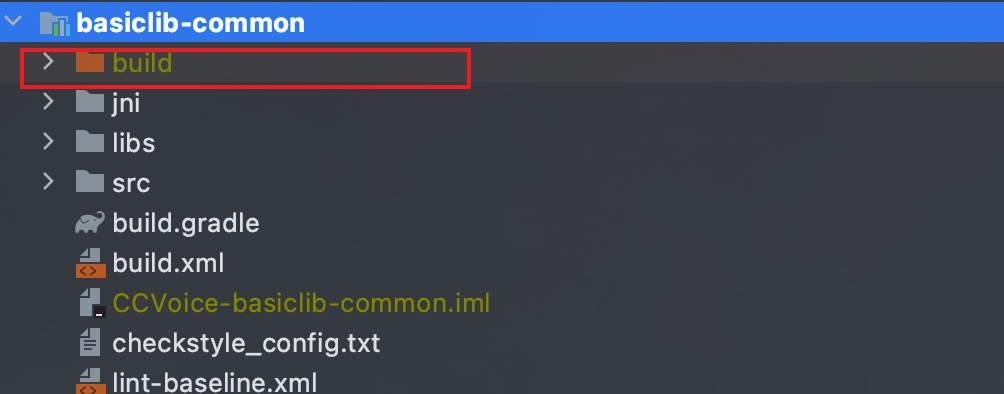
如果只是删除这个目录的情况下,构建时间只是需要 1分钟 左右,会比 fullClean 要快上不少
之前一直出现这个问题的原因是,我们一直在移动代码,导致一直出现这个事情
如下图,编译到最后会告诉你出现重复类的问题
原因是我们正在拆分CC中d的库,会把类的位置挪动,比如 CollectionUtils 这个类会从 basic-common 移动到tiny-utils这个库上,因为 basic-common 的 build 目录已经编译出 CollectionUtils.class 文件,android构建也不会自动删除这个文件,导致两个module 都会出现 CollectionUtils.class 这个文件,最后就出现重复了
找到 CollectionUtils.class 这个文件在原本哪个 module 上,比如在basiclib-common 的 build 目录下删除即可

如果只是删除这个目录的情况下,构建时间只是需要 1分钟 左右,会比 fullClean 要快上不少

之前一直出现这个问题的原因是,我们一直在移动代码,导致一直出现这个事情
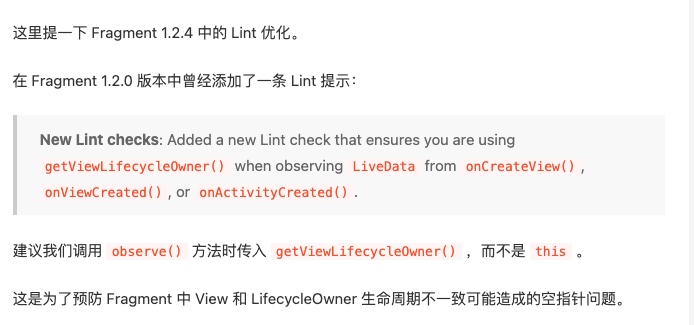
新增加了一个 FragmentLiveDataObserve Lint check observer传入的对象必须改为 getViewLifecleOwner而不是 this或者 activity或者 fragment
解决方案就是设置一个 DNS
sudo vi /etc/netplan/50-cloud-init.yaml
sudo netplan apply
设置完成之后就是这样
network:
    ethernets:
        eth0:
            addresses: []
            dhcp4: true
            nameservers:
              addresses: [114.114.114.114,8.8.4.4]
    version: 2
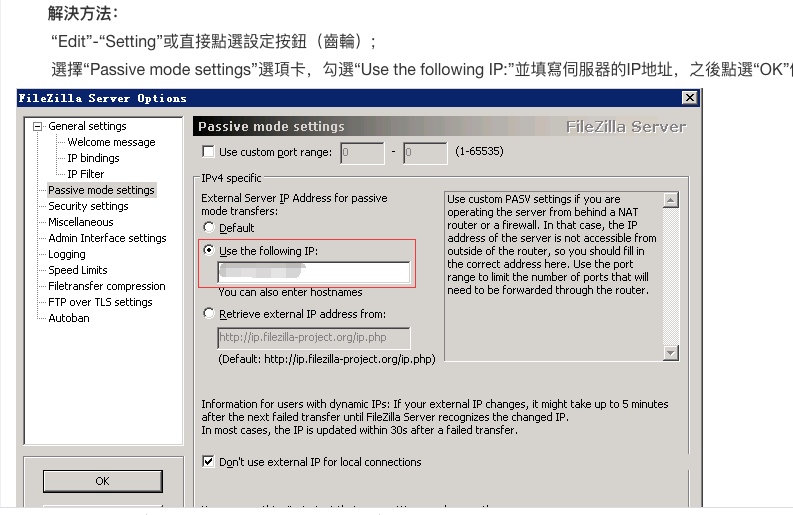
Filezilla報錯:You appear to be behind a NAT router. Please configure the passive mode settings and ...
设置固定ip即可
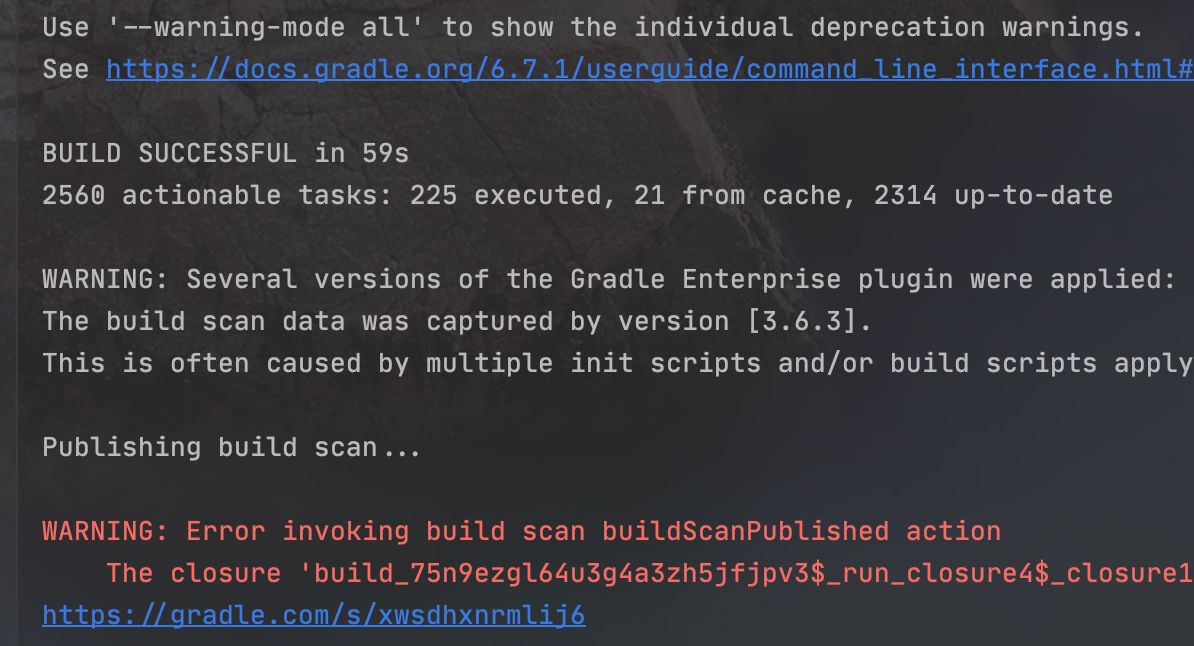
gradle 默认是以 CPU 的线程数量创建 workers 数量的,同时下载一来的时候也是由这个数量进行并发的。同时因为 jar 包其实是非常小的文件,频繁建立连接下载小文件,不那么容易跑满整个带宽,同时 CPU 占用率也不高,最后所有的构建都会卡在下载依赖包这里。如果我们可以提供 worker 的数量就能直接提高并发现在的能力能力加快依赖的构建完成。
Gradle 的确提供这样的命令
./gradlew assemble --parallel --max-workers=40
这样就可以把原本是下图这样的并发量
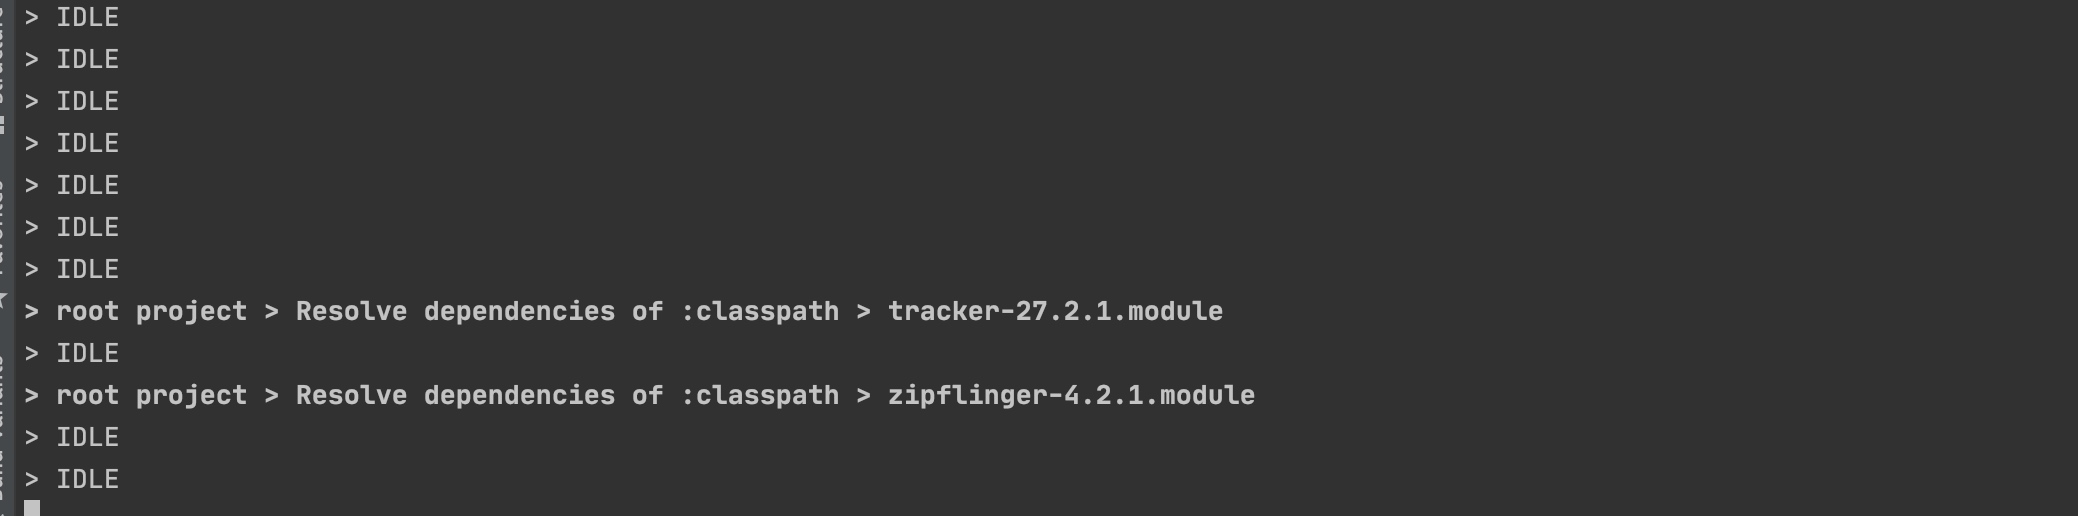
变成这样的并发量
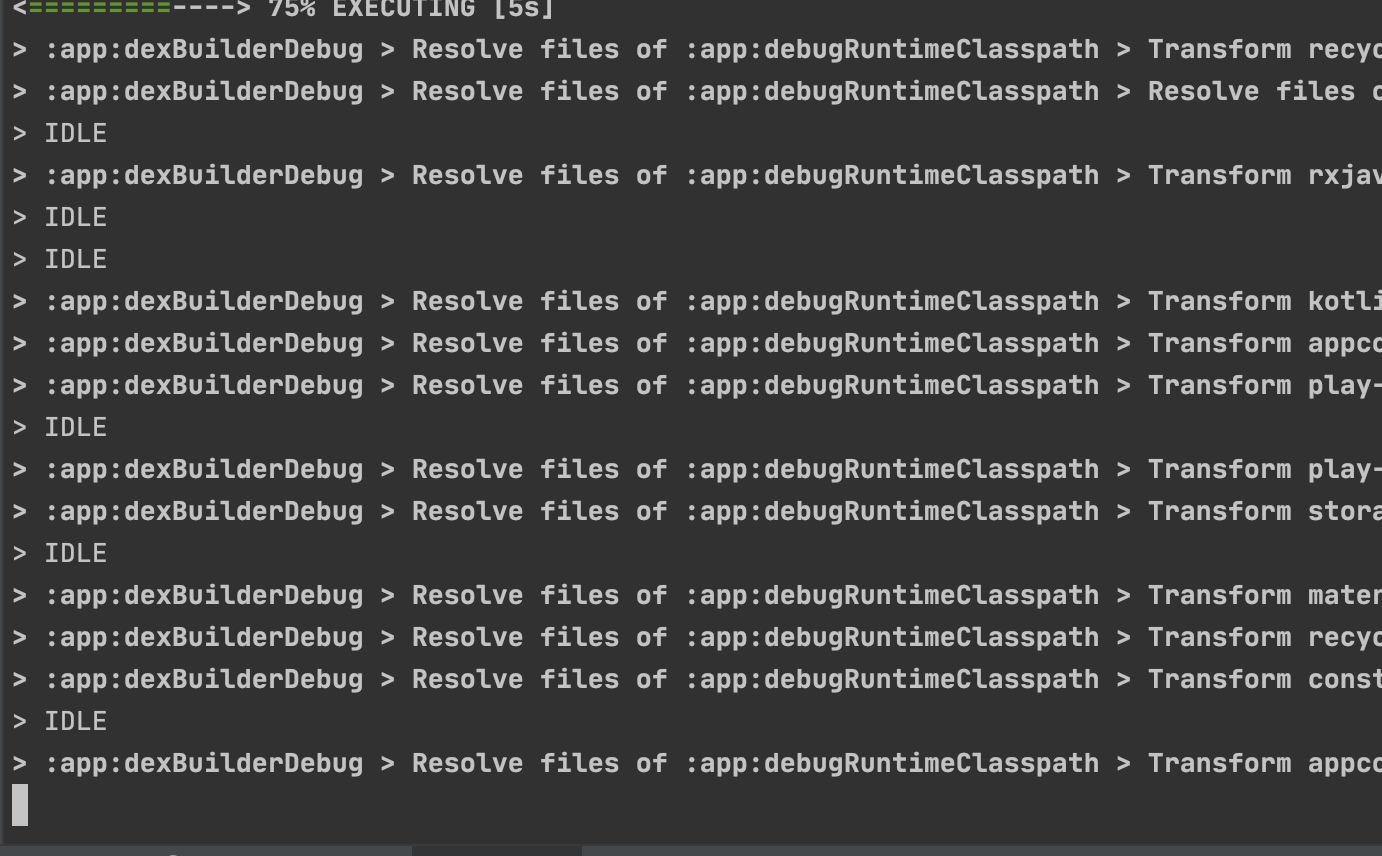
40这个数值只是为了好突破上限,Gradle 默认最大就是 CPU 线程数目+8
虽然有阿里云的代理服务,但是貌似阿里云的代理服务速度也不是很快,最后觉得在自己家里搭建一个 nexus3 作为缓存配置也是不错的选择
docker stack 配置如下
version: '3.7'

services:
  nexus3:
    image: sonatype/nexus3:3.30.1
    ports:
      - "18081:8081"
    volumes:
      - nexus-data:/nexus-data

volumes:
  nexus-data:

networks:
  default:
    external:
      name: nginx
启动后这货的密码写入到 data 文件中的,还是需要连接上去查看,最后就是增加几个代理的设置,为了代理的稳定性,这边直接加入的也是 aliyun 的 maven 配置

这边比较推荐加入阿里云的 public 和 gradle-plugin ,google 这个 maven 其实中国大陆是有加速的,速度非常快,配置 google 的会更快一点
nexus3 有个小问题,就是代理的库如果上传了新的包,立刻请求去获取是获取不到的